Brightwing Mission Guide
Learn how to complete the Brightwing mission in Warcraft Rumble. Follow our suggested build and strategy for Brightwing, in Moonglade.
Best Builds
rumblo:CFMQABoECBsQARoECDYQARoECCwQABoECFkQAhoECEYQABoECB4QAQ==
Important talents
- None of the talents are mandatory
Strategy
- Send a Kobold with some support to the right gold vein at the start
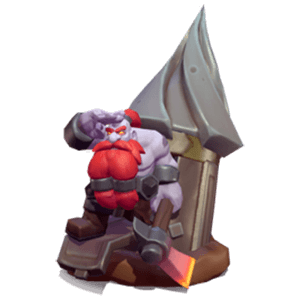
- Grab the chest in the middle at the start, preferably with Dark Iron Miner
- Defend against Brightwing’s initial push and then take all the Meeting Stones and start attacking Brightwing
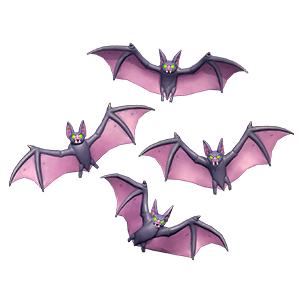
- Dire Batlings can see through stealth, so they can take out Prowlers and Spiderlings
Watch it in action
rumblo:CDkQAhoECBUQABoECDYQARoECB4QARoECFkQAhoECEYQABoECBsQAQ==
Important talents
- None of the talents are mandatory
Strategy
- Send a Kobold with some support to the right gold vein at the start
- Grab the chest in the middle at the start, preferably with Dark Iron Miner
- Defend against Brightwing’s initial push and then take all the Meeting Stones and start attacking Brightwing
- Dire Batlings can see through stealth, so they can take out Prowlers and Spiderlings
Watch it in action
rumblo:CBYQABoECBwQABoECFAQARoECEYQABoECB4QARoECBsQARoECFkQAg==
Important talents
- Momentum allows the Stonehoof Tauren to attack a Huntress in the backline
Strategy
- Send a Kobold with some support to the right gold vein at the start
- Grab the chest in the middle at the start, preferably with Dark Iron Miner
- Defend against Brightwing’s initial push and then take all the Meeting Stones and start attacking Brightwing
- Dire Batlings can see through stealth, so they can take out Prowlers and Spiderlings
Watch it in action
rumblo:CB8QAhoECFAQARoECEYQABoECB4QARoECBsQARoECFkQAhoECBwQAA==
Important talents
- Momentum allows the Stonehoof Tauren to attack a Huntress in the backline
Strategy
- Send a Kobold with some support to the right gold vein at the start
- Grab the chest in the middle at the start, preferably with Dark Iron Miner
- Defend against Brightwing’s initial push and then take all the Meeting Stones and start attacking Brightwing
- Dire Batlings can see through stealth, so they can take out Prowlers and Spiderlings
Watch it in action
rumblo:CBIQAhoECB4QARoECCwQABoECBsQARoECFkQAhoECD8QABoECEYQAA==
Important talents
- None of the talents are mandatory
Strategy
- Send a Kobold with some support to the right gold vein at the start
- Grab the chest in the middle at the start, preferably with Dark Iron Miner
- Defend against Brightwing’s initial push and then take all the Meeting Stones and start attacking Brightwing
- Dire Batlings can see through stealth, so they can take out Prowlers and Spiderlings
Watch it in action
rumblo:CBAQARoECE0QAhoECEcQAhoECB4QARoECEwQARoECFkQAhoECBsQAQ==
Important talents
- Explosive Shells is crucial for Anub’arak to add more damage
- Exhume adds more Skeletons when summoned near the base or a Meeting Stone
Strategy
- Send a Kobold with some support to the right gold vein at the start
- Grab the chest in the middle at the start, preferably with Dark Iron Miner
- Defend against Brightwing’s initial push and then take all the Meeting Stones and start attacking Brightwing
- Dire Batlings can see through stealth, so they can take out Prowlers and Spiderlings
Watch it in action
rumblo:CEIQARoECBsQARoECD8QABoECCoQABoECFkQAhoECEYQABoECB4QAQ==
Important talents
- None of the talents are mandatory
Strategy
- Send a Kobold with some support to the right gold vein at the start
- Grab the chest in the middle at the start, preferably with Dark Iron Miner
- Defend against Brightwing’s initial push and then take all the Meeting Stones and start attacking Brightwing
- Dire Batlings can see through stealth, so they can take out Prowlers and Spiderlings
Watch it in action
Boss Strategy

This guide focuses on the Heroic Brightwing encounter in Moonglade, but also works for the normal version.
Minis in Brightwing’s army
- Blizzard - Brittle Ice
- Faerie Dragon - Phase Shift
- Harpies - Infectious Swipes
- Huntress - Darnassian Steel
- Moonkin - Typhoon
- Prowler - On the Prowl
- Spiderlings - Cave Dwellers
Other minis and map mechanics
Brightwing has a damage shield that mitigates more damage for each Meeting Stone it controls. If you control all three Meeting Stones, the damage shield is completely off.
Brightwing also teleports around the map every 12 seconds.
In Heroic, Brightwing summons a Faerie Dragon at its location every 20 seconds in addition to the Faerie Dragons it plays from its deck.
It is notable that while Brightwing is a Faerie Dragon, it is not immune to poison as it lacks the Nullify trait.
Brightwing:
- 6750 health
- Unstoppable
- Magic Spit: 200 Elemental damage, 1.5 seconds attack speed, 8 range
General strategy
At the start of the battle, there are two gold nuggets on the right gold vein and a chest in the middle. Securing these assets is a top priority. Brightwing often starts with a Kobold miner from the right, which you need to take down to be able to mine the vein yourself. Sending an unbound mini to secure the chest is a good way to get an early gold advantage.
Brightwing’s first push usually comes from the left, sometimes from the right. Left is the preferable situation because then you can secure the middle and right Meeting Stones with minimal resources while meeting the push and then taking the left Meeting Stone. If the first push comes from the right, it can delay your push to take all Meeting Stones a little, but you can work with that.
You want to maintain control of the Meeting Stones and attack Brightwing as it keeps teleporting around the map. However, do not focus too much on Brightwing alone, as its minis may wipe out your push and turn the tables on you while all your minis are focused on shooting Brightwing itself. If and when that happens, fight back in a gold-effective way, often letting your base tank a bit of damage, and build a new push.
When defending near your base, it is a good idea to position your damage dealers off to the side and not behind your tank because Brightwing has Huntress who can hit damage dealers behind a tank easily.
Brightwing also has Blizzard available, so try to avoid building too large groups of minis. If you send enough of your minis from different directions, Brightwing may never use Blizzard at all.
You will need to run after the boss a bit in this one, but should be able to whittle it down eventually.
