Ysera Mission Guide
Learn how to complete the Ysera mission in Warcraft Rumble. Follow our suggested build and strategy for Ysera, in Moonglade.
Best Builds
Malfurion with Huntress


rumblo:CDkQAhoECBUQAhoECDYQAhoECFgQARoECFkQAhoECBMQARoECEYQAA==
Important talents
None of the talents are mandatory.
Strategy
- Use Huntress to take down the Chimaeras. Send a tank to soak some of the damage from the top pair, if your Huntress does not survive them alone with Malfurion healing.
- Try to get minis around the map before the Spiderlings arrive. When the wave comes, destroy any that make it to your base with Pyromancer, Bat Rider, and/or Witch Doctor.
- Make sure you always have a Malfurion alive.
Watch it in action
Doomhammer with Pyromancer

rumblo:CB8QAhoECFYQARoECEYQABoECFgQARoECAwQABoECBMQARoECFkQAg==
Important talents
- Pyromancer needs Pyroblast to be able to take down the Chimaeras. Orgrim’s Leader ability allows a level 24 Pyromancer to succeed instead of the usual level 26 or higher.
- Warsong Grunts need Guard Duty to be cost-effective. You can also use a Swole Troll with Meatier Elbow if you have one at a high level.
Strategy
- Use Pyromancer to shoot down Chimaeras. With Pyroblast, she can one-shot them if they are her first attack.
- When Pyromancer is not available, use Witch Doctor and Polymorph to take out Chimaeras.
- Deploy Whelp Eggs to the top-left spawn point preemptively.
- Try to get minis around the map before the Spiderlings arrive. When the wave comes, destroy any that make it to your base with Pyromancer, Bat Rider, and/or Witch Doctor.
- Stealing Onu with Doomhammer can give you a strong tank
Watch it in action
Charlga with Banshee

rumblo:CBgQARoECAwQABoECDIQARoECFEQAhoECFkQAhoECBEQAhoECFgQAQ==
Important talents
- Swole Troll needs Meatier Elbow to engage the squad minis. You can also use Guard Duty Grunts.
- Harpies need Trinket Collectors to be able to mine. You can mine with Kobolds and use Infectious Swipes instead.
Strategy
- Use Banshee to steal the bottom Chimaera and Polymorph to help your stolen Chimaera take down the top Chimaera pair.
- Deploy Whelp Eggs to the top-left spawn point preemptively.
- Try to get minis around the map before the Spiderlings arrive. When the wave comes, destroy any that make it to your base with Witch Doctor.
Watch it in action
Tirion with Huntress
rumblo:CFMQABoECAwQABoECDYQAhoECFkQAhoECBMQARoECEYQABoECFgQAQ==
Important talents
- Pyromancer needs Pyroblast and she has to be level 26+ to one-shot a Chimaera.
Strategy
- Use Huntress to beat the bottom Chimaera and Polymorph to help your Huntress also take down the top Chimaera pair. Alternatively, use your level 26+ Pyromancer to take down the top Chimaera pair. You can also use Witch Doctor + Polymorph, especially if the lower Chimaera attacks with many friends.
- Deploy Whelp Eggs to the top-left spawn point preemptively.
- Try to get minis around the map before the Spiderlings arrive. When the wave comes, destroy any that make it to your base with Pyromancer and Witch Doctor.
Watch it in action
Arthas

rumblo:CF4QAhoECBEQAhoECF0QABoECEYQABoECAwQABoECBMQARoECFkQAg==
Important talents
- Pyromancer needs Pyroblast and she has to be level 26+ to one-shot a Chimaera.
Strategy
- Use Banshee to steal the bottom Chimaera and Polymorph to help your stolen Chimaera take down the top Chimaera pair. Alternatively, use your level 26+ Pyromancer to take down the top Chimaera pair. As another alternative, you can also use Witch Doctor and Polymorph to take out a Chimaera or even two.
- Deploy Whelp Eggs to the top-left spawn point preemptively.
- Try to get minis around the map before the Spiderlings arrive. When the wave comes, destroy any that make it to your base with Bat Rider, Pyromancer, and Witch Doctor.
Watch it in action
Boss Strategy
This guide focuses on the Heroic Ysera encounter in Moonglade, but also works for the normal version. The normal Ysera has a slightly weaker army than the Heroic version.
Minis in army
- Chain Lightning – Storm’s Reach
- Fire Elemental – Blazing Speed (?)
- Harpies – Trinket Collectors
- Moonkin – Vengeance
- Prowler – On the Prowl
- Raptors – Fast Food
- Spiderlings – Bloated Carapace
Ysera has several notable talents on her minis. The Harpies will mine, if you do not. The Raptors will heal up if they get kills. Most notably, the Spiderlings explode when they die, dealing damage, poisoning, and stunning nearby enemies on a radius of 5. This includes both ground and flying units since the Spiderling rework of January 2025.
The Fire Elemental has erroneously been assigned a Firehammer talent, which does nothing on it, so it is effectively talentless for now.
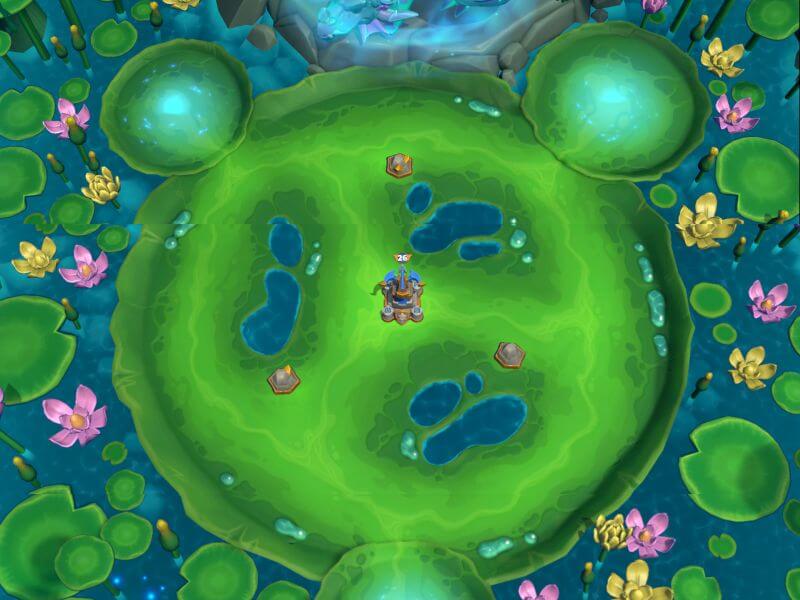
Other minis and map mechanics
Ysera is a defense battle, in which you need to survive until Ysera wakes up. She wakes up at 0:35, so the fight is a bit shorter than it first appears.
There are multiple timed waves in addition to the minis in Ysera’s deck.
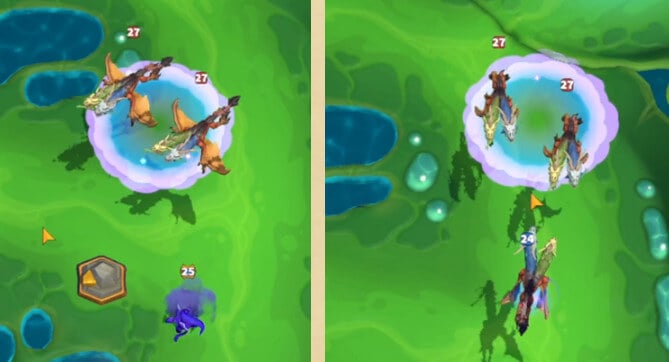
There are Chimaeras that spawn in groups. One arrives from the bottom, followed by two from the top right shortly thereafter. There are four waves overall:
- 3:15 bottom and 3:00 top right
- 2:30 bottom and 2:15 top right
- 1:45 bottom and 1:30 top right
- 1:00 bottom and 0:45 top right
The final 0:45 wave from top right is not able to reach your base in time, so you do not have to worry about that. In modes other than Heroic, these waves spawn Bog Beasts instead of Chimaeras.
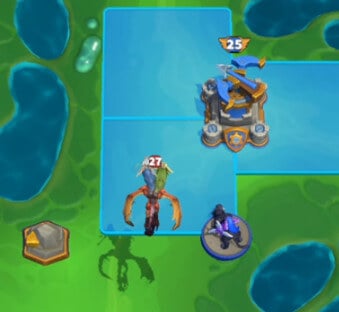
Onu spawns in the top left corner at set times: 2:45, 2:00, and 1:15.
There is also one big wave of Spiderlings that spawns all over the outer circle at 1:47. Luckily, these Spiderlings do not have a talent, so they do not explode on death. You can safely engage them at close range without getting stunned. In modes other than Heroic, the wave consists of Vultures instead.
As a downside, the Chimaera spawn at 1:45 comes shortly after the Spiderlings, so you need to be able to handle the Spiderlings and then answer the next Chimaeras immediately after.
General strategy
You want to get minis around the circle before the Spiderlings come, so that they can handle at least a part of the wave. You can also safely kill the wave Spiderlings right at your base with area-of-effect damage because they do not explode on death.
Handling the Chimaera waves is of utmost importance, and there are many ways to do it:
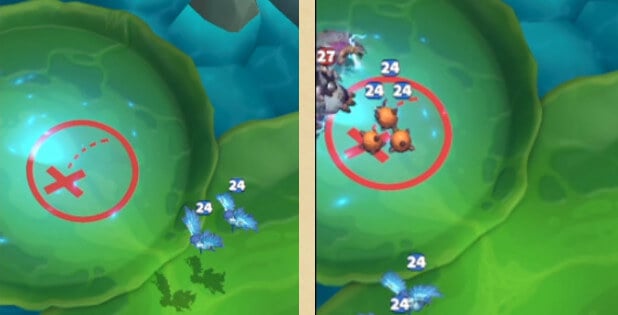
- Banshee to steal the lone Chimaera from the bottom (use line of sight), and then use the stolen Chimaera + Polymorph to deal with the pair coming from the top.
- Huntress to kill them: a level 26 Huntress with Shadowmeld kills one and lives, and you can then keep it alive with Polymorph against the top pair.
- Drake or Witch Doctor with Polymorph first
- Level 26 or higher Pyromancer with Pyroblast
As your minis gain more levels, you may find the Polymorph unnecessary. Polymorph does have an additional advantage in that you can Polymorph Spiderlings right before they die to avoid triggering their on-death explosion.
There are several moments in the fight that require precise positioning or timing.
If you use a Banshee to steal the bottom Chimaera, make good use of line-of-sight to ensure the capture. Deploy the Banshee before the Chimaera turns around the corner. If a Chimaera meets a Banshee in an open field, it has enough time to shoot the Banshee down. If you miss your timing window, you can also deploy the Banshee only after the Chimaera starts attacking your base.

If you use a Huntress, you usually want it to run the inner circle. You can either let the base tank for you or use another mini to distract the Chimaera. With a higher-level Huntress, an outer circle positioning and sending it earlier also works.
You often want to Polymorph the Chimaera pair. If you use a Shadowmeld Huntress, you want to cast Polymorph right as the Huntress is about to shoot. If you use a stolen Chimaera, you want to time the Polymorph based on the movement animation of the enemy Chimaeras: they move in a wave-like motion, and if you Polymorph them right at the end of the wave, they will not have enough time to shoot.
Whelp Eggs are a great bomb that you can set up at spawn points, usually the top left spawn. Deploy them near the middle of the circle, so if a Moonkin spawns, it will pop the Eggs and the Whelps will shoot it before it has time to shoot again.