Dire Maul Dungeon Guide
Learn how to complete the Dire Maul mission in Warcraft Rumble. Follow our suggested build and strategy for Dire Maul.
In this guide to the Dire Maul dungeon in Warcraft Rumble, I showcase strong armies for completing the dungeon at red difficulty with various Leaders and go through each boss fight in detail.
The comps include quick instructions for the fights and you can refer to the boss descriptions for full details on all mechanics.
This dungeon is not the current active dungeon.
Go to Active DungeonBest Builds
-
 Alliance
-
 Beast
Beast
-
 Blackrock
-
 Cenarion
-
 Horde
Horde
-
 Undead
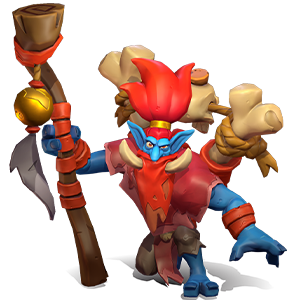
Arthas with Plague Farmer


rumblo:CF4QABoECEQQAhoECB0QARoECFkQAhoECF0QAhoECAkQABoECFoQAQ==
Important talents
- Splashing Pumpkins on Plague Farmer is needed for it to hit the bosses from outside their aggro radius. Plague Farmer can still provide dps without the talent, but then it always needs to be behind a tank.
- Pick Lock on Defias Bandits is useful for extra income in the first map, but it is not mandatory. They are still useful as a cheap squad unit for Eye bombs on the second boss.
Stomper Kreeg
- Use Execute to make Kreeg’s minis fight against each other, their own Towers, and even the boss itself.
- Use Defias Bandits to open the chest for additional income.
- Take at least one Tower, usually the one on the right lane, and push towards the boss.
Immol’thar
- Send Plague Farmer up the left lane and focus your attack on the Tower to the right. Plague Farmer with range can solo the boss if left alone.
- Use Defias Bandits to summon Eye bombs to defend.
King Gordok
- Start by taking the middle Tower.
- Send Fire Elemental to the right lane to get Lethtendris to join your army.
- Defeat King Gordok by slowing him so that Arthas can tank him.
- Kill the healer with Executes and Worgen.
Watch it in action
Hogger with Plague Farmer and Harpies
Important talents
- Splashing Pumpkins on Plague Farmer is needed for it to hit the bosses from outside their aggro radius. Plague Farmer can still provide dps without the talent, but then it always needs to be behind a tank.
- Pick Lock on Defias Bandits is useful for extra income in the first map, but it is not mandatory. They are still useful as a cheap squad unit for Eye bombs on the second boss.
Stomper Kreeg
- Use Execute to make Kreeg’s minis fight against each other, their own Towers, and even the boss itself.
- Use Defias Bandits to open the chest for additional income.
- Take at least one Tower, usually the one on the right lane, and push towards the boss.
Immol’thar
- Send Plague Farmer up the left lane and focus your attack on the Tower to the right. Plague Farmer with range can solo the boss if left alone.
- If your Plague Farmer has difficulties finding a quiet spot, you can also send Harpies through the left or the middle lane, whichever is free, and turn the boss around with Quilboar as they get close.
- Use Defias Bandits to summon Eye bombs to defend.
King Gordok
- Start by taking the middle Tower.
- Send Harpies to the right lane to get Lethtendris to join your army. Turn Lethtendris around with Quilboar as your Harpies approach.
- You can send a lone Plague Farmer to the left to get Kromcrush to join your army (optional). Make sure that the push from the right side reaches the boss first.
- Defeat King Gordok by slowing him so that Quilboar and Prowler can tank him. Poison damage from Plague Farmers will eventually overcome his healing, or you can kill the healer with Executes and optionally a push from the left.
Watch it in action
Charlga with Fire Elemental

Important talents
- Earth Shield on Frostwolf Shaman is strong to make the Fire Elemental Armored. Shaman can still be useful for healing even without it.
- Pick Lock on Defias Bandits is useful for extra income in the first map, but it is not mandatory. They are still useful as a cheap squad unit for Eye bombs on the second boss.
Stomper Kreeg
- Use Execute to make Kreeg’s minis fight against each other, their own Towers, and even the boss itself.
- Use Defias Bandits to open the chest for additional income.
- Take at least one Tower, usually the one on the right lane, and push towards the boss.
Immol’thar
- Send your Fire Elemental up left and protect it to the best of your ability. A Fire Elemental or two can kill Immol’thar.
- Use Defias Bandits to summon Eye bombs to defend.
King Gordok
- Start by taking the middle Tower.
- Send Fire Elemental to the right lane to get Lethtendris to join your army.
- Defeat King Gordok by slowing him so that Fire Elemental can tank him.
- Kill the healer with Executes and Quilboar.
Watch it in action
Old Murk-Eye with Fire Elemental
Important talents
- Earth Shield on Frostwolf Shaman is strong to make the Fire Elemental Armored. Shaman can still be useful for healing even without it.
- Pick Lock on Defias Bandits is useful for extra income in the first map, but it is not mandatory. They are still useful as a cheap squad unit for Eye bombs on the second boss.
Stomper Kreeg
- Use Execute to make Kreeg’s minis fight against each other, their own Towers, and even the boss itself.
- Use Defias Bandits to open the chest for additional income.
- Take at least one Tower, usually the one on the right lane, and push towards the boss.
Immol’thar
- Send your Fire Elemental up left and protect it to the best of your ability. A Fire Elemental or two can kill Immol’thar.
- Use Defias Bandits to summon Eye bombs to defend.
King Gordok
- Start by taking the middle Tower.
- Send Fire Elemental to the right lane to get Lethtendris to join your army.
- Defeat King Gordok by slowing him so that Fire Elemental can tank him.
- Kill the healer with Executes and Quilboar.
Watch it in action
Anub'arak doing Anub'arak things
rumblo:CBAQARoECB4QABoECEcQAhoECEQQAhoECE0QAhoECEwQAhoECFkQAg==
Note that you can also play a regular build and not use Anub'arak at all if you struggle against the second boss with the swarm strategy.
Important talents
- Explosive Shells on Anub’arak is vital to turn your Scarabs into a proper threat.
- Spirit Ward on Witch Doctor can protect your swarm.
Stomper Kreeg
- Deal some damage to Kreeg’s minis to make them fight against each other, their own Towers, and even the boss itself.
- Take at least one Tower, usually the one on the right lane, and push towards the boss.
Immol’thar
- Send Plague Farmer up the left lane and focus your attack on the Tower to the right, or vice versa - depending on where you can play Anub the safest. Plague Farmer with range can solo the boss if left alone.
- Your swarm will summon loads of Eye bombs: watch out for them and try to keep Anub alive.
King Gordok
- Start by taking the middle Tower.
- Attack the right lane to get Lethtendris to join your army.
- Defeat King Gordok by slowing him so that you can tank him.
- Kill the healer with unbound minis.
Watch it in action
Orgrim Doomhammer in Dire Maul

rumblo:CB8QARoECEsQAhoECCcQABoECB0QARoECAkQABoECFgQARoECEQQAg==
Important talents
- Splashing Pumpkins on Plague Farmer is needed for it to hit the bosses from outside their aggro radius. Plague Farmer can still provide dps without the talent, but then it always needs to be behind a tank.
- Pick Lock on Defias Bandits is useful for extra income in the first map, but it is not mandatory. They are still useful as a cheap squad unit for Eye bombs on the second boss.
- Earth Shield on Frostwolf Shaman is strong to make the Fire Elemental Armored. Shaman can still be useful for healing even without it.
- Conqueror’s Diplomacy on Orgrim Doomhammer is a liability in the first map because the converted minis remain enraged and attack everything. It is better to go without a talent than with Diplomacy for this one.
Stomper Kreeg
- Use Execute to make Kreeg’s minis fight against each other, their own Towers, and even the boss itself.
- Use Defias Bandits to open the chest for additional income.
- Take at least one Tower, usually the one on the right lane, and push towards the boss.
Immol’thar
- Send Plague Farmer up the left lane and focus your attack on the Tower to the right. Plague Farmer with range can solo the boss if left alone.
- Fire Elemental can tank the boss if your distraction is not successful.
- Use Defias Bandits or Whelp Eggs to summon Eye bombs to defend.
King Gordok
- Start by taking the middle Tower.
- Send Fire Elemental to the right lane to get Lethtendris to join your army. You can send ranged dps to support shortly afterwards.
- You can send a lone Plague Farmer to the left to get Kromcrush to join your army (optional). Make sure that the push from the right side reaches the boss first.
- Defeat King Gordok by slowing him so that Fire Elemental can tank him. Poison damage from Plague Farmers will eventually overcome his healing, or you can kill the healer with Executes and optionally a push from the left or Whelp Eggs.
Watch it in action
Rend
rumblo:CEoQARoECB0QARoECCcQABoECFgQARoECEUQABoECEsQAhoECEQQAg==
Important talents
- Splashing Pumpkins on Plague Farmer is needed for it to hit the bosses from outside their aggro radius. Plague Farmer can still provide dps without the talent, but then it always needs to be behind a tank.
- Pick Lock on Defias Bandits is useful for extra income in the first map, but it is not mandatory. They are still useful as a cheap squad unit for Eye bombs on the second boss.
- Earth Shield on Frostwolf Shaman is strong to make the Fire Elemental Armored. Shaman can still be useful for healing even without it.
Stomper Kreeg
- Use Whelp Eggs to make Kreeg’s minis fight against each other, their own Towers, and even the boss itself. Ideally, you would use Execute, but Rend cannot buff it without a Wildcard slot.
- Use Defias Bandits to open the chest for additional income.
- Take at least one Tower, usually the one on the right lane, and push towards the boss.
Immol’thar
- Send Plague Farmer up the left lane and focus your attack on the Tower to the right. Plague Farmer with range can solo the boss if left alone.
- Fire Elemental can tank the boss if your distraction is not successful.
- Use Defias Bandits or Whelp Eggs to summon Eye bombs to defend.
King Gordok
- Start by taking the middle Tower.
- Send Fire Elemental to the right lane to get Lethtendris to join your army. You can send ranged dps to support shortly afterwards.
- You can send a lone Plague Farmer to the left to get Kromcrush to join your army (optional). Make sure that the push from the right side reaches the boss first.
- Defeat King Gordok by slowing him so that Fire Elemental can tank him. Poison damage from Plague Farmers will eventually overcome his healing, or you can kill the healer with a push from the left or Whelp Eggs.
Watch it in action
Thaurissan
rumblo:CCUQARoECFgQARoECCcQABoECB0QARoECAkQABoECEQQAhoECEsQAg==
Important talents
- Splashing Pumpkins on Plague Farmer is needed for it to hit the bosses from outside their aggro radius. Plague Farmer can still provide dps without the talent, but then it always needs to be behind a tank.
- Pick Lock on Defias Bandits is useful for extra income in the first map, but it is not mandatory. They are still useful as a cheap squad unit for Eye bombs on the second boss.
- Earth Shield on Frostwolf Shaman is strong to make the Fire Elemental Armored. Shaman can still be useful for healing even without it.
Stomper Kreeg
- Use Execute to make Kreeg’s minis fight against each other, their own Towers, and even the boss itself.
- Use Defias Bandits to open the chest for additional income.
- Take at least one Tower, usually the one on the right lane, and push towards the boss.
Immol’thar
- Send Plague Farmer up the left lane and focus your attack on the Tower to the right. Plague Farmer with range can solo the boss if left alone.
- Fire Elemental can tank the boss if your distraction is not successful.
- Use Defias Bandits or Whelp Eggs to summon Eye bombs to defend.
King Gordok
- Start by taking the middle Tower.
- Send Fire Elemental to the right lane to get Lethtendris to join your army. You can send ranged dps to support shortly afterwards.
- You can send a lone Plague Farmer to the left to get Kromcrush to join your army (optional). Make sure that the push from the right side reaches the boss first.
- Defeat King Gordok by slowing him so that Fire Elemental can tank him. Poison damage from Plague Farmers will eventually overcome his healing, or you can kill the healer with Executes and optionally a push from the left or Whelp Eggs.
Watch it in action
Drakkisath
rumblo:CCEQABoECCcQABoECFgQARoECEQQAhoECB0QARoECEsQAhoECAkQAA==
Important talents
- Splashing Pumpkins on Plague Farmer is needed for it to hit the bosses from outside their aggro radius. Plague Farmer can still provide dps without the talent, but then it always needs to be behind a tank.
- Pick Lock on Defias Bandits is useful for extra income in the first map, but it is not mandatory. They are still useful as a cheap squad unit for Eye bombs on the second boss.
- Earth Shield on Frostwolf Shaman is strong to make the Fire Elemental Armored. Shaman can still be useful for healing even without it.
Stomper Kreeg
- Use Execute to make Kreeg’s minis fight against each other, their own Towers, and even the boss itself.
- Use Defias Bandits to open the chest for additional income.
- Take at least one Tower, usually the one on the right lane, and push towards the boss.
Immol’thar
- Send Plague Farmer up the left lane and focus your attack on the Tower to the right. Plague Farmer with range can solo the boss if left alone.
- Fire Elemental can tank the boss if your distraction is not successful.
- Use Defias Bandits or Whelp Eggs to summon Eye bombs to defend.
King Gordok
- Start by taking the middle Tower.
- Send Fire Elemental to the right lane to get Lethtendris to join your army. You can send ranged dps to support shortly afterwards.
- You can send a lone Plague Farmer to the left to get Kromcrush to join your army (optional). Make sure that the push from the right side reaches the boss first.
- Defeat King Gordok by slowing him so that Fire Elemental can tank him. Poison damage from Plague Farmers will eventually overcome his healing, or you can kill the healer with Executes and optionally a push from the left or Whelp Eggs.
Watch it in action
Ragnaros with Molten Giant


rumblo:CEgQARoECFgQARoECDsQABoECB0QARoECEQQAhoECF0QABoECC4QAA==
Your main general goal is to get Ragnaros and Molten Giant on the board to give Molten Giant damage reflection. Do not hurry too much, you can get Ragnaros there when it is safe.
Important talents
- Splashing Pumpkins on Plague Farmer is needed for it to hit the bosses from outside their aggro radius. Plague Farmer can still provide dps without the talent, but then it always needs to be behind a tank.
- Pick Lock on Defias Bandits is useful for extra income in the first map, but it is not mandatory. They are still useful as a cheap squad unit for Eye bombs on the second boss.
Stomper Kreeg
- Use Whelps Eggs, S.A.F.E. Pilot, or Plague Farmer to make Kreeg’s minis fight against each other, their own Towers, and even the boss itself.
- Use Defias Bandits to open the chest for additional income.
- Take at least one Tower, usually the one on the right lane, and push towards the boss.
Immol’thar
- Send Plague Farmer up the left lane and focus your attack on the Tower to the right. Plague Farmer with range can solo the boss if left alone.
- Molten Giant can tank the boss if your distraction is not successful.
- Use Defias Bandits or Whelp Eggs to summon Eye bombs to defend.
King Gordok
- Start by taking the middle Tower.
- Send Molten Giant to the right lane to get Lethtendris to join your army. You can send ranged dps to support shortly afterwards.
- Send another push, either with Molten Giant or just a lone Plague Farmer to the left to get Kromcrush to join your army. This attack targets the healer: send minis from the bottom of the left deploy zone to get them close enough, or use Blast Wave to knock the healer to the route of your minis. Make sure that the push from the right side reaches the boss first.
- Defeat King Gordok by slowing him so that Molten Giant can tank him. Poison damage from Plague Farmers can eventually overcome his healing, even if you fail to kill the healer.
Watch it in action
Cairne in Dire Maul
rumblo:CBYQABoECEsQAhoECAkQABoECEQQAhoECFkQAhoECCcQABoECB0QAQ==
Important talents
- Splashing Pumpkins on Plague Farmer is needed for it to hit the bosses from outside their aggro radius. Plague Farmer can still provide dps without the talent, but then it always needs to be behind a tank.
- Pick Lock on Defias Bandits is useful for extra income in the first map, but it is not mandatory. They are still useful as a cheap squad unit for Eye bombs on the second boss.
- Earth Shield on Frostwolf Shaman is strong to make the Fire Elemental Armored. Shaman can still be useful for healing even without it.
Stomper Kreeg
- Use Execute to make Kreeg’s minis fight against each other, their own Towers, and even the boss itself.
- Use Defias Bandits to open the chest for additional income.
- Take at least one Tower, usually the one on the right lane, and push towards the boss.
Immol’thar
- Send Plague Farmer up the left lane and focus your attack on the Tower to the right. Plague Farmer with range can solo the boss if left alone.
- Fire Elemental can tank the boss if your distraction is not successful.
- Use Defias Bandits to summon Eye bombs to defend.
King Gordok
- Start by taking the middle Tower.
- Send Fire Elemental to the right lane to get Lethtendris to join your army. You can send ranged dps to support shortly afterwards.
- You can send a lone Plague Farmer to the left to get Kromcrush to join your army (optional). Make sure that the push from the right side reaches the boss first.
- Defeat King Gordok by slowing him so that Fire Elemental can tank him. Poison damage from Plague Farmers will eventually overcome his healing, or you can kill the healer with Executes and optionally a push from the left.
Watch it in action
Grom in Dire Maul
rumblo:CDAQARoECAkQABoECFAQARoECDIQABoECEQQAhoECEcQAhoECAUQAQ==
Important talents
- Splashing Pumpkins on Plague Farmer is needed for it to hit the bosses from outside their aggro radius. Plague Farmer can still provide dps without the talent, but then it always needs to be behind a tank.
- Infectious Swipes on Harpies will greatly increase their damage.
Stomper Kreeg
- Use Execute to make Kreeg’s minis fight against each other, their own Towers, and even the boss itself.
- Take at least one Tower, usually the one on the right lane, and push towards the boss.
Immol’thar
- Send Plague Farmer up the left lane and focus your attack on the Tower to the right. Plague Farmer with range can solo the boss if left alone.
- Alternatively, send Harpies through whenever you spot an opening on the left or in the middle. Turn Immol’thar around with Quilboar to get Harpies to hit it in the back. Use Cheat Death as necessary to keep the Harpies alive.
King Gordok
- Start by taking the middle Tower.
- Send Harpies to the right lane and distract Lethtendris with Quilboar.
- You can send a lone Plague Farmer to the left to get Kromcrush to join your army (optional). Make sure that the push from the right side reaches the boss first.
- Defeat King Gordok by slowing him so that Quilboar and Stonehoof Tauren can tank him. Poison damage from Plague Farmers will eventually overcome his healing, or you can kill the healer with Executes and optionally a push from the left.
Watch it in action
Sneed in Dire Maul
rumblo:CE4QAhoECAkQABoECEsQAhoECFEQARoECEQQAhoECFkQAhoECFgQAQ==
Important talents
- Splashing Pumpkins on Plague Farmer is needed for it to hit the bosses from outside their aggro radius. Plague Farmer can still provide dps without the talent, but then it always needs to be behind a tank.
- Earth Shield on Frostwolf Shaman is strong to make the Swole Troll Armored. Shaman can still be useful for healing even without it.
Stomper Kreeg
- Use Execute to make Kreeg’s minis fight against each other, their own Towers, and even the boss itself.
- Take at least one Tower, usually the one on the right lane, and push towards the boss.
Immol’thar
- Send Plague Farmer up the left lane and focus your attack on the Tower to the right. Plague Farmer with range can solo the boss if left alone.
King Gordok
- Start by taking the middle Tower.
- Send Swole Troll to the right lane with dps support to get Lethtendris to join your army. Use Execute to deal damage faster.
- You can send a lone Plague Farmer to the left to get Kromcrush to join your army (optional). Make sure that the push from the right side reaches the boss first.
- Defeat King Gordok by slowing him so that Swole Troll can tank him. Poison damage from Plague Farmers will eventually overcome his healing, or you can kill the healer with Executes and optionally a push from the left or Whelp Eggs.
Watch it in action
Orgrim Doomhammer in Dire Maul
rumblo:CB8QARoECEsQAhoECCcQABoECB0QARoECAkQABoECFgQARoECEQQAg==
Important talents
- Splashing Pumpkins on Plague Farmer is needed for it to hit the bosses from outside their aggro radius. Plague Farmer can still provide dps without the talent, but then it always needs to be behind a tank.
- Pick Lock on Defias Bandits is useful for extra income in the first map, but it is not mandatory. They are still useful as a cheap squad unit for Eye bombs on the second boss.
- Earth Shield on Frostwolf Shaman is strong to make the Fire Elemental Armored. Shaman can still be useful for healing even without it.
- Conqueror’s Diplomacy on Orgrim Doomhammer is a liability in the first map because the converted minis remain enraged and attack everything. It is better to go without a talent than with Diplomacy for this one.
Stomper Kreeg
- Use Execute to make Kreeg’s minis fight against each other, their own Towers, and even the boss itself.
- Use Defias Bandits to open the chest for additional income.
- Take at least one Tower, usually the one on the right lane, and push towards the boss.
Immol’thar
- Send Plague Farmer up the left lane and focus your attack on the Tower to the right. Plague Farmer with range can solo the boss if left alone.
- Fire Elemental can tank the boss if your distraction is not successful.
- Use Defias Bandits or Whelp Eggs to summon Eye bombs to defend.
King Gordok
- Start by taking the middle Tower.
- Send Fire Elemental to the right lane to get Lethtendris to join your army. You can send ranged dps to support shortly afterwards.
- You can send a lone Plague Farmer to the left to get Kromcrush to join your army (optional). Make sure that the push from the right side reaches the boss first.
- Defeat King Gordok by slowing him so that Fire Elemental can tank him. Poison damage from Plague Farmers will eventually overcome his healing, or you can kill the healer with Executes and optionally a push from the left or Whelp Eggs.
Watch it in action
Sylvanas with Plague Farmer
rumblo:CFIQABoECE0QAhoECEQQAhoECEsQAhoECAkQABoECB0QARoECCcQAA==
Important talents
- Splashing Pumpkins on Plague Farmer is needed for it to hit the bosses from outside their aggro radius. Plague Farmer can still provide dps without the talent, but then it always needs to be behind a tank.
- Earth Shield on Frostwolf Shaman is strong to make the Fire Elemental Armored. Shaman can still be useful for healing even without it.
- Pick Lock on Defias Bandits is useful for extra income in the first map, but it is not mandatory. They are still useful as a cheap squad unit for Eye bombs on the second boss.
Stomper Kreeg
- Use Execute to make Kreeg’s minis fight against each other, their own Towers, and even the boss itself.
- Use Defias Bandits to open the chest for additional income.
- Take at least one Tower, usually the one on the right lane, and push towards the boss.
Immol’thar
- Send Plague Farmer up the left lane and focus your attack on the Tower to the right. Plague Farmer with range can solo the boss if left alone.
- Alternatively, send your Fire Elemental up left and protect it to the best of your ability. A Fire Elemental or two can kill Immol’thar.
- Use Defias Bandits to summon Eye bombs to defend.
King Gordok
- Start by taking the middle Tower.
- Send Fire Elemental to the right lane to get Lethtendris to join your army.
- Defeat King Gordok by slowing him so that Fire Elemental can tank him.
- Kill the healer with Executes and Skeletons.
Watch it in action
Thrall
rumblo:CF8QABoECAkQABoECEsQAhoECB0QARoECFgQARoECFEQAhoECEQQAg==
Important talents
- Splashing Pumpkins on Plague Farmer is needed for it to hit the bosses from outside their aggro radius. Plague Farmer can still provide dps without the talent, but then it always needs to be behind a tank.
- Pick Lock on Defias Bandits is useful for extra income in the first map, but it is not mandatory. They are still useful as a cheap squad unit for Eye bombs on the second boss.
- Earth Shield on Frostwolf Shaman is strong to make the Swole Troll Armored.
- Meatier Elbow on Swole Troll allows it to fight other minis.
Stomper Kreeg
- Use Execute to make Kreeg’s minis fight against each other, their own Towers, and even the boss itself.
- Use Defias Bandits to open the chest for additional income.
- Take at least one Tower, usually the one on the right lane, and push towards the boss.
Immol’thar
- Send Plague Farmer up the left lane and focus your attack on the Tower to the right. Plague Farmer with range can solo the boss if left alone.
- Swole Troll can tank the boss if your distraction is not successful.
- Use Defias Bandits or Whelp Eggs to summon Eye bombs to defend.
King Gordok
- Start by taking the middle Tower.
- Send Swole Troll to the right lane to get Lethtendris to join your army. You can send ranged dps to support shortly afterwards.
- You can send a lone Plague Farmer to the left to get Kromcrush to join your army (optional). Make sure that the push from the right side reaches the boss first.
- Defeat King Gordok by slowing him so that Swole Troll can tank him. Poison damage from Plague Farmers will eventually overcome his healing, or you can kill the healer with Executes and optionally a push from the left or Whelp Eggs.
Watch it in action
Sylvanas with Plague Farmer
rumblo:CFIQABoECE0QAhoECEQQAhoECEsQAhoECAkQABoECB0QARoECCcQAA==
Important talents
- Splashing Pumpkins on Plague Farmer is needed for it to hit the bosses from outside their aggro radius. Plague Farmer can still provide dps without the talent, but then it always needs to be behind a tank.
- Earth Shield on Frostwolf Shaman is strong to make the Fire Elemental Armored. Shaman can still be useful for healing even without it.
- Pick Lock on Defias Bandits is useful for extra income in the first map, but it is not mandatory. They are still useful as a cheap squad unit for Eye bombs on the second boss.
Stomper Kreeg
- Use Execute to make Kreeg’s minis fight against each other, their own Towers, and even the boss itself.
- Use Defias Bandits to open the chest for additional income.
- Take at least one Tower, usually the one on the right lane, and push towards the boss.
Immol’thar
- Send Plague Farmer up the left lane and focus your attack on the Tower to the right. Plague Farmer with range can solo the boss if left alone.
- Alternatively, send your Fire Elemental up left and protect it to the best of your ability. A Fire Elemental or two can kill Immol’thar.
- Use Defias Bandits to summon Eye bombs to defend.
King Gordok
- Start by taking the middle Tower.
- Send Fire Elemental to the right lane to get Lethtendris to join your army.
- Defeat King Gordok by slowing him so that Fire Elemental can tank him.
- Kill the healer with Executes and Skeletons.
Watch it in action
Thalnos with Plague Farmer
rumblo:CBQQABoECEQQAhoECE0QAhoECAkQABoECCcQABoECB0QARoECEsQAg==
Important talents
- Splashing Pumpkins on Plague Farmer is needed for it to hit the bosses from outside their aggro radius. Plague Farmer can still provide dps without the talent, but then it always needs to be behind a tank.
- Earth Shield on Frostwolf Shaman is strong to make the Fire Elemental Armored. Shaman can still be useful for healing even without it.
- Pick Lock on Defias Bandits is useful for extra income in the first map, but it is not mandatory. They are still useful as a cheap squad unit for Eye bombs on the second boss.
Stomper Kreeg
- Use Execute to make Kreeg’s minis fight against each other, their own Towers, and even the boss itself.
- Use Defias Bandits to open the chest for additional income.
- Take at least one Tower, usually the one on the right lane, and push towards the boss.
Immol’thar
- Send Plague Farmer up the left lane and focus your attack on the Tower to the right. Plague Farmer with range can solo the boss if left alone.
- Alternatively, send your Fire Elemental up left and protect it to the best of your ability. A Fire Elemental or two can kill Immol’thar.
- Use Defias Bandits to summon Eye bombs to defend.
King Gordok
- Start by taking the middle Tower.
- Send Fire Elemental to the right lane to get Lethtendris to join your army.
- Defeat King Gordok by slowing him so that Fire Elemental can tank him.
- Kill the healer with Executes and Skeletons.
Watch it in action
Rivendare with Plague Farmer
rumblo:CBIQAhoECEQQAhoECB0QARoECE0QAhoECAkQABoECF0QAhoECCcQAA==
Important talents
- Splashing Pumpkins on Plague Farmer is needed for it to hit the bosses from outside their aggro radius. Plague Farmer can still provide dps without the talent, but then it always needs to be behind a tank.
- Pick Lock on Defias Bandits is useful for extra income in the first map, but it is not mandatory. They are still useful as a cheap squad unit for Eye bombs on the second boss.
Stomper Kreeg
- Use Execute to make Kreeg’s minis fight against each other, their own Towers, and even the boss itself.
- Use Defias Bandits to open the chest for additional income.
- Take at least one Tower, usually the one on the right lane, and push towards the boss.
Immol’thar
- Send Plague Farmer up the left lane and focus your attack on the Tower to the right. Plague Farmer with range can solo the boss if left alone.
- Alternatively, send your Fire Elemental up left and protect it to the best of your ability. A Fire Elemental or two can kill Immol’thar.
- Use Defias Bandits to summon Eye bombs to defend.
King Gordok
- Start by taking the middle Tower.
- Send Fire Elemental to the right lane to get Lethtendris to join your army.
- Defeat King Gordok by slowing him so that Fire Elemental can tank him.
- Kill the healer with Executes and Skeletons.
Watch it in action
Arthas with Plague Farmer
rumblo:CF4QABoECEQQAhoECB0QARoECFkQAhoECF0QAhoECAkQABoECFoQAQ==
Important talents
- Splashing Pumpkins on Plague Farmer is needed for it to hit the bosses from outside their aggro radius. Plague Farmer can still provide dps without the talent, but then it always needs to be behind a tank.
- Pick Lock on Defias Bandits is useful for extra income in the first map, but it is not mandatory. They are still useful as a cheap squad unit for Eye bombs on the second boss.
Stomper Kreeg
- Use Execute to make Kreeg’s minis fight against each other, their own Towers, and even the boss itself.
- Use Defias Bandits to open the chest for additional income.
- Take at least one Tower, usually the one on the right lane, and push towards the boss.
Immol’thar
- Send Plague Farmer up the left lane and focus your attack on the Tower to the right. Plague Farmer with range can solo the boss if left alone.
- Use Defias Bandits to summon Eye bombs to defend.
King Gordok
- Start by taking the middle Tower.
- Send Fire Elemental to the right lane to get Lethtendris to join your army.
- Defeat King Gordok by slowing him so that Arthas can tank him.
- Kill the healer with Executes and Worgen.
Watch it in action
Anub'arak doing Anub'arak things
rumblo:CBAQARoECB4QABoECEcQAhoECEQQAhoECE0QAhoECEwQAhoECFkQAg==
Note that you can also play a regular build and not use Anub'arak at all if you struggle against the second boss with the swarm strategy.
Important talents
- Explosive Shells on Anub’arak is vital to turn your Scarabs into a proper threat.
- Spirit Ward on Witch Doctor can protect your swarm.
Stomper Kreeg
- Deal some damage to Kreeg’s minis to make them fight against each other, their own Towers, and even the boss itself.
- Take at least one Tower, usually the one on the right lane, and push towards the boss.
Immol’thar
- Send Plague Farmer up the left lane and focus your attack on the Tower to the right, or vice versa - depending on where you can play Anub the safest. Plague Farmer with range can solo the boss if left alone.
- Your swarm will summon loads of Eye bombs: watch out for them and try to keep Anub alive.
King Gordok
- Start by taking the middle Tower.
- Attack the right lane to get Lethtendris to join your army.
- Defeat King Gordok by slowing him so that you can tank him.
- Kill the healer with unbound minis.
Watch it in action
Dungeon Strategy
Stomper Kreeg

Minis in army
- Defias Bandits
- Ghoul
- Huntress
- Mountaineer
- Ogre Mage
- Warsong Grunts
Other minis and map mechanics
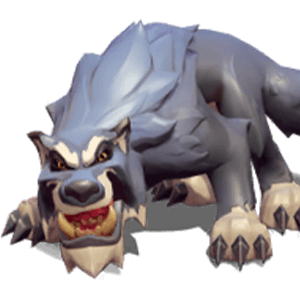
Stomper Kreeg has several minis already on the board when the battle begins, including the only appearance of a Darkspear Troll in the fight.
Stomper Kreeg summons two Ogre Mages on a timer, at 3:10, 2:10, 1:10, and 0:10.
The main map mechanic of Stomper Kreeg is that his minis will fight against anyone nearby - including each other, their own Towers, and the boss - when they are damaged to below 70% Health. If they already have a target, they will keep hitting it until it dies, but if they have no current target, you can make them fight each other.
The berserk aura is permanent once a unit has gained it, and this can be a downside if you try to steal things, as stolen berserk minis continue attacking everything in sight.
General strategy
The most important thing in the map is to make Kreeg’s minis fight against each other. Ideally, you start by making some of the starting minis fight against each other, get them to damage the Towers for you, and as you gain control of the Towers, you make them go crazy near the boss itself so that they will also fight the boss for you.
Execute is typically the first choice: at -3 levels it can immediately make the units fight against each other. At -4 levels, it needs a tiny nudge from something else to drop the units below 70%.
Spells, unbound minis, and area-of-effect damage can also be useful in making Kreeg’s minis go crazy.
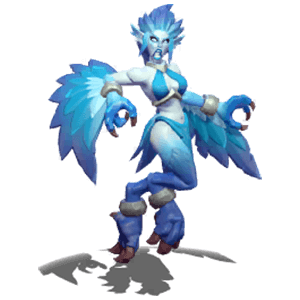
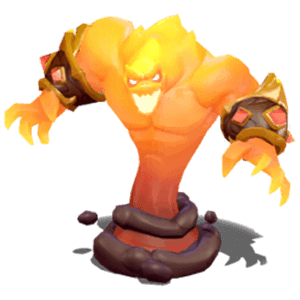
Immol'thar
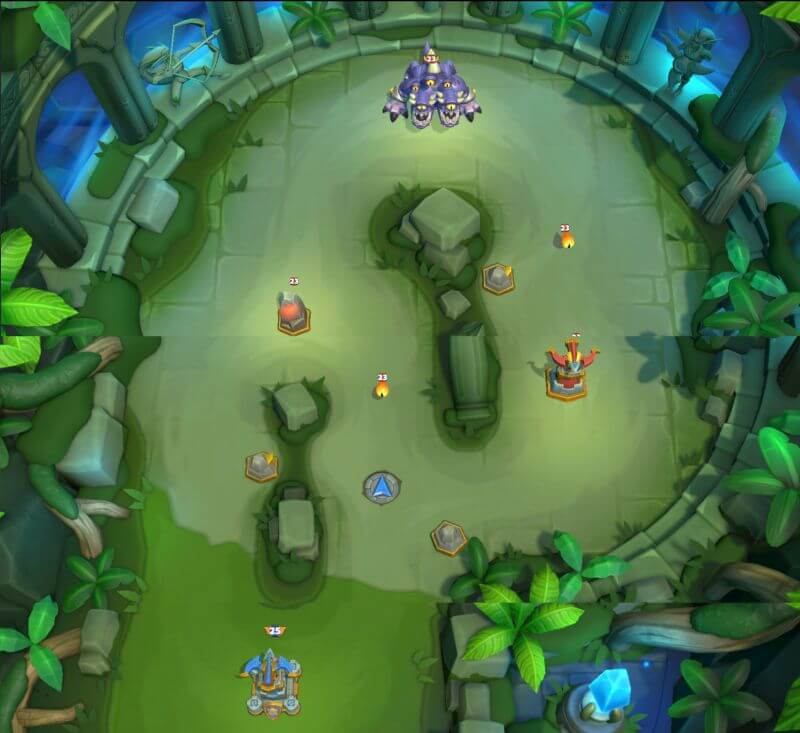
Minis in army
- Banshee
- Chain Lightning
- Defias Bandits
- Huntress
- Ogre Mage
- Prowler
- Spiderlings
Other minis and map mechanics
Immol’thar itself has a formidable cone-shaped breath attack that deals Elemental damage.
Whenever you deploy a mini during the Immol’thar battle, an Eye of the Void will spawn after a small delay. The Eyes explode when near your minis or when hit. They deal 200 Elemental damage that hits both your minis and Immol’thar’s minis.
General strategy
Eyes of the Void are a threat, but they are also an opportunity. Because their explosions damage friend and foe alike, you can use cheap Squad minis to summon a group of bombs in the middle of enemy units to blow them all up.
The Eye explosion is powerful enough to take out small troops by itself, but because the Eyes spawn with a small delay, you can position your troops in a way that they survive. It is essential for your fragile troops to move out of the way before an Eye will spawn, so try to position them so that they can start moving immediately.
For Kobolds, avoid deploying them at the far ends of your deploy zones: the Eyes will be out of reach of your base there and will follow and blow up your Kobolds. Instead, summon your Kobolds within the range of your base so that the Kobold will move out of the way and the base will shoot the Eye before it can follow.
There are three main strategies I like to use to attack Immol’thar:
- Send a Plague Farmer with the range talent up the left lane and focus your other attacks towards the right lane. If Immol’thar does not send a mini to attack the Plague Farmer, it can shoot Immol’thar from outside its aggro range and solo the boss. A hard push to the right makes it more likely that the boss will spend all of its gold defending the right side.
- Use a resistant tank with a Healer, typically Fire Elemental and Frostwolf Shaman. This combo can tank the boss. You can optionally add ranged dps to the mix. Just watch out for Banshees and try to counter them with spells or unbound minis.
- Use Harpies to deal damage to the boss and a Quilboar (an unbound resistant tank) to distract it. Cheat Death can be invaluable to keep the Harpies alive long enough to beat the boss. You should be able to find an opening to send your Harpies through the left lane or the middle lane, depending on where Immol’thar plays its minis.
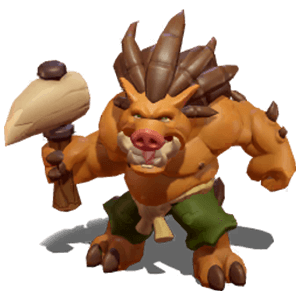
King Gordok
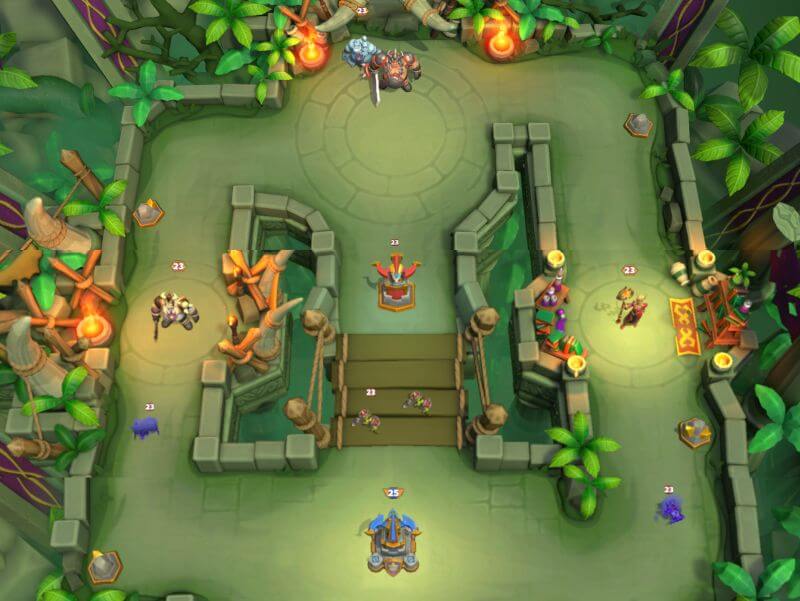
Minis in army
- Defias Bandits
- Ghoul
- Huntress
- Mountaineer
- Ogre Mage
- Warsong Grunts
Other minis and map mechanics
King Gordok has Greater Fury, which is an uncapped attack speed increase. He keeps hitting things faster and faster while in combat. The effect is reset when combat ends.
King Gordok also has three named units on his side:
- Cho’Rush the Observer: King Gordok’s pocket healer
- Lethtendris: The lieutenant of the right side, casts a slowing Curse of Exhaustion, and swaps allegiance at 10% Health
- Kromcrush: The lieutenant of the left side, cleaves targets and reduces Cho’Rush’s healing on them, and swaps allegiance at 10% Health
Note that these mini-bosses count as regular minis for Execute and take a lot of damage from it.
General strategy
With enough levels, you can just rush up the middle and beat King Gordok through his Fury and healing. At more challenging levels, you need to address those advantages.
I still like to start by taking the middle Tower so that my base is safe and secure throughout the fight.
Usually, you want to get at least the right-most lieutenant, Lethtendris, to your side because Lethtendris can slow down King Gordok’s attacks and make him much more manageable. A push through the right, luring King Gordok away from his healer and then killing the healer while slowing and tanking King Gordok is a straightforward way to win the battle.
The healer, Cho’Rush the Observer can be killed with a combination of Execute and unbound minis. You can also attack him with your regular minis from the left: deploy your minis at the bottom of the left deployment zone to make them take a route that leads them close to Cho’Rush. Otherwise they are prone to just attacking the King, even if you pull the King to the right.
If you choose to take both lieutenants, take the right one first and the left one slightly thereafter, so that you pull King Gordok to the right first and then get an attack going towards the healer from the left.