
As you travel the world of Pywel, you will discover Sealed Abyss Artifacts. These Artifacts are required to gains skills and improve your character. Sometimes given to you as quest rewards or puzzle rewards, you can also find Abyss Artefact locations physically in the world of Pywel. This guide will show you the locations for all Sealed Abyss Artifacts in Crimson Desert.
Note: This guide will cover the locations of the Sealed Abyss Artifacts by region and will be continuously updated.
Quick Links
- How Sealed Abyss Artifacts Work
- How to Find "Unmarked" Artifacts
- Sealed Abyss Artifact Rewards
- Sealed Abyss Artifact Locations
How Sealed Abyss Artifacts Work
Abyss Artifacts involve completing challenges in order to unlock their rewards.
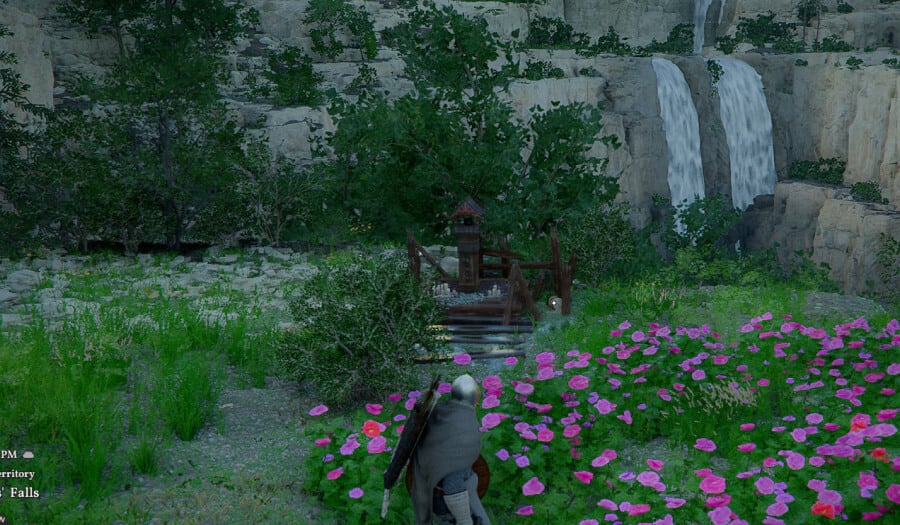
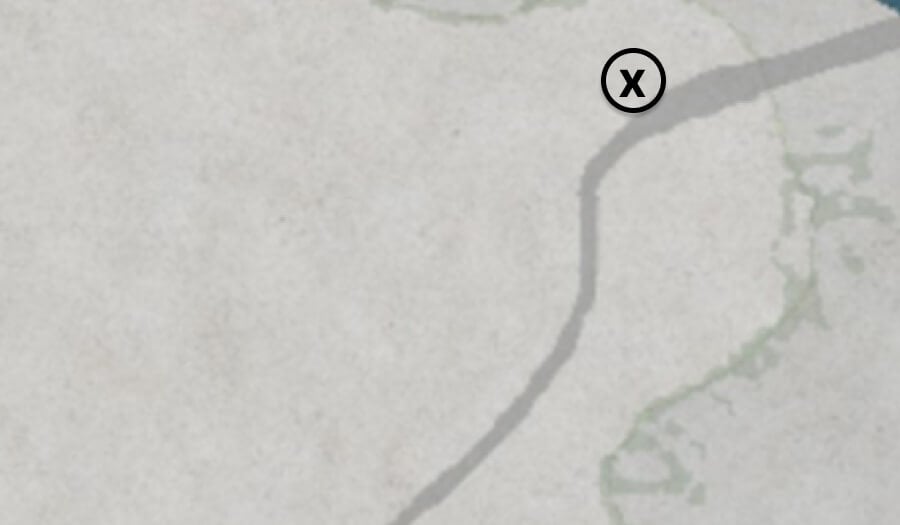
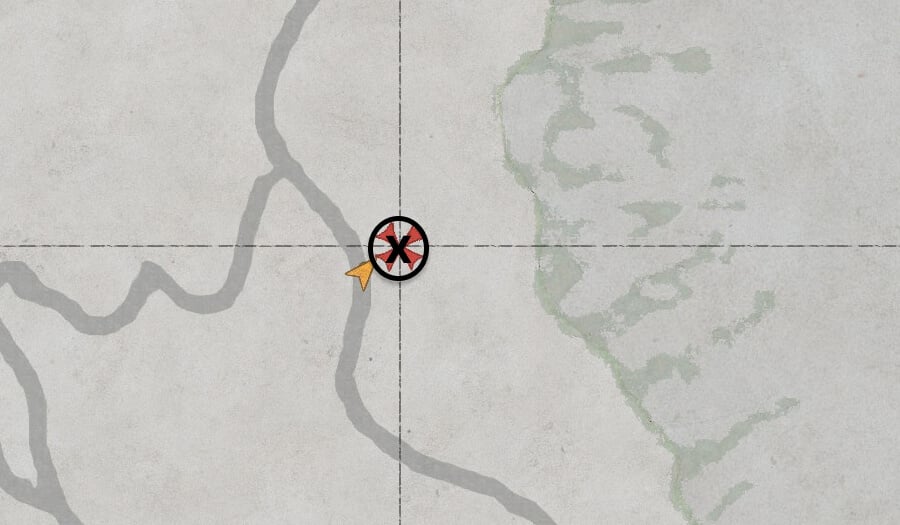
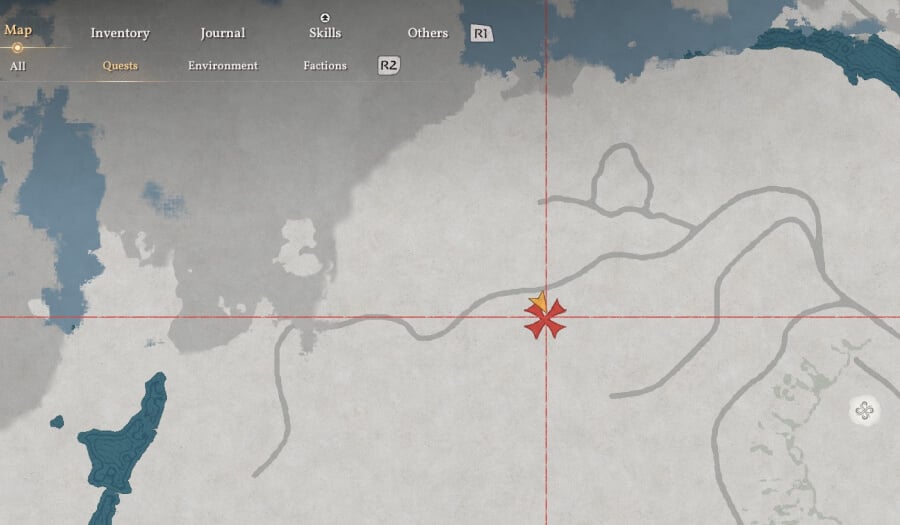
- The Location: Abyss Artifacts are almost always by the road on shrines, so make a habit of running around with your lantern out.
- The Reveal: Once picked up, check Journal > Challenges to see the exact requirement or find the Abyss Artifact in your inventory.
- The Reward: Unsealing an artifact typically grants Abyss Artifacts (Skill Points), Faded Abyss Artifacts (Respec items), or Abyss Gears (powerful runes for your equipment).
Pro Tip: Hold up your Lantern while exploring. Sealed Artifacts will emit a distinct white ring of light from a distance, making them much easier to spot at night or from horseback. They also appear on your minimap as a purple marker, though they do not appear on the main map.
How to Find "Unmarked" Artifacts
If you are hunting for more, follow these three rules:
- Follow the Main Roads: 90% of Sealed Artifacts are placed on stone cairns or small altars directly alongside primary travel paths.
- Use Guiding Light: Use your sword’s Guiding Light ability (L1+R1 / LB+RB). If an artifact is nearby, it will give off a faint blue glimmer even through walls or brush.
- Check the Minimap: When you are within ~30 meters of a Sealed Artifact, a purple cube icon will appear on your minimap.
Sealed Abyss Artifact Rewards
- Abyss Artifacts: Used to unlock new nodes in your Skill Tree (Health, Spirit, Stamina trees)
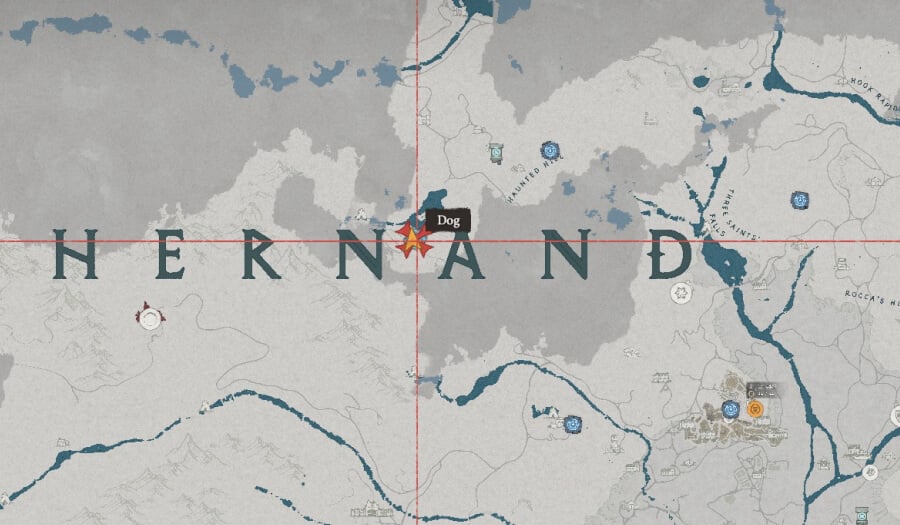
- Faded Abyss Artifacts: These are rare! Keep these for when you want to respec your character
- Abyss Gears: These are essentially "Gems" you socket into your weapons to add elemental effects like Fire, Ice, or Lightning
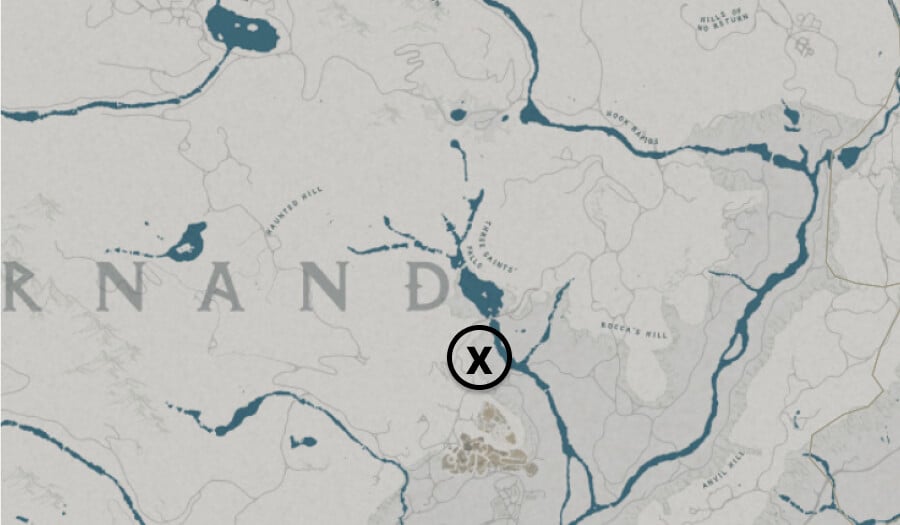
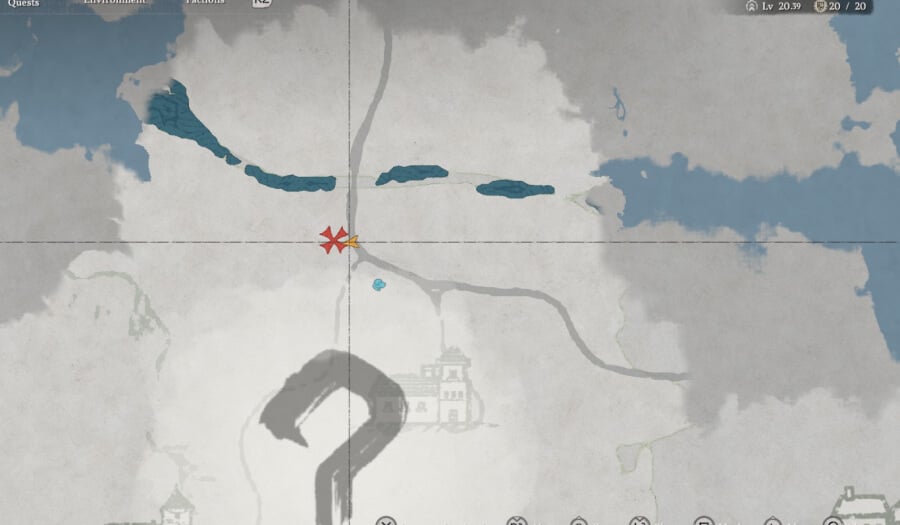
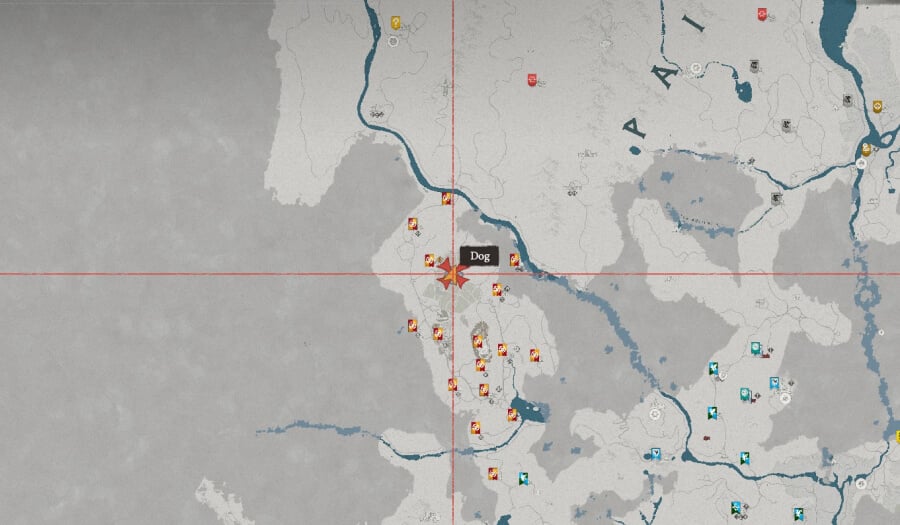
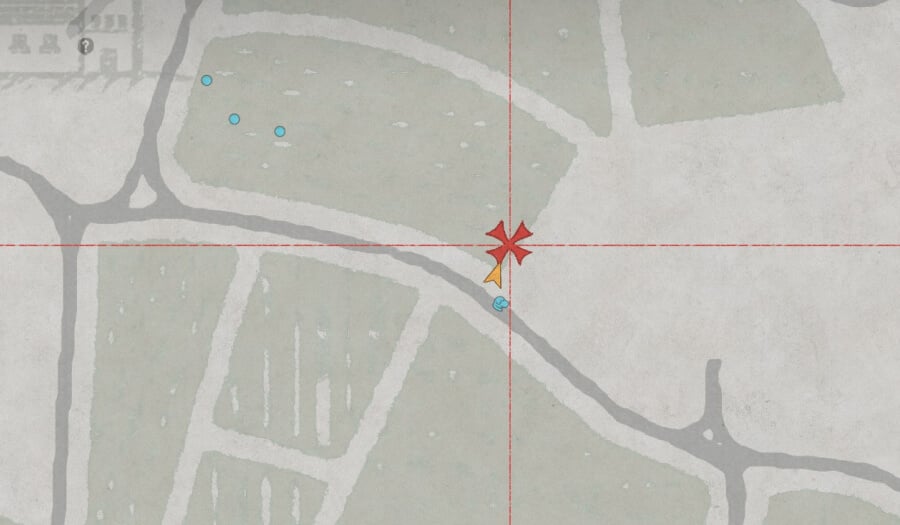
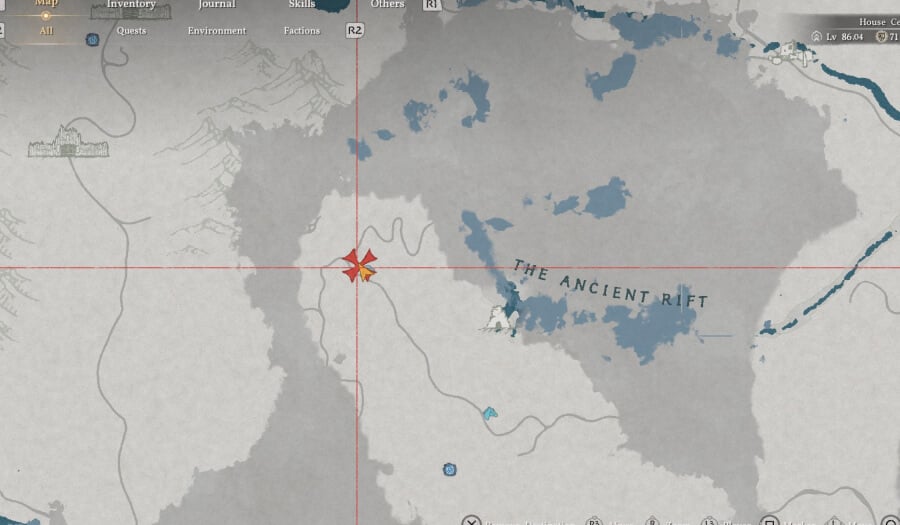
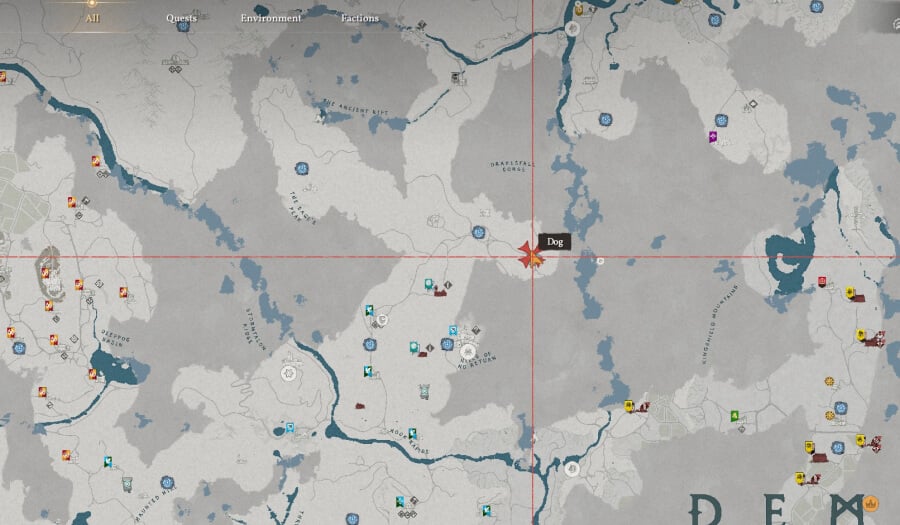
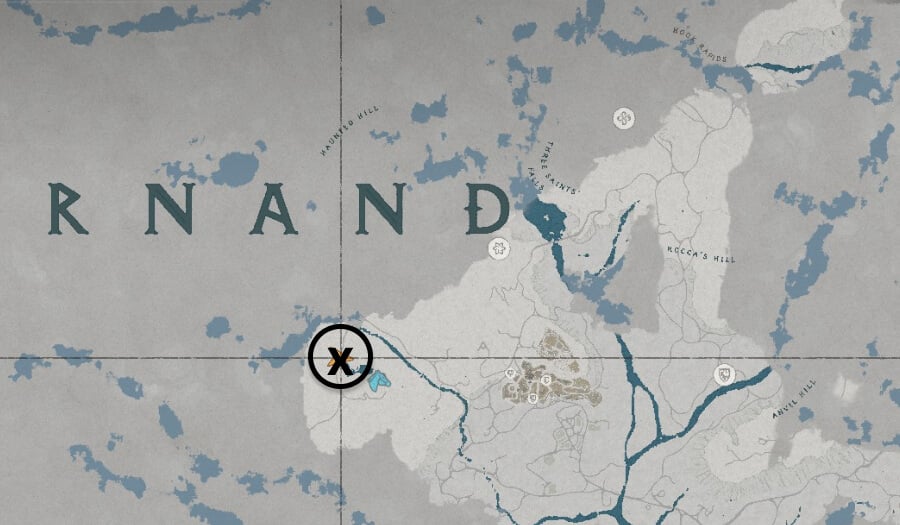
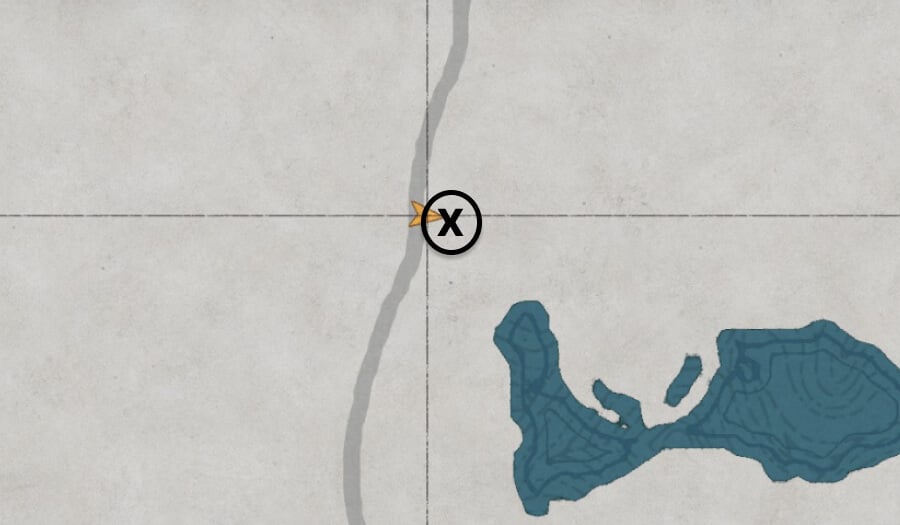
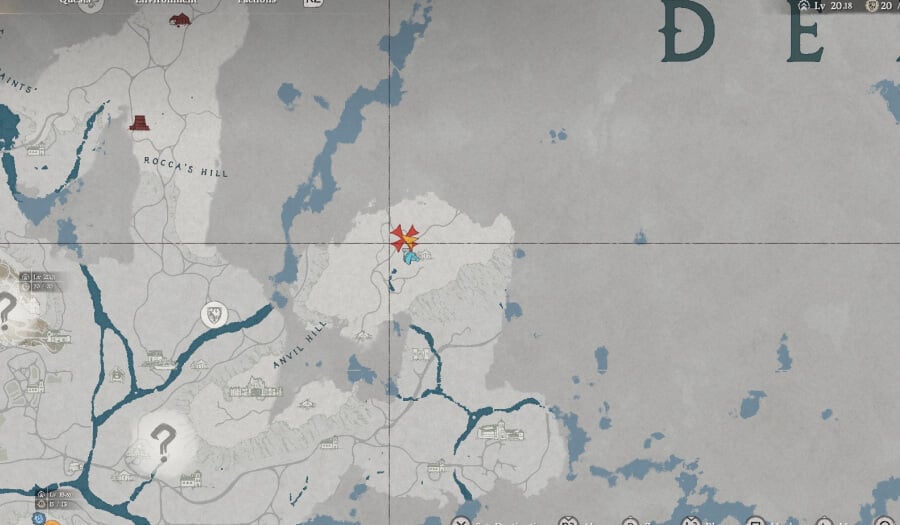
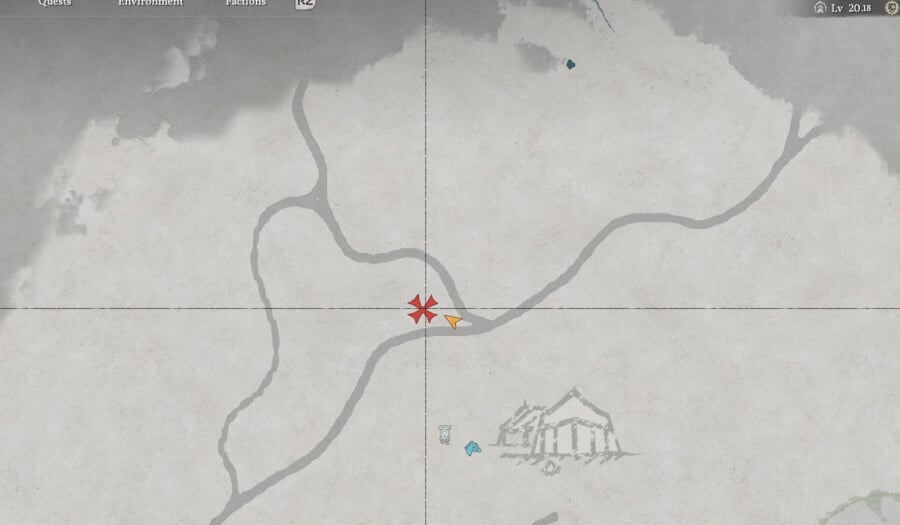
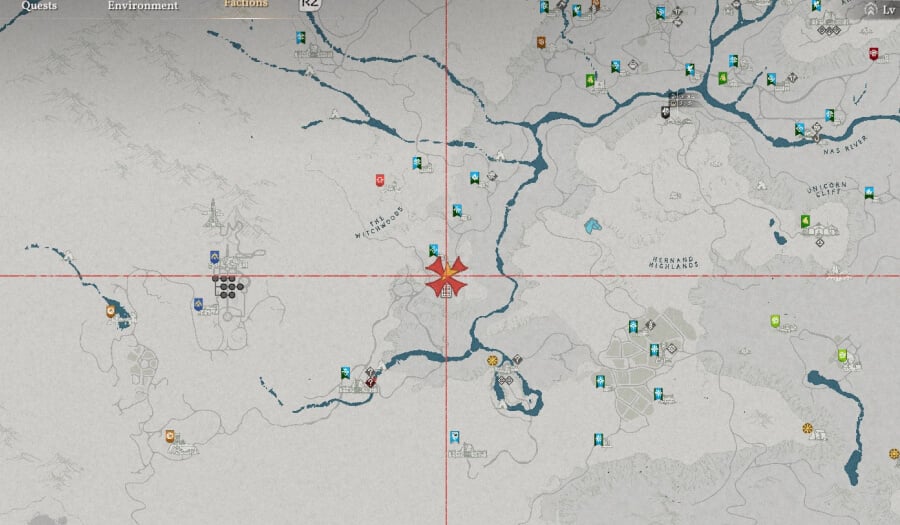
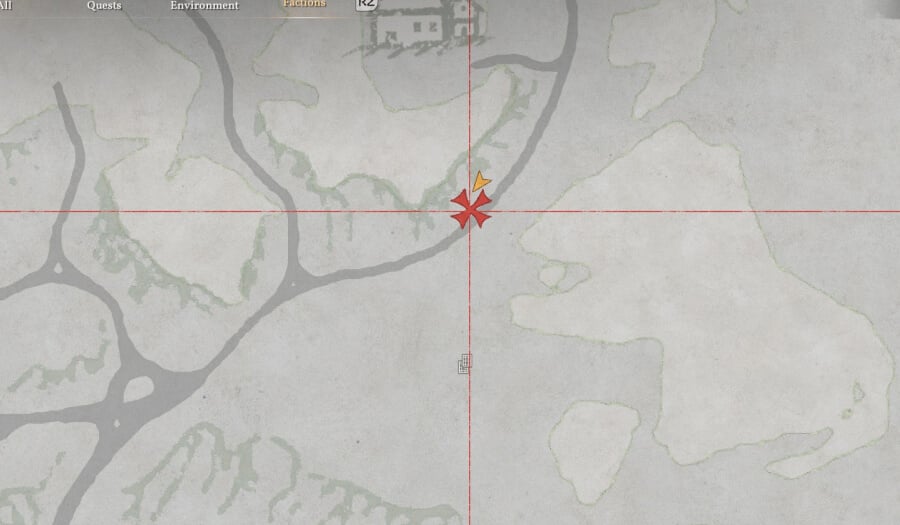
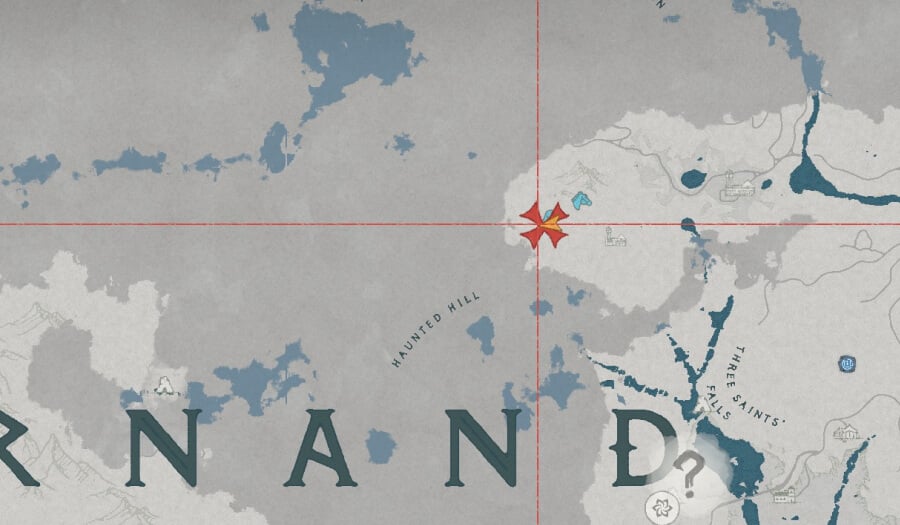
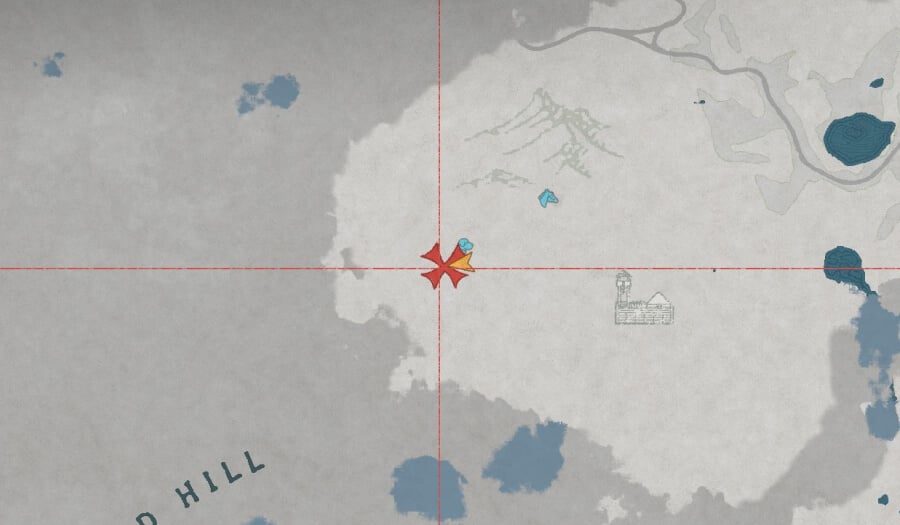
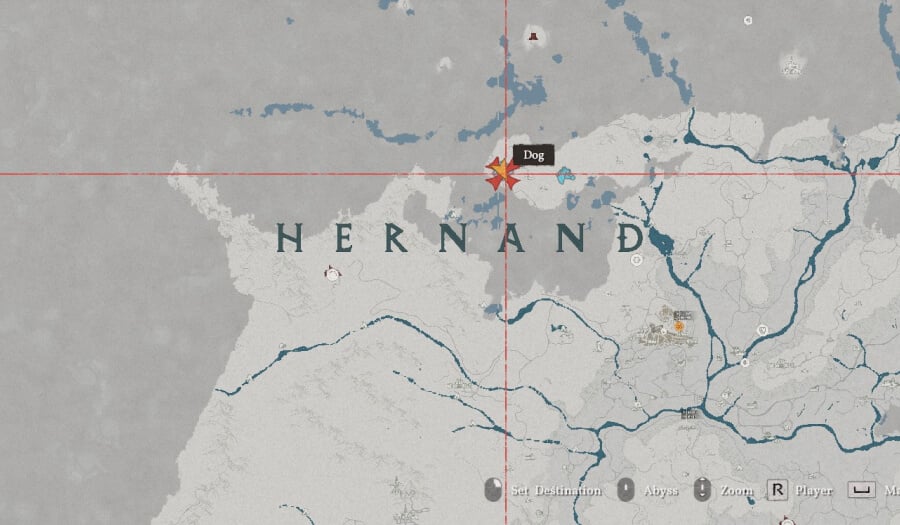
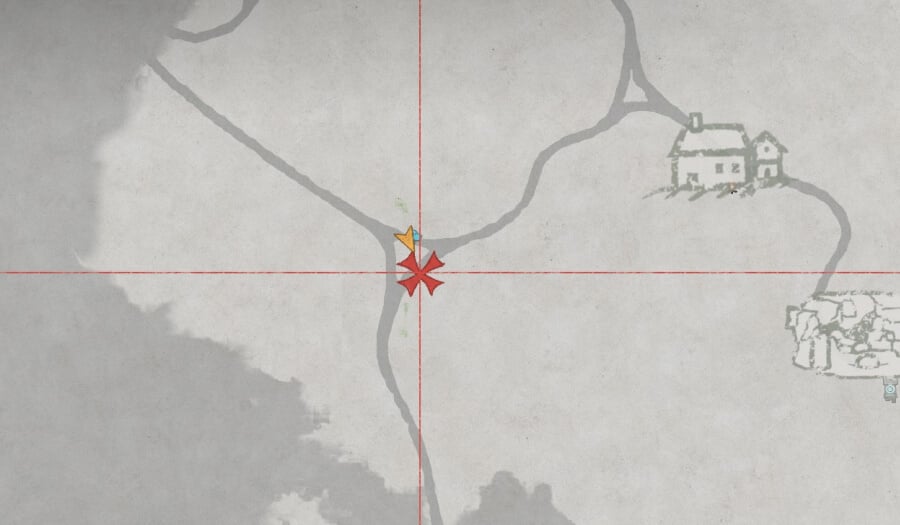
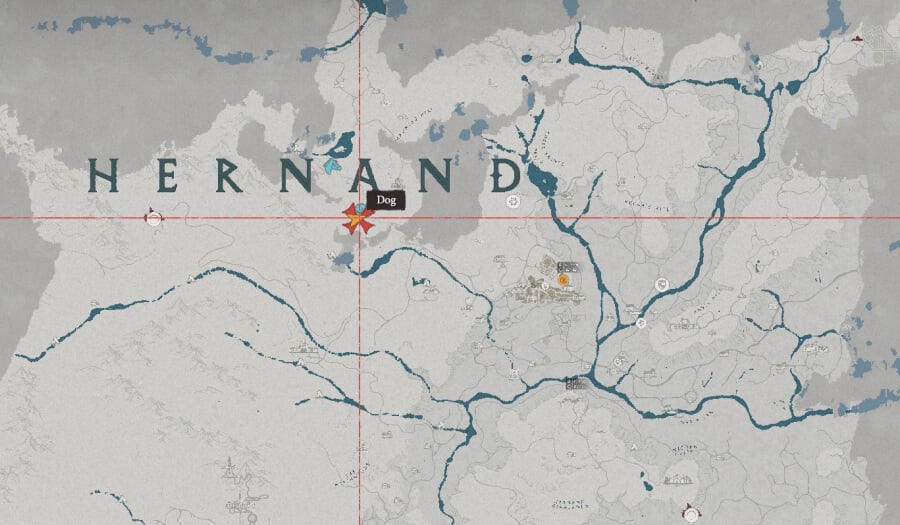
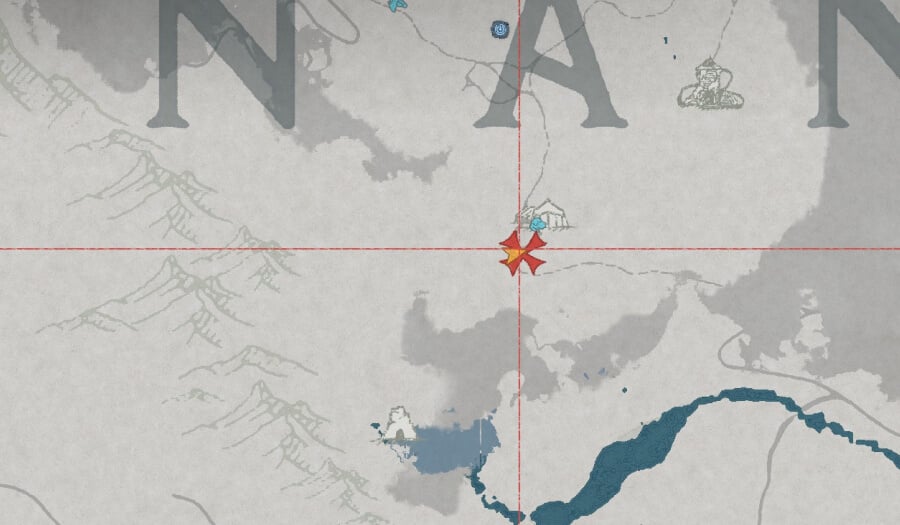
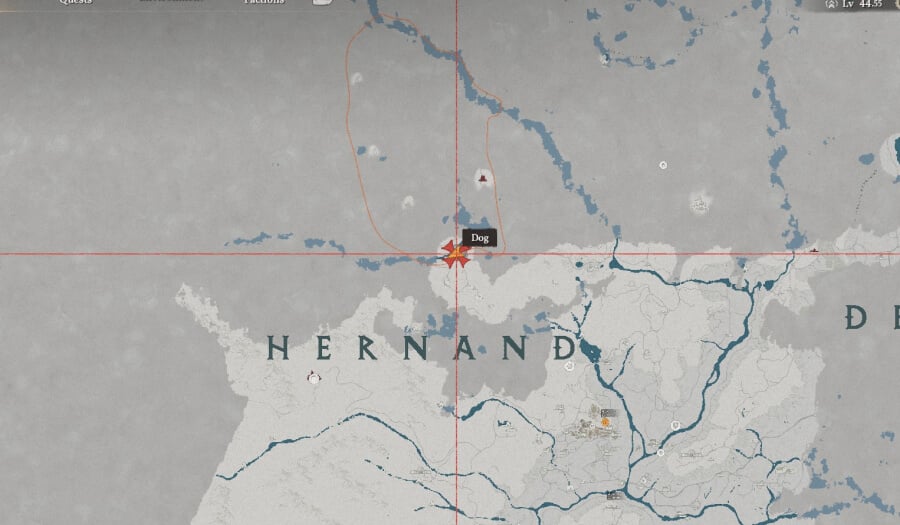
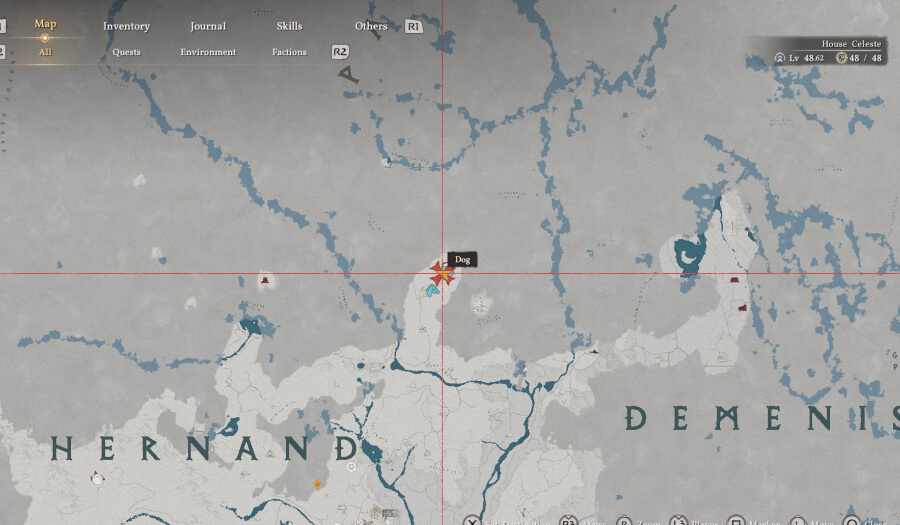
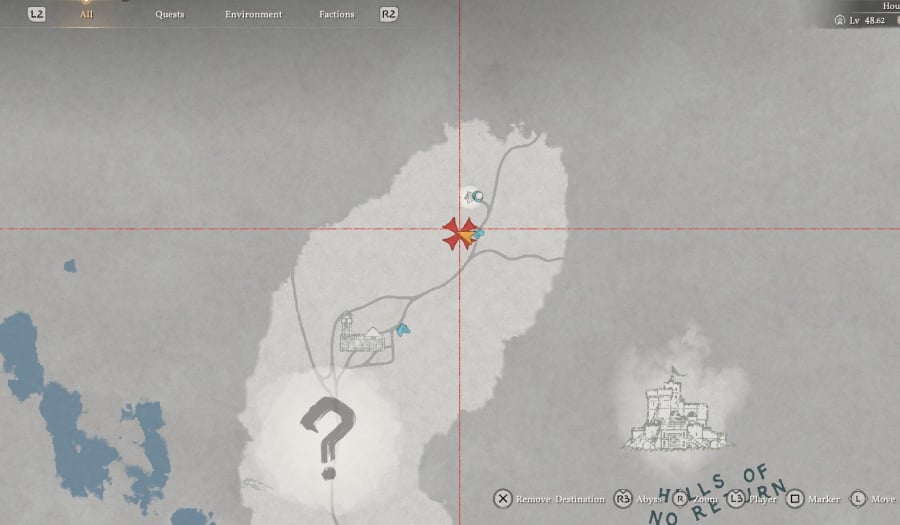
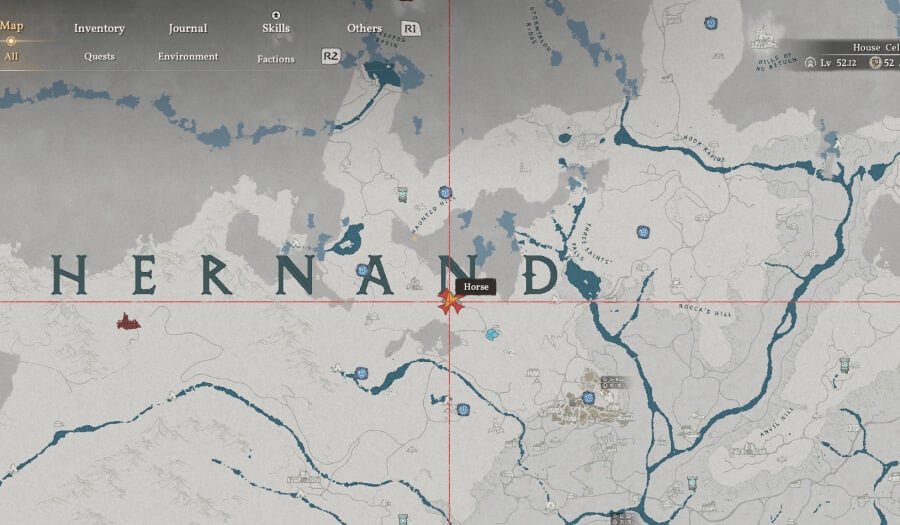
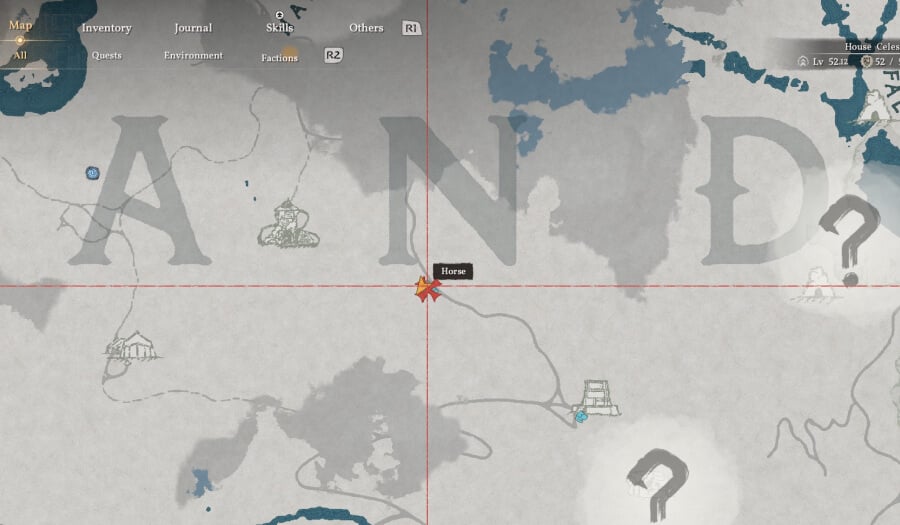
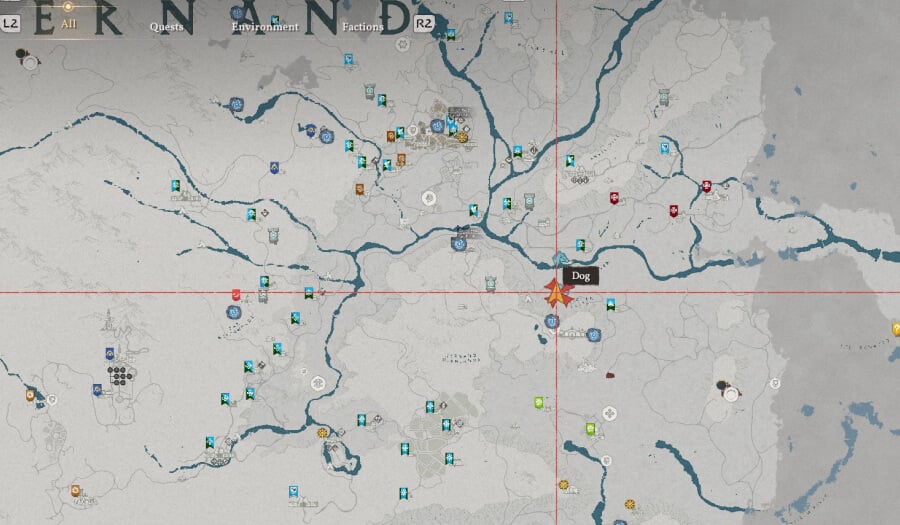
Sealed Abyss Artifact Locations: Hernand Region
You can see the locations of the Abyss Arifacts for the Hernand Region in the map images below.
Note: Click the maps below to enlarge them.
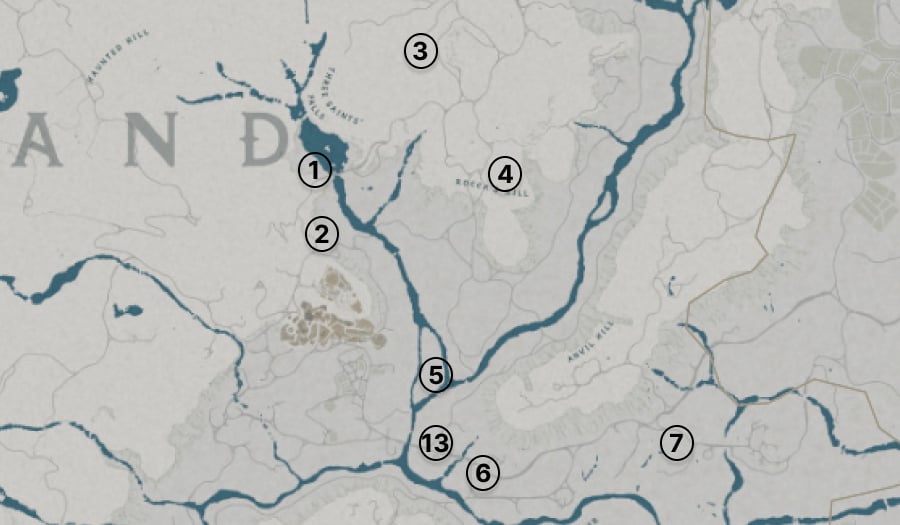
Note: The above map only includes locations up to 12. See the full list below for locations as we update this hourly
| # | Artifact Name | Location | Challenge |
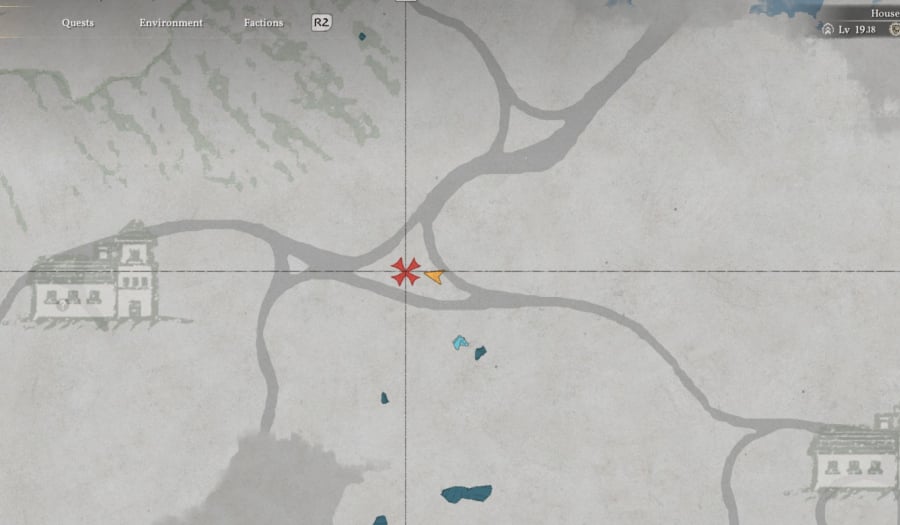
| 1 | Sword of Trials 1 | Follow the road from Hernand Castle towards Meandering Hills and head to the large bridge | Defeat 3 enemies within 30 seconds using a sword |
| 2 | Shield of Unchanging Will 1 | Follow the road towards Meandering Hills from the large bridge at location 1 | Defeat 3 enemies with a shield |
| 3 | Feather of the Earth |
Head along the road to Karin Quarry and look for an altar of rocks. The location is north of the Excavatron boss fight |
Carry five birds |
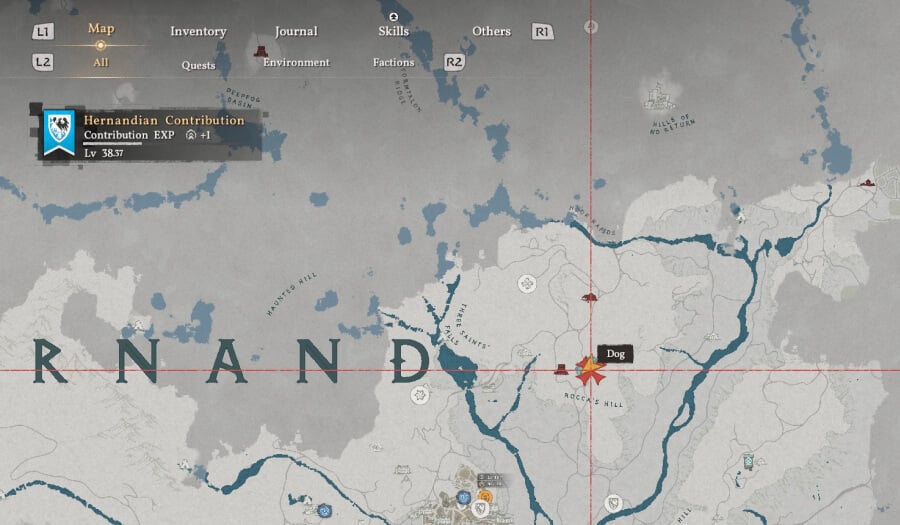
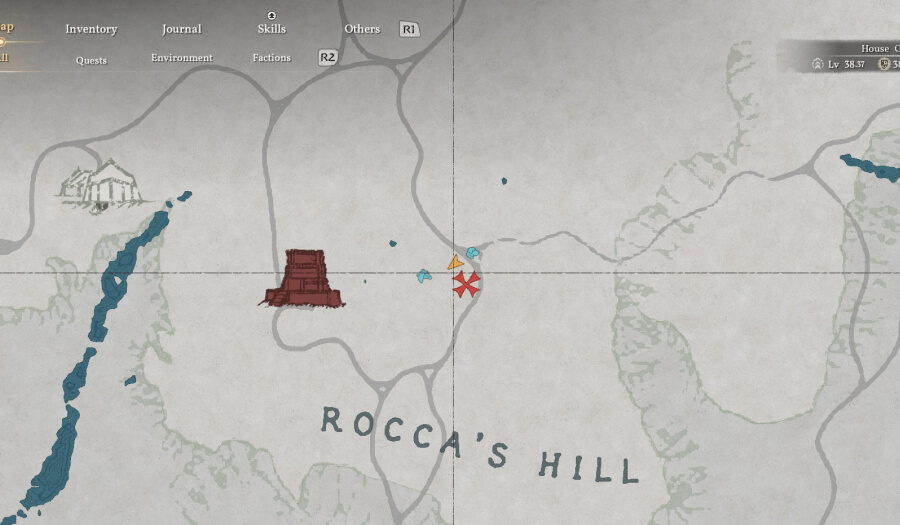
| 4 | Shield of Unchanging Will 4 | By the tree near the three-point crossing at Rocca's Hill, next to the Embernest Beacon Liberation site | Defeat 5 enemies with a Shield without taking damage |
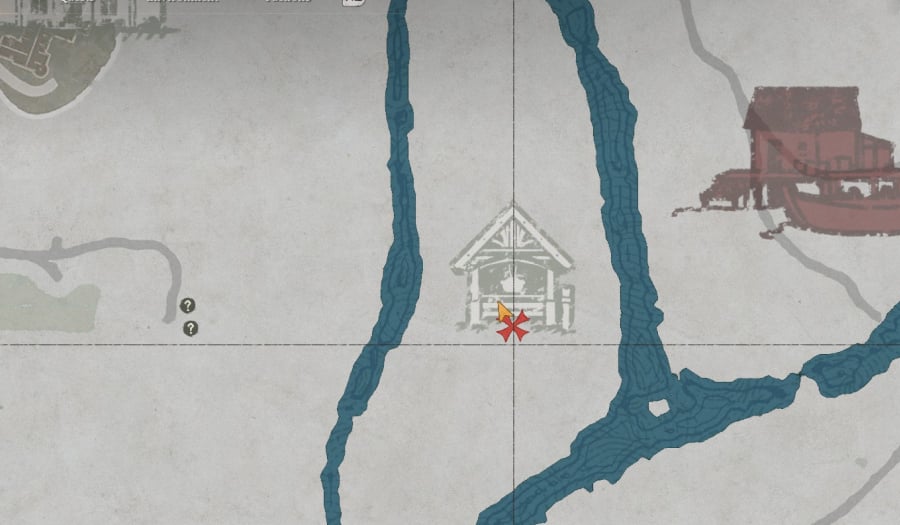
| 5 | Sharpened Spear 2 | Southeast from Hernand Castle, cross over the Nas River to find the Red Greymane Shrine | Hit enemies 30 times with a spear within 30 seconds |
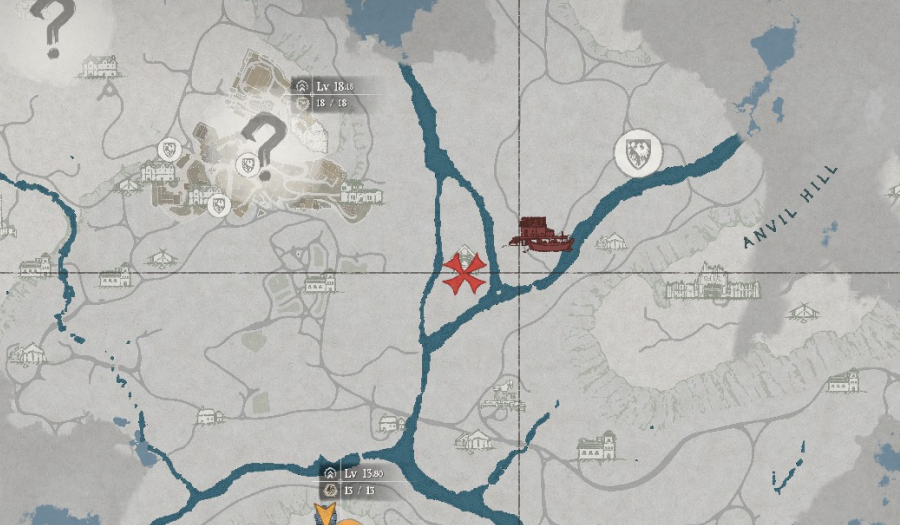
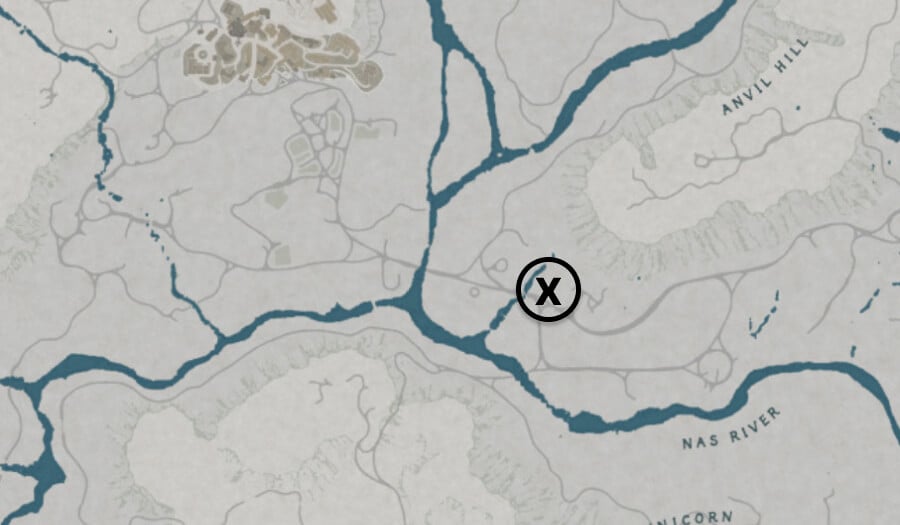
| 6 | Sliding Down the Slope | Head to the junction in the road at the Anvil Riverside Terrace | Slide down 50m |
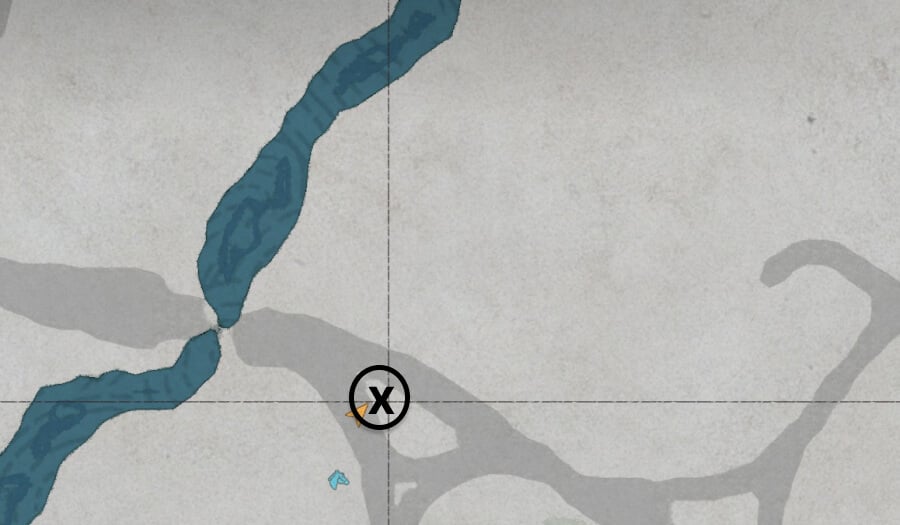
| 7 | Night of the Silent Banner Pike | Head to the crossing at the Anvil Riverside Terrace, west of the St. Halssius' House of Healing and the Trading Post | Destroy 10 Banner Pikes without being detected at night |
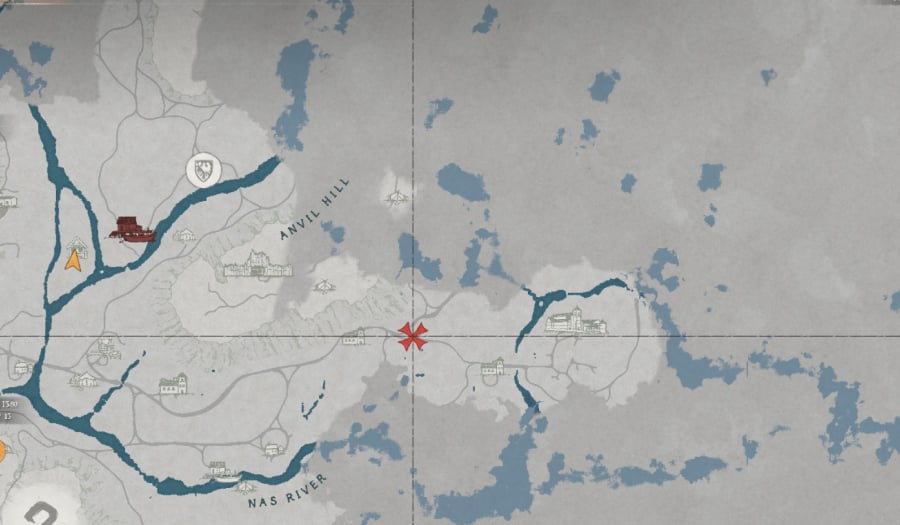
| 8 | Shield of Unchanging Will 2 | On the road near Kharonso in the Scholastone area, you will find the stone near Oxen and Goats. A good time to do this is during Chapter 4 on the Head to Scholastone quest | Block 10 Arrows with a shield |
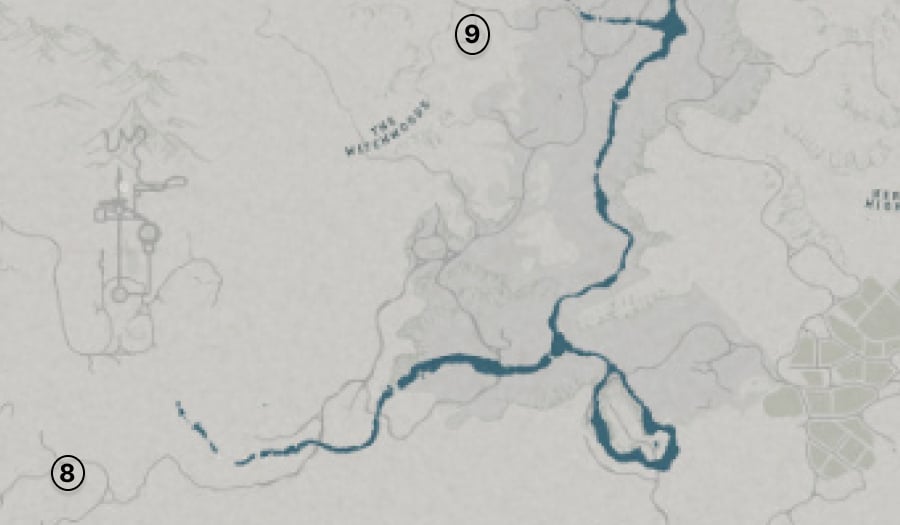
| 9 | Under the Ashen Banner Pike | At the Phoniel Ranche Mysterious Energy location near the Azure Moon Labyrinth | Find 20 Greymanes |
| 10 | Worth its Weight | Located at the Calphade Farmhouse on the road that separates the top farm from the one below. | Sell 10 pigs to the fence |
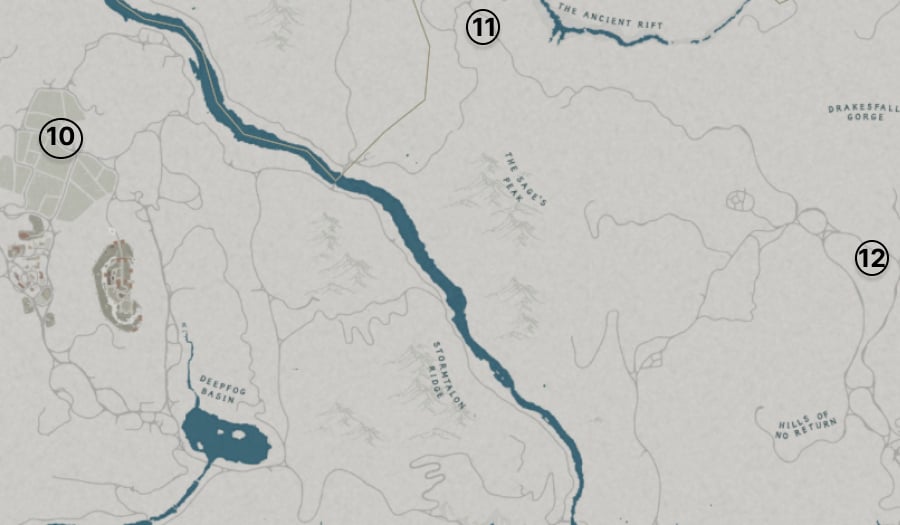
| 11 | Animal Meat | South of the "P" in Pauline and left of The Anchient Rift map location near the Twisted Thicketway Puzzle | Acquire all meat knowledge |
| 12 | Sharpened Spear 5 | Northeast towards the Hills of No Return | Defeat 5 enemies without taking damage from spears while mainttaining 100% Health |
| 13 | Sword of Trials 3 | Just over the bridge towards the Goldleaf Trading post | Defeat three enemies without taking any damage |
| 14 | Sword of Trial Four | Northwest of the Kilnden Workshop, where you do the quest to craft the Pot | Defeat 3 enemies at once with a Sword Turning Slash attack |
| 15 | Spot the Trickery in Duo | At a fork in the road near the large Wild Raiders camp north of Anvil Hill | Spot a cheater in Duo using the "accuse" action |
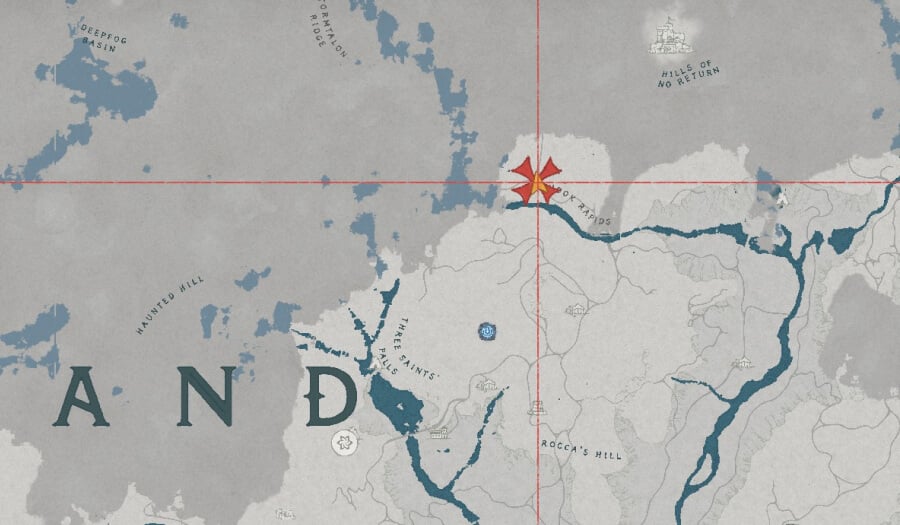
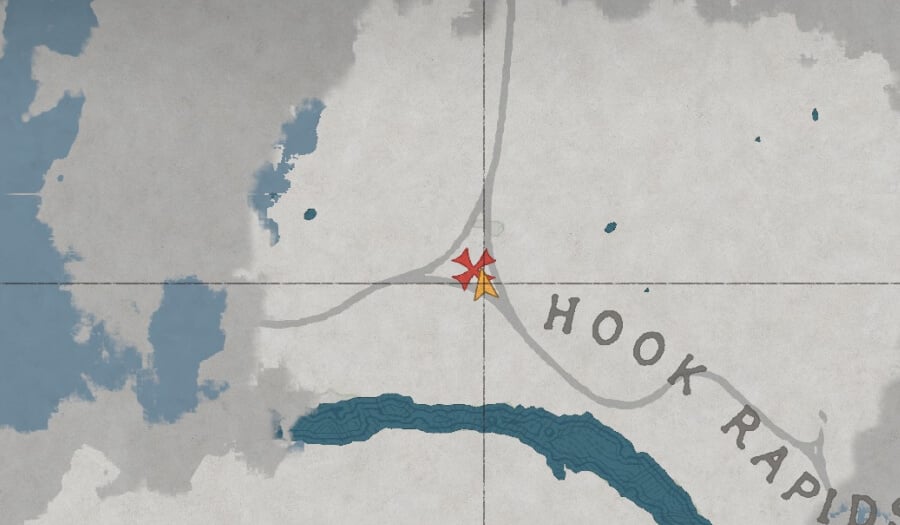
| 16 | Sharpened Spear 3 | Located north of the Karim Quarry over the river near "Hook Rapids" on the map | Take down 5 enemies within 15 seconds with the Stab attack (with the spear) |
| 17 | When Lighting Strikes 5 | On the main path in the Steel Mountains region. Close to the spire, and between Grace Manor and the Ruined Chapel | Take down 3 enemies with regular shots; Take down 3 enemies with Evasive Shot or Focused Evasive Shot; Take down 3 enemies with aerial shots |
| 18 | Dancing Blade, Shining Shield 1 | On the road south of Meshley Trapsmith and south of the Witchwoods. Chapter 5 will take you here | Playing as Damiane, defeat 5 enemies with a Rapier in under 1 minute |
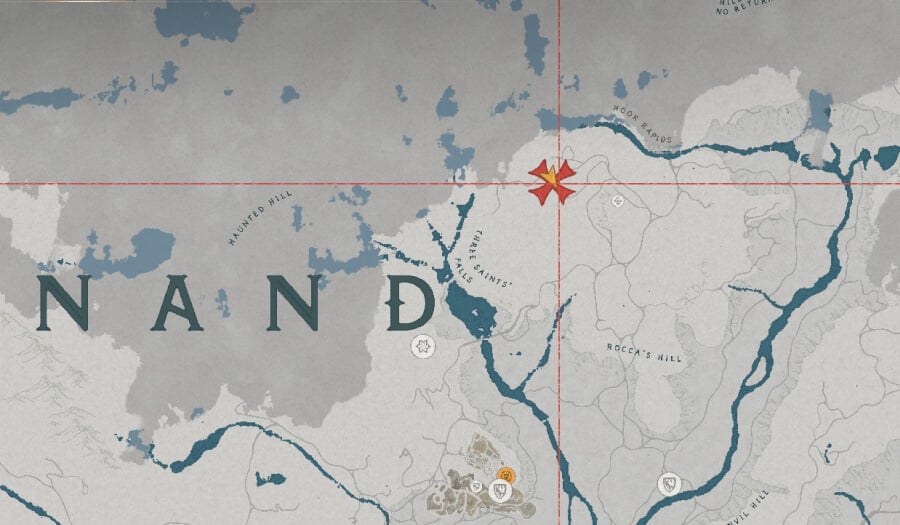
| 19 | Judgement of the Storm | Perched on a stone altar at the bottom of a cliff. North of the "N" in Hernand on the map | Defeat 30 enemies within 1 minute |
| 20 | Sharpened Spear 1 | North of the Haunted Hill and west of the Hunter's Cabin Relic | Land 15 Counterattacks with your spear within 30 seconds |
| 21 | Star That Cleaves the Heavens | Located in Hernand directly under the "A" and to the west of Ivynook | Leap from the Abyssal Cliff Edge (The Island in the sky) and land on the ground within 30 seconds |
| 22 | Overwhelming Slash 3 | Located between the "N" and "A" in Hernand and just north of Ivynook | Knock back 10 enemies within 30 seconds using a Longsword |
| 23 | Bow Aimed at Fate 2 | Very north of Hernand, directly above the "A" in the word on the map. South of the Calphade gate and near the Hunter's Cabin Relic puzzle. | Defeat 7 enemies in a row using only normal arrows |
| 24 | Touch of Darkness | Northwest of Hernand City and north of the Hills of No Return | Assassinate 3 enemies within 1 minute |
| 25 | The Herder's Lament | You will find this directly under the "N" in Hernand on the map | Sell 3 goats to Bram at the Greymane Camp's ranch |
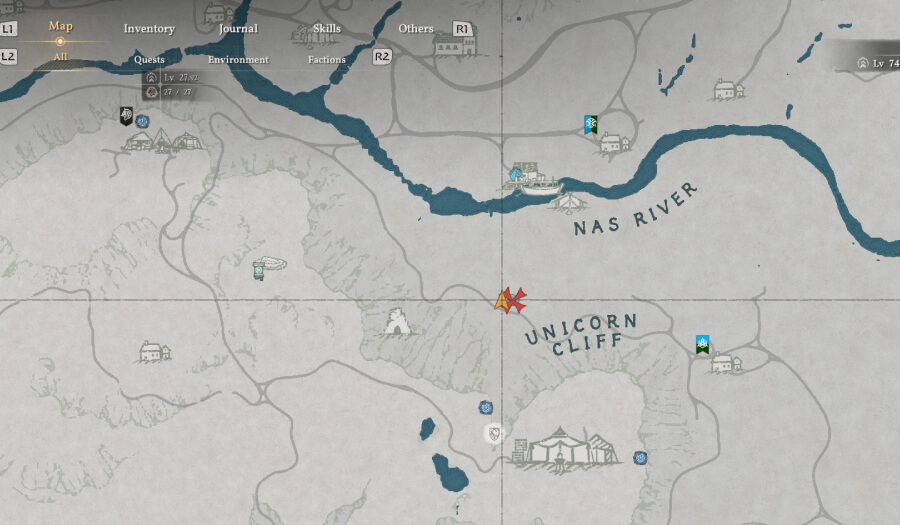
| 26 | Keeping Balance on the Wind | Southwest of the Greymane Camp, along the Unicorn Cliff and south of the Nas River | Walk 10m on a rope |
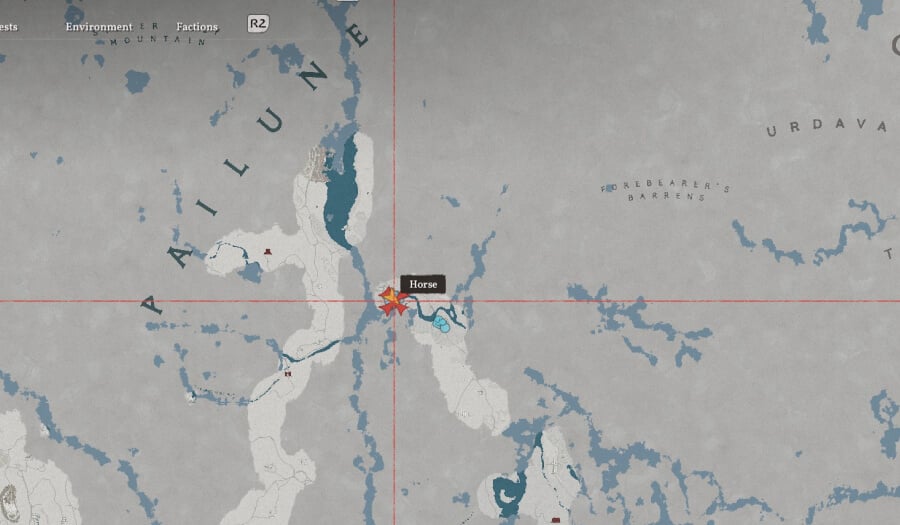
| 27 | Mythical Ecosystem | South of Pauline City, and at the bottom of the river, at the crossroads | Capture 3 Choppies |
| 28 | Bow Aimed at Fate 3 | South of Pailune city at the Beighen Candlery. Located on the right side of the bottom of the lake | Hit 3 enemies in mid-air with a bow |
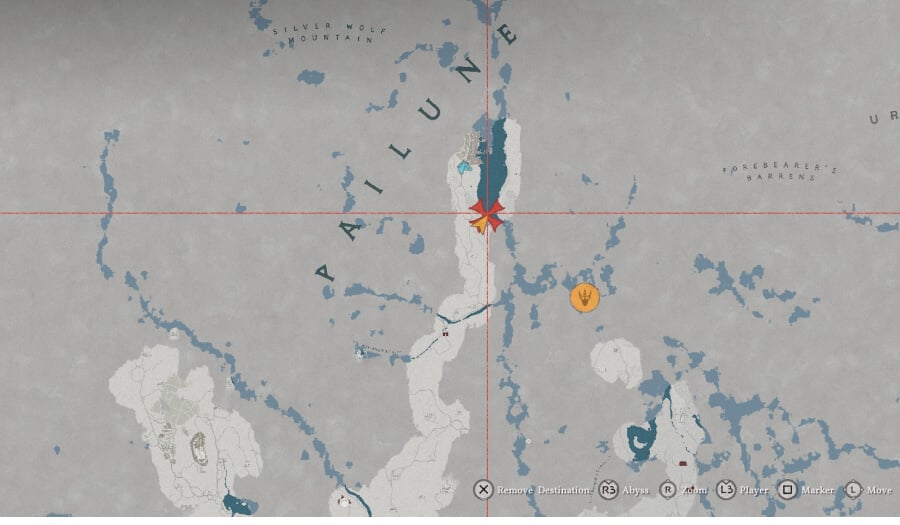
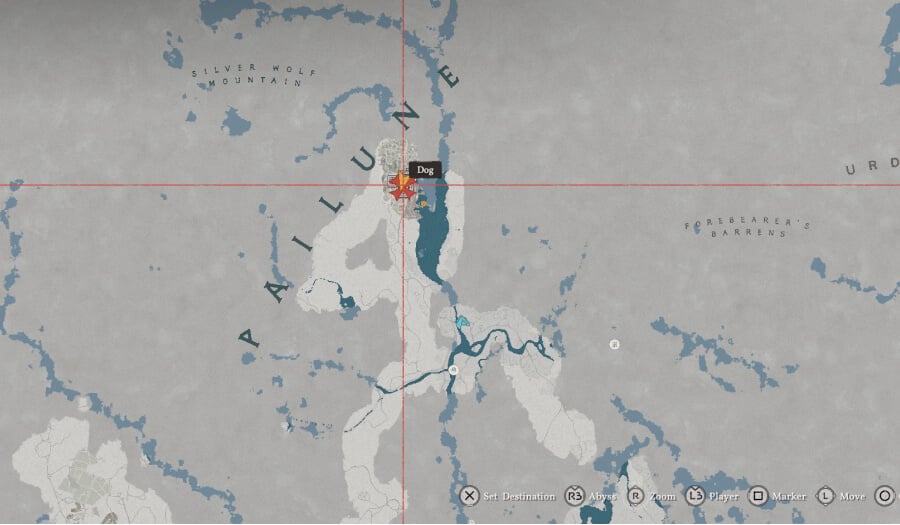
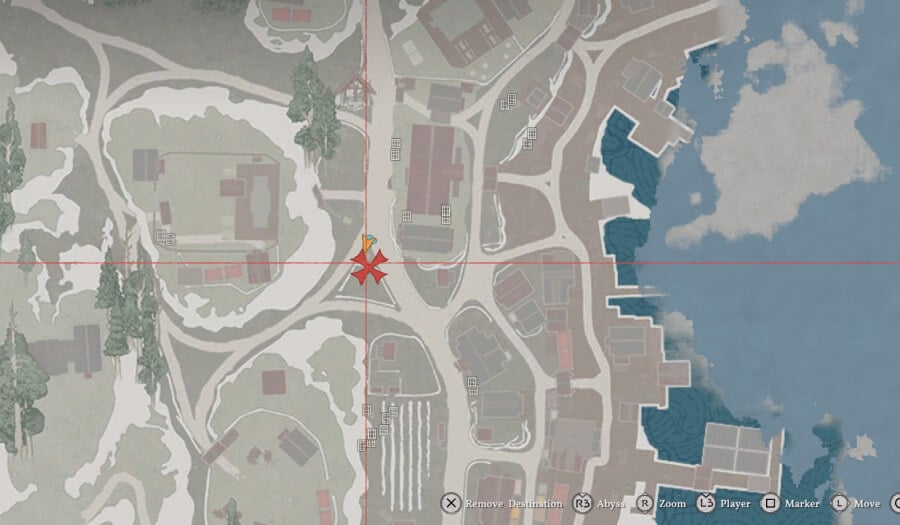
| 29 | Traveler with Oak Barrels | Located inside Pailune City, on the monument | Meet the inn owners from all the eight regions |
1. Sword of Trials 1
Location: Follow the road from Hernand Castle towards Meandering Hills and head to the large bridge
Challenge: Defeat 3 enemies within 30 seconds using a sword

2. Shield of Unchanging Will 1
Location: Follow the road towards Meandering Hills from the large bridge at location 1
Challenge: Defeat 3 enemies with a shield
3. Feather of the Earth
Location: Head along the road to Karin Quarry and look for an altar of rocks. The location is north of the Excavatron boss fight
Challenge: Carry five birds (not at the same time)
4. Shield of Unchanging Will 4
Pro Tip: To do this challenge, YOU need to kill enemies WITH YOUR SHIELD. There is no time limit here, just that you kill five enemies one after another with your shield. Use the Shield Bash skill (ATRL + Right click/ L1+R2/ LB+RT)
Location: By the tree near the three-point crossing at Rocca's Hill, next to the Embernest Beacon Liberation site
Challenge: Defeat 5 enemies with a Shield without taking damage
5. Sharpened Spear 2
Location: Southeast of Hernand Castle, cross over the Nas River to find the Red Greymane Shrine
Challenge: Hit enemies 30 times with a spear within 30 seconds
Pro Tip: Use the spear "hold" heavy attack to start the fight. The nearby Fishing Dock is a great place to complete this.
6. Sliding Down the Slope
Location: Head to the junction in the road at the Anvil Riverside Terrace
Challenge: Slide down 50m
Pro Tip: Head to the hill near your camp south of Howling Hill. Place a marker at the bottom of the hill and then run 50m+ away up the hill. Sprint towards the spot and then press the crouch button to start the slide
7. Night of the Silent Banner Pike
Location: Head to the crossing at the Anvil Riverside Terrace, west of the St. Halssius' House of Healing and the Trading Post
Challenge: Destroy 10 Banner Pikes without being detected at night
8. Shield of Unchanging Will 2
Location: On the road near Kharonso in the Scholastone area, you will find the stone near Oxen and Goats. A good time to do this is during Chapter 4 on the Head to Scholastone quest.
Challenge: Block 10 arrows with a shield
9 Under the Ashen Banner Pike
Location: At the Phoniel Ranche Mysterious Energy location near the Azure Moon Labyrinth
Challenge: Find 20 Greymanes
10. Worth its Weight
Location: Located at the Calphade Farmhouse on the road that separates the top farm from the one below.
Challenge: Sell 10 pigs to the fence
11. Animal Meat
Location: South of the "P" in Pauline and left of The Anchient Rift map location near the Twisted Thicketway Puzzle
Challenge: Obtain all meat knowledge

12. Sharpened Spear 5
Location: Northeast towards the Hills of No Return
Challenge: Defeat 5 enemies without taking damage from spears while mainttaining 100% Health
13. Sword of Trials 3
Location: Just over the bridge towards the Goldleaf Trading post
Challenge: Defeat three enemies without taking any damage
14. Sword of Trial Four
Location: Northwest of the Kilnden Workshop, where you do the quest to craft the Pot
Challenge: Defeat 3 enemies at once with a Sword Turning Slash attack
15. Spot the Trickery in Duo
Location: At a fork in the road near the large Wild Raiders camp north of Anvil Hill
Challenge: Spot a cheater in Duo using the "accuse" action
Pro Tip: When playing Duo, the card game, you can accuse someone if you think they are cheating. Note, if you get it wrong, you will be banned for a day.
16. Sharpened Spear 3
Location: Located north of the Karim Quarry over the river near "Hook Rapids" on the map
Challenge: Take down 5 enemies within 15 seconds with the Stab attack (with the spear)
17. When Lighting Strikes 5
Location: On the main path in the Steel Mountains region. Close to the spire, and between Grace Manor and the Ruined Chapel
Challenge: Take down 3 enemies with regular shots; Take down 3 enemies with Evasive Shot or Focused Evasive Shot; Take down 3 enemies with aerial shots
18. Dancing Blade, Shining Shield 1
Location: On the road south of Meshley Trapsmith and south of the Witchwoods. Chapter 5 will take you here.
Challenge: Playing as Damiane, defeat 5 enemies with a Rapier in under 1 minute.
19. Judgement of the Storm
Note: There is a camp nearby that you can liberate
Location: Perched on a stone altar at the bottom of a cliff. North of the "N" in Hernand on the map
Challenge: Defeat 30 enemies within 1 minute
20. Sharpened Spear 1
Location: North of the Haunted Hill and west of the Hunter's Cabin Relic
Challenge: Land 15 counterattacks with a spear within 30 seconds
Pro Tip: You need to unlock Counter Stance in the spear skill tree (Armed Combat - Counter Stance). You will need to "spam" ALT + Left click (RB/B, R+0) to do this
21. Star That Cleaves the Heavens
Location: Located in Hernand directly under the "A" and to the west of Ivynook
Challenge: Leap from the Abyssal Cliff Edge (The Island in the sky) and land on the ground within 30 seconds
22. Overwhelming Slash 3
Location: Located between the "N" and "A" in Hernand and just north of Ivynook
Challenge: Knock back 10 enemies within 30 seconds using a Longsword
23. Bow Aimed at Fate 2
Location: Very north of Hernand, directly above the "A" in the word on the map. South of the Calphade gate and near the Hunter's Cabin Relic puzzle.
Challenge: Defeat 7 enemies in a row using only normal arrows
24. Touch of Darkness
Location: Northwest of Hernand City and north of the Hills of No Return
Challenge: Assassinate 3 enemies within 1 minute
25. The Herder's Lament
Location: You will find this directly under the "N" in Hernand on the map
Challenge: Sell 3 goats to Bram at the Greymane Camp's ranch
Pro tip: The "champ" in question is Greymane Camp. The ranch is unlocked once you progress the Greymane faction quest and can give you access to Fleece, a rare crafting resource.
26. Keeping Balance on the Wind
Location: Southwest of the Greymane Camp, along the Unicorn Cliff and south of the Nas River
Challenge: Walk 10m on a rope
27. Mythical Ecosystem
Location: South of Pauline City, and at the bottom of the river, at the crossroads
Challenge: Capture 3 Choppies
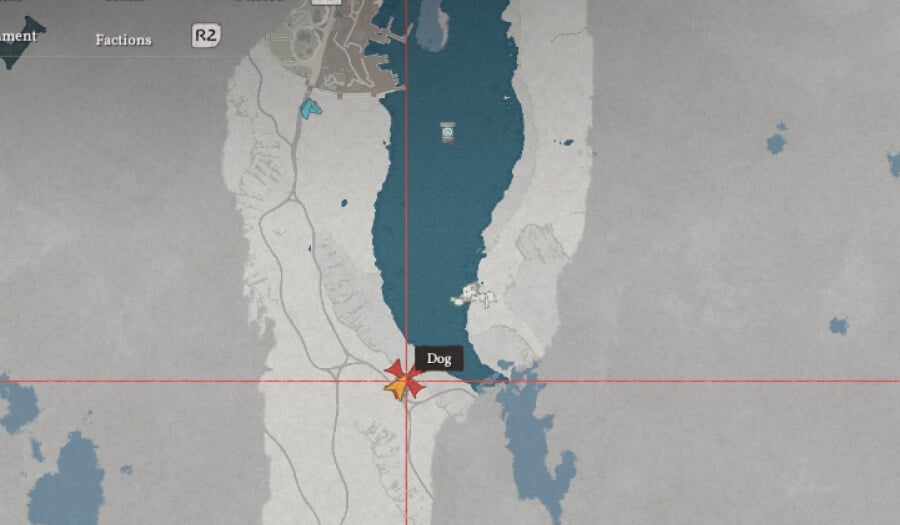
28. Bow Aimed at Fate 3
Location: South of Pailune city at the Beighen Candlery. Located on the right side of the bottom of the lake
Challenge: Hit 3 enemies in mid-air with a bow

29. Traveler with Oak Barrels
Location: Located inside Pailune City, on the monument
Challenge: Meet the inn owners from all the eight regions
And that’s a wrap on our Sealed Abyss Artifact. This article is being updated as we play. In the meantime, check out our other content for more in-depth Crimson Desert coverage and expert tips.