Stormwind Siege Guide
Learn how to complete the Stormwind Siege in Warcraft Rumble. Follow our suggested build and strategy for General Marcus, Innkeeper Allison and Highlord Bolvar.
Welcome to our Siege of Stormwind guide. This guide will contain the information and strategy you need to defeat this Siege on Normal Difficulty. In the other tab, you can find the details for Heroic difficulty.
Co-op Builds
Tirion - General Marcus - Solo-capable


rumblo:CFMQABoECCoQABoECC4QABoECFgQARoECFkQAhoECEYQABoECBMQAQ==
Important talents
None of the talents are mandatory.
Strategy
- Control the central Tower
- Be ready to retake at least one of the top Towers after a phase transition
- Use Whelp Eggs and Safe Pilot to harass Arbalists
- Use Tirion and Footmen to build a sturdy push, add ranged dps to support it
Watch it in action
Doomhammer - General Marcus

rumblo:CB8QAhoECFkQAhoECFgQARoECCoQABoECEsQAhoECBMQARoECEYQAA==
Important talents
None of the talents are mandatory.
Strategy
- Control the central Tower
- Be ready to retake at least one of the top Towers after a phase transition
- Use Whelp Eggs to harass Arbalists
- Use Frostwolf Shaman and Footmen to build a sturdy push, add ranged dps to support it
Watch it in action
Boss Strategy
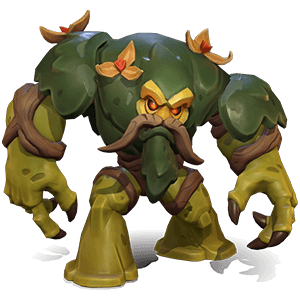
General Marcus is the first boss in Siege of Stormwind. He guards the gates with his Arbalists. The reward for defeating General Marcus is 200 Valor, which can be used to upgrade an army slot to Diamond (+4 levels).
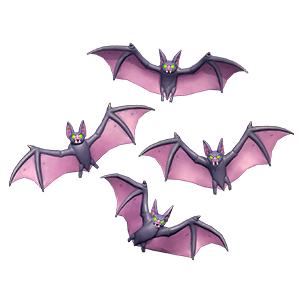
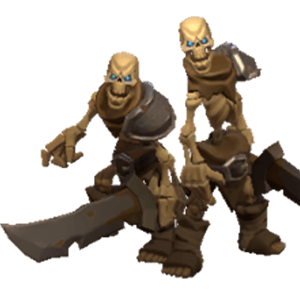
Minis in army
- Gnoll Brute - Thick Hide
- Gryphon Rider - Mighty Throw
- Harpies - Trinket Collectors
- Huntress - Elven Might
- Mountaineer - Mend Pets
- Murloc Tidehunters - Careful Aim
Other minis and map mechanics
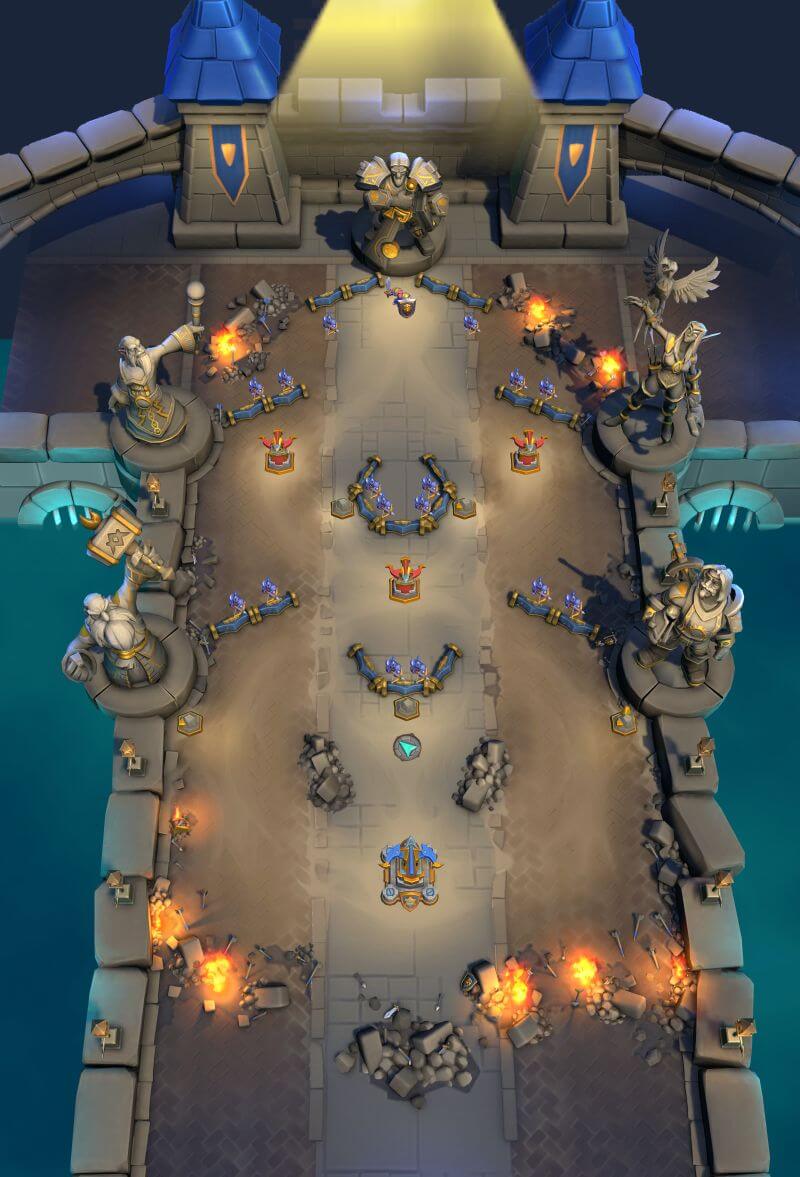
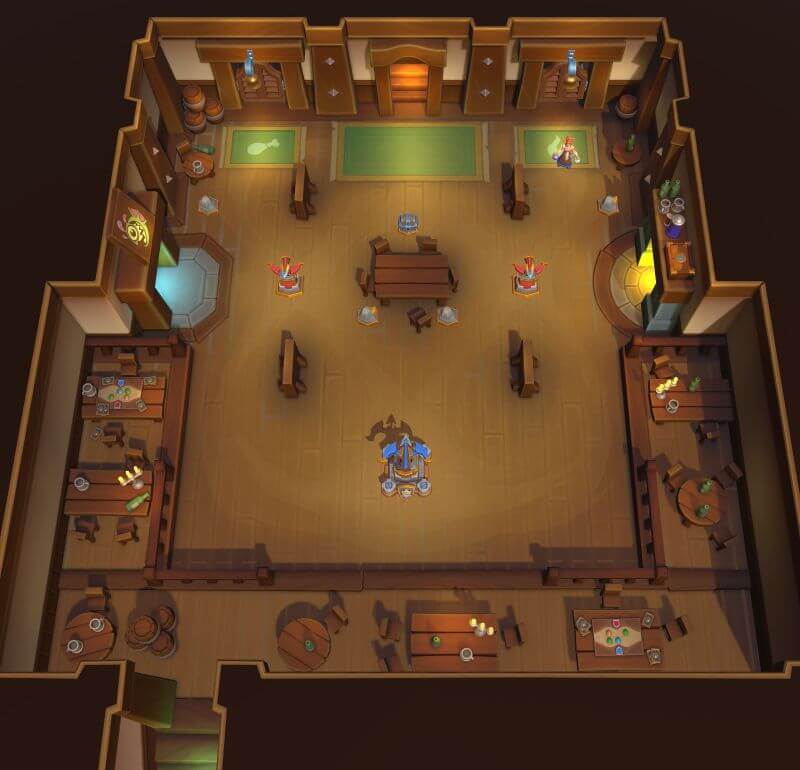
The gates of Stormwind are guarded by a large number of Arbalists. These Armored crossbowmen are located behind barricades all over the map, and they stay in their positions.
At the start of phase 2, General Marcus charges to the central barricade and takes control of the two top-most Towers. He destroys all minis in a reverse T-shape where the ends of the T hit the Towers. He also summons two groups of 2 Footmen and an Arbalists, who enter the map from top-left and top-right.
During phase 2, General Marcus will periodically inspire his Arbalists, giving them additional damage and increased range. You can see this by the glow in their crossbows. The increased range is 12, enough to let them hit the Towers from behind the barricades.
At the start of phase 3, General Marcus charges to the central barricade and takes control of the two top-most Towers. He destroys all minis in a reverse T-shape where the ends of the T hit the Towers. He also summons two groups of 2 Footmen and an Arbalists, who enter the map from top-left and top-right. As a phase 3 special, he also buffs his Arbalists and allows them to move, so any Arbalists on the map at the start of phase 3 will start attacking towards your base.
During phase 3, General Marcus will periodically summon two groups of 2 Footmen and an Arbalists, who enter the map from top-left and top-right.
It is notable that while all minis in Marcus’ army deal physical damage, all damage General Marcus himself deals is Elemental.
General strategy
Because Marcus retakes the top Towers at both phase transitions, the central Tower becomes crucial. You want to hold on to it at any cost, and use it to launch your attacks at phase changes. Ideally, your push is already moving towards either of the top Towers when they fall, and you are able to reclaim at least one of the Towers before it is fully constructed.
Unbound minis can be useful against Arbalists and also to chip in some damage to General Marcus to get a phase change at an appropriate time.
Saving gold for phase changes is important, and you can also clear out some of the Arbalists before pushing into phase 3 to prevent them all from attacking at the same time.
Co-op Builds
Baron Rivendare - Innkeeper Allison - Solo-capable


rumblo:CBIQAhoECA4QABoECAUQARoECEcQAhoECFkQAhoECEsQAhoECFgQAQ==
Important talents
None of the talents are mandatory..
Strategy
- Take the right Tower and push towards Allison from there, getting through phase 1
- Take the left Tower and push towards Allison from there, getting through phase 2
- End the fight with a third push, with Whelp Eggs and Quilboar, or by using Cheat Death on either of the previous pushes to make one of them go through two phases
Watch it in action
Anub'arak - Innkeeper Allison

rumblo:CBAQARoECEwQARoECEcQAhoECB4QARoECFgQARoECFkQAhoECE0QAg==
Important talents
- Explosive Shells helps Anub’arak deal a lot more damage with Beetles.
- Exhume adds more Skeletons when summoned close to a Tower.
Strategy
- Send Anub’arak from as far back left as possible
- Attack Allison on the right to push at least one phase
- Take the left Tower
- Keep attacking Allison
- Play another Anub’arak at bottom left if needed
Watch it in action
Ysera - Innkeeper Allison - Suitable for XP farming


rumblo:CFsQARoECAUQARoECA0QABoECB0QARoECFgQARoECCQQAhoECEcQAg==
Some players prefer to use Execute over Smoke Bomb. Execute adds some more damage, but Smoke Bomb has its upsides too, such as retargeting and easier cycling.
Defias Bandits is the flex slot for a mini you want XP for.
Important talents
- Obsidian Shard helps the Earth Elemental tank a little bit longer.
- Ambush on Smoke Bomb gives a little extra damage.
Strategy
- Play Whelp Eggs and an Unbound tank at Allison, try to get through the first phase.
- For the second phase, play Whelp Eggs and an Unbound tank again, and add Ysera Whelps to the mix.
- Use Cheat Death to get through the second phase transition.
Watch it in action
Boss Strategy
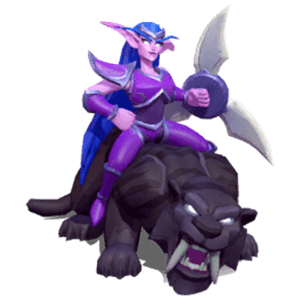
Innkeeper Allison is the second boss in Siege of Stormwind. She guards the Inn. The reward for defeating Innkeeper Allison is a Rare-O-Matic gadget that can be used to buy a direct Rare mini from the Grid.
Minis in army
- Defias Bandits - Last Resort
- Firehammer - Moultin’ Metal
- Footmen - Shield Bash
- Harvest Golem - Trojan Chickens
- Mountaineer - Frenzied Spirit
Other minis and map mechanics
Allison patrols the top edge of the map. Barrels will periodically roll down from the side she is on towards the Towers: if a Barrel scores a direct hit on a Tower, the Tower is destroyed and more enemies arrive. If Allison already controls the Tower, the Tower itself is unaffected, but the same minis will spawn regardless.
Barrels can be blocked by minis: if a Barrel hits minis with a total of at least 1800 Health, the Barrel is destroyed while destroying the minis. The Barrels that roll towards your base in the final phase have 3000 Health.
The Barrels on the right side summon two Fire Elementals from the fireplace if they connect with a Tower. The Barrels on the left side summon Murloc Tidehunters and Angry Chickens alongside King Mukla style bananas that increase the level of the minis that touch them if they connect with a Tower.
When there are several minis close to Allison, she periodically summons one of the following minis to fight by her side: Gryphon Rider, Huntress, Safe Pilot, Pyromancer, or Worgen.
At the start of phase 2 and phase 3, Allison destroys all minis from a 20-range radius around her. This can be overcome with Cheat Death, if necessary. Allison also cleanses herself of any poison or burn effects.
General strategy
Allison is the fastest of the Stormwind Siege bosses by far in normal difficulty, but she can still be dangerous. If you fail to take her out, she can overwhelm you with Barrels and minis.
You can beat Allison with multiple pushes, possibly in combination with Cheat Death, or with unbound minis.
A multiple-push strategy starts by taking both Towers, and continuing from the right Tower to Allison. This push should complete the first phase, possibly also the second if you use Cheat Death. Then, the army that took the left Tower comes in, having survived the small radius of the board wipe, and pushes another phase. The final phase can be completed by Cheat Death, sending a third army, or with unbound minis.
Co-op Builds
Sneed - Highlord Bolvar

rumblo:CE4QARoECFkQAhoECBMQARoECDsQAhoECAkQABoECB0QARoECEYQAA==
Note: Sneed is also an excellent Leader for Heroic Bolvar, so you may want to use some other Leader with this same army in Normal to save Sneed for Heroic.
Important talents
Defias Bandits are here for the extra income and they are quite useless without Pick Lock. You can replace them with a Meat Wagon, preferably with the Range talent so that it can shoot over Bolvar’s Consecration.
Strategy
- Use Bandits or Sneed to take Chests
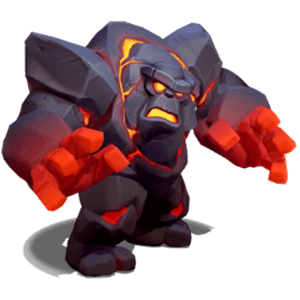
- Push with the Molten Giant, take the Towers
- Send the Molten Giant from one side and dps minis from the other side to attack Bolvar
- Save gold for phase changes, retake the Towers. Use Execute as needed to help.
- You can use Execute to help against Bolvar too
Watch it in action
Malfurion - Highlord Bolvar

rumblo:CDkQAhoECBUQABoECB0QARoECD0QAhoECDYQARoECFkQAhoECFgQAQ==
Important talents
None of the talents are mandatory.
Strategy
- Use Malfurion to heal your Alliance and Cenarion minis
- Huntress is your primary damage dealer, but she needs the tanks to help her
- Take the Towers
- Save gold for phase changes, retake the Towers - you can send a Huntress at a Tower after around 6 seconds - and replay Malfurion
- You can use Whelp Eggs against Bolvar as needed
Watch it in action
Boss Strategy
Highlord Bolvar is the third and final normal boss in Siege of Stormwind. He guards the throne room. The reward for defeating Highlord Bolvar is a Wildcard slot that you can use to turn the top-right army slot of a Leader of your choice - it does not have to be the one you beat Bolvar with - into a wildcard that gives the bonus to any mini.
Minis in army
- Footmen - Shield Bash
- Gryphon Rider - Mighty Throw
- Harpies - Talon Dive
- Holy Nova - Renew
- Prowler - Predatory Instincts
- Worgen - Premeditation
Other minis and map mechanics
Bolvar summons a group of three Royal Guards and an Arbalist every 40 seconds (at 5:20, 4:40, 4:00, and so on). The first group spawns on the left, then the next one on the right, and so on. A Royal Guard is basically a beefier Footman with 1250 Health instead of 800.
Bolvar has two main attacks: a cleave melee sword swing and a ranged Avenger’s Shield that bounces to three additional targets.
When there are 7 or more enemies around Bolvar (within a radius of 6, so closer than most ranged minis), he casts Highlord’s Justice that stuns enemies in a radius of 10 for 5 seconds, deals 200 damage to them, and knocks them back.
At phase transitions, Bolvar casts Consecration around himself and around all Towers. Consecration lasts for 8 seconds and destroys any mini or Tower in a 12-range radius in one second. Bolvar also casts Divine Shield on himself, negating all damage for 5 seconds. Finally, Bolvar summons two Royal Guards and two Arbalists close to him at every phase change.
Because Consecration does not cover the entire map, it is possible for minis on the way from Towers towards Bolvar to survive it and attack him again even before the Towers are back up.
Starting from phase 2, Bolvar plants various banners to buff his troops. Only one banner is active at a time. The different banners are:
Banner of Unity (blue):
- Bolvar’s Tank minis gain Taunt
- When a nearby friendly mini dies, others gain a level
Banner of War (red):
- Bolvar’s minis gain Unstoppable and Bloodlust
Banner of Light (yellow):
- Bolvar’s minis gain Lifesteal and Resist
In phase 3, Bolvar gains Retribution aura and begins to reflect 80 damage on his attackers each time he is hit.
General strategy
You want to control the gold, which means controlling the Towers. Because Bolvar has an area-of-effect damage attack, it is most effective to tank him from one side and deal damage from the other. Controlling the Towers also helps with sending troops from two directions.
At phase change, you want to attack the Towers before they are fully rebuilt. Because Consecration destroys minis very quickly, this requires some careful timing or a Meat Wagon with the Range talent to outrange Consecration.
Banner of Light, the yellow one, is generally the most dangerous of Bolvar’s banners. With Lifesteal and Resist, it can become difficult to take out his troops. Depending on your levels, you may want to focus on defense for the duration of the Banner of Light, and push again when the banner changes.