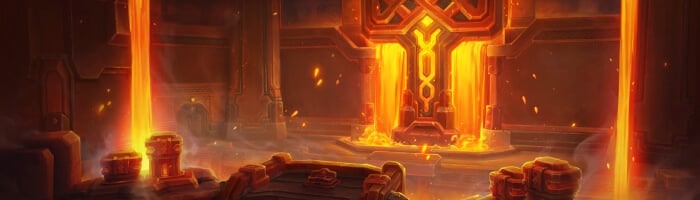
Introduction
Hey everyone, and welcome to the Stonevault dungeon guide for season 1 of The War Within! In this guide I’ll be going over the abilities of all the trash mobs and bosses throughout the dungeon as well as how I recommend you handle them. I’ll be focusing on the mythic and M+ versions of the dungeon, but it still applies to both normal and heroic difficulties as well. I’ll also be including my recommended, PUG friendly route via the Mythic Dungeon Tools addon for anyone interested.
Some background on myself, my name is Tactyks and I am an avid M+ player, achieving the 0.1% M+ title in every season it has existed, as well as competing in The Great Push in season 4 of Shadowlands. I also create M+ and Raid guide content on my YouTube and Twitch channels, so be sure to stop by and say hi!
If you are using the Mythic Dungeon Tools addon, you can import my recommended route using the following link: https://wago.io/kVuAuSgmj
Minecarts and Versatility Buff
To help you travel quickly across this instance, there are minecarts in both the east and west wing of the dungeon that players can interact with to take them back to the centre. There are no profession or class requirements to unlock the use of these carts, so anyone is free to interact with them.
In addition to these minecarts, in the west wing of the dungeon, just before the Master Machinists boss, there is a forge in the Northernmost corner of the room which players can interact with if they are a Warrior, Dwarf, or have at least 25 Khaz Algar skill in blacksmithing, granting Imbued Iron Energy to them and all party members, increasing versatility by 10% for 10 minutes. This is one-time use and lost on death, so make sure you plan when to use it accordingly!
Video Guide
E.D.N.A Trash
Cursedheart Invader
- Void Infection debuffs random players, use Curse dispels to remove as many as you can
- Use spare interrupts on the Arcing Void cast and spread out to reduce cleave damage
Earth Infused Golem
- This mob is immune to CC
- Tanks make sure to point the Seismic Wave frontal away from your group and step out of the effect
- Beware of the extra unavoidable damage from Ground Pound
Ghastly Voidsoul
- Make sure to interrupt every cast of Howling Fear
Repurposed Loaderbot
- Avoid the swirly under a random player created by Pulverizing Pounce
E.D.N.A Boss Fight
The main mechanic to deal with in this fight are the Volatile Spikes. These spawn under 3 random players and can be destroyed in a few different ways, applying a stacking 4s DoT to your group whenever one is destroyed. I recommend you destroy them with the Refracting Beam attack, a series of line attacks that shoot out from the boss towards each member of your party one at a time.
The mechanic that can clear these pillars is the Earth Shatterer cast at 100 energy, which also deals a big nature hit to the party. Because this deals additional damage on top of the DoT the spikes put on players, I recommend avoiding destroying pillars with this mechanic without major defensives up.
If you miss any spikes with these beams, you can always soak them yourself by running over them, just note this also does a very large hit to the soaking player, so you’ll only want tanks or immune classes to do this as a last resort.
For tanks there is a pretty significant physical hit in Seismic Smash, which also applies a 30s Magic DoT. When this DoT is dispelled the tank gains a 50% DR for 6s, so ideally you use a large defensive on the very first cast of this ability since you won’t be able to get this DR bonus, then every other cast the healer can dispel the tank once Seismic Smash starts, allowing the tank to use a small defensive and still survive.
My general strategy for this fight involves having your group stack up, to spawn all the Volatile Spikes in one spot. Then move the boss off these spikes and loosely fan out around the boss to avoid cleaving the Refracting Beams, with your tank pointing their beam directly at the spikes. This allows every other player to be as healthy as possible for the DoT, and it syncs up your stacks so you don’t take more ticks than you need to, reducing overall group damage. Repeat for each set of Volatile Spikes.
Master Machinists Brokk and Dorlita Trash
Engine Speaker
- Concussive Smash targets the tank, use freedom effects or a Magic dispel to remove the stacking slow
Aspiring Forgehand
- The melee attacks of this mob have a chance to apply Fracturing Blows, beware of these stacks and use defensives or kite if necessary
Forgebound Mender
- Restoring Metals is cast at low health, be sure to interrupt this cast
- Alloy Bolt targets a random player, use spare interrupts on this
Forge Loader
- This mob is immune to CC
- Avoid the ball of lava fired at a random player by Lava Cannon
- Molten Mortar targets a random player, use a defensive if targeted and healers beware of the DoT damage on this player
Master Machinists Brokk and Dorlita Boss Fight
This is a 2 boss encounter where both bosses are tanked, however the bosses do not share health so you’ll need to put damage into them both. When one dies, the other gains the Silenced Speaker buff, so ideally you kill them evenly.
Starting with Speaker Brokk, you’ll want to keep a kick rotation on the Molten Metal ability. Occasionally Brokk will cast Scrap Song, jumping to one side of the arena and throwing a metal cube through the centre. Make sure to move towards the edges when this happens to avoid this damage. Immediately after the cube is thrown the boss usually does a Molten Metal cast, so try and save a ranged kick for when this happens.
Throughout the fight Brokk will use Exhaust Vents, causing 3 of the 4 vents in the corners of the room to turn on and spawn flame puddles randomly in the quadrant they are in which last for 30s. Standing directly on the active vents is lethal, otherwise you just take some ticking damage for 6s after this cast. If possible, I recommend moving towards the inactive vent, as you won’t need to avoid puddle spawns and it can make dodging some of Dorlita’s abilities a bit easier.
At the same time you’ll need to avoid Speaker Dorlita’s Lava Cannon attack, which is the same as the trash ability discussed earlier, shooting a line attack at a random player. Dorlita also does the Igneous Hammer tank hit, so make sure you have a defensive running for every cast.
On top of these abilities, shortly after Brokk has done her Scrap Song cast, Dorlita will drag the cube to the centre of the arena and use Blazing Crescendo, doing a large party hit, applying a DoT to players within 20yds, and shooting waves out of all 4 sides of the cube.
To avoid these hits you’ll want to position yourself on the edges of the room on the diagonals of the box. If you are near an inactive vent you can stand directly on top of it and be safe, just make sure to move off of it quickly once the waves and 20yd circle have disappeared. If you are near an active vent, you can stand directly beside the vent on the left or right to avoid the lethal ticking damage it does while also dodging the waves from the cube.
Skarmorak Trash
Void Bound Despoiler
- This mob is immune to CC
- Shadow Claw targets the tank, be sure to have a defensive up for each cast
- Void Outburst deals heavy party damage over 6s, use group defensives or healing CDs here
Void Bound Howler
- Prioritize interrupting Piercing Wail as the group damage debuffs your party
Turned Speaker
- Censoring Gear targets a random player, use spare interrupts on this cast or if it doesn’t target your healer dispel the Magic silence it applies
Void Touched Elemental
- Avoid the swirlies created under every player by Crystal Salvo
Skarmorak Boss Fight
This boss fight is all about managing Crystal Shards, which are spawned in sets of 3 by the Crystalline Smash tank buster. These shards spawn randomly throughout the room, dealing damage to nearby players when they land, and remain stationary without needing to be tanked. When these adds die they do a Crystalline Eruption hit to the group, also applying a 100% vulnerability to the party for 3s, so you want to stagger killing these mobs to avoid stacking up this damage taken increase. I recommend dragging the boss towards the shard you want to kill just to allow for players to cleave off the boss.
You’ll want to make sure you kill all these Shards before the boss hits 0 energy, as they’ll cast Fortified Shell, gaining a Fortified Shell absorb shield at the end of the cast that increases if there are any remaining shards. In total 2 sets of Crystal Shards are spawned before each Fortified Shell cast, so 6 total shards need to be defeated before it happens.
Killing the shield quickly is also important as the boss deals pulsing damage from Void Discharge while this shield holds, which can be very dangerous the longer it goes on as each hit increases the damage by 10%. Regardless you’ll likely want to use healing CDs on this damage.
To assist you with destroying the shield, players are able to gain stacks of Void Empowerment, increasing both your healing done and damage done specifically to the Fortified Shell by 50% per stack, however this also comes with the downside of a DoT for 30s, so it can be dangerous if players get too many stacks. In terms of how to gain stacks, orbs are spawned under all 5 players whenever the boss does the 15yd AoE Unstable Crash, so you can choose to distribute these however you deem fit, though beware they will despawn after 15s so you’ll need to pick them up before that happens.
This ability also happens twice before each Fortified Shell, so you’ll have 10 total orbs to spread across your group. On most key levels and in PUG groups I recommend just having players absorb their own orb, meaning each player will have 2 stacks.
Void Speaker Eirich Trash
Cursedforge Honor Guard
- This mob is immune to CC
- Avoid the Shield Stampede line attack that targets a random player, if possible aim these towards a nearby wall for better melee uptime
- Stonebreaker Strike targets the tank, use defensives as needed
Rock Smasher
- This mob is immune to CC
- Smash Rock applies a nasty debuff that increases the damage of each cast, use defensives as needed particularly as these stacks rise
- Avoid the swirlies created under every player by Granite Eruption
Cursedforge Stoneshaper
- Stone Bolt targets the tank, use spare interrupts on this cast to reduce tank damage
- Make sure to immediately focus the Earth Burst Totem when it spawns and destroy it before its cast finishes as it deals heavy damage to the entire group
Void Speaker Eirich Boss Fight
During this boss fight you’ll notice 2 Void Rifts on the edge of the room. These rifts are dangerous if they get too close, instantly killing anyone who gets within 3yds of them, but they are very important to help reduce your groups damage intake, as they help counter Eirich’s Void Corruption mechanic. This applies a DoT to every player with no duration that ticks every 3s, with each tick increasing in damage by 25%.
The only way to remove these from yourself is by moving within 15yds of a Void Rift, which causes it to absorb the DoT and teleport somewhere else in the room. Because of this movement, I recommend having your squishier or less mobile players clear their DoT first, followed by your tankier or more mobile players once the portals jump, then finally having your tank clear last as there is no major tank damage on this fight.
To make getting to the rifts a bit more difficult, Entropic Reckoning hits all players and causes them to drop an 8yd puddle on the ground which slowly shrinks over 1.5mins. Tankier players can opt to drop on existing puddles to help conserve space. On top of this, the boss will occasionally target a random player with the Unbridled Void frontal, just make sure to avoid it.
