Raid Setup
Introduction
Welcome to our Mythic Sprocketmonger Lockenstock boss guide, for the Liberation of Undermine raid. Learn about the Mythic specific Sprocketmonger Lockenstock mechanics and the strategy we recommend to deal with this boss on Mythic difficulty!
Fight Style: Single Target fight
Recommended Setup: 2x Tank / 4x Healer / 14x DPS
Enrage: Hard - Popping 2+ mines at the same time
Useful utilities: Warlock Gate and Speed boosts
Hero/Lust usage: On Pull
Easy Mode
- Assign mine soakers and make sure to pop mines with the correct color
- Do not touch players with opposite color
- Dodge all inventions (rockets, beams)
- Bait Drills to the side
- Quickly react to color swaps
- Get knocked properly (check strategy section)
Mechanics
Your entire raid gets marked with this ability, causing half of the raid to have Positive (blue) and Negative (red) marks. Coming in contact with a player with the opposite mark, knocks both of them away from each other and adds a DoT that ticks for 2 million damage per second, for 6 seconds.
This ability is used several times throughout the fight, which means colors will alternate, but you are not guaranteed to get the opposite color on the next cast.
Strategy
Before you begin, you will need to assign a mine pop order using a WeakAura. Depending on your choice of WA, some will have the priority baked in, and in others, you have the freedom of choice.
We suggest setting all your healers and melees to pop the close mines, and mobile ranged players like Mages, Hunters, Evokers to pop the far mines.
Additionally, you should know that this guide is based on Method’s strategy, some guilds have a different priority for mine pops, especially when it comes to the further away mines. That is just preference and you should decide for yourself how you want to do it.
Phase 1
Once you start the fight, you will get the first Polarization Generator cast that will divide your raid into two colors.
Note: Every time this ability is used in the fight, players need to adjust their positions as soon as possible.
Important note about the mines: On Mythic difficulty, you do not have much headroom to be slow on mines, because if inventions hit a mine, it will explode, dealing lethal damage to the entire raid. Therefore your goal should be to remove all 4 mines as soon as possible.
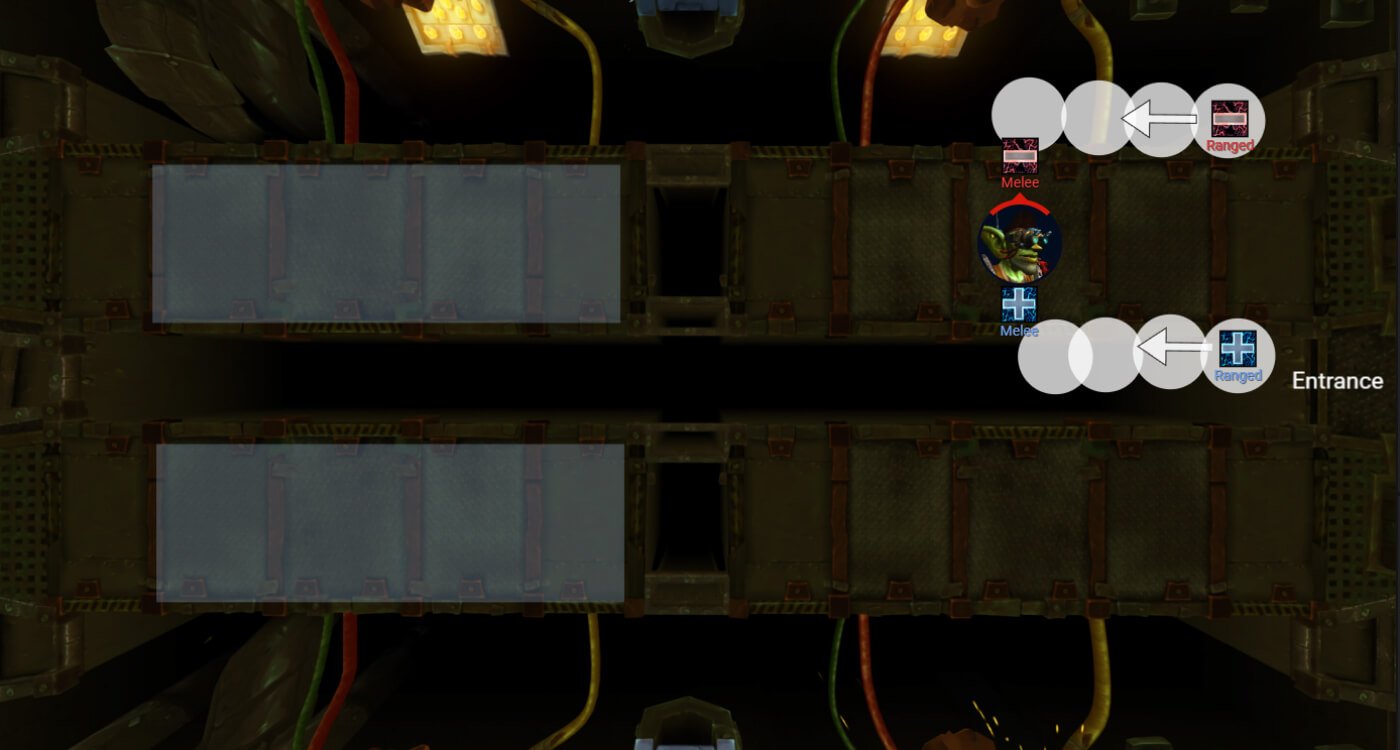
1st set of Mines
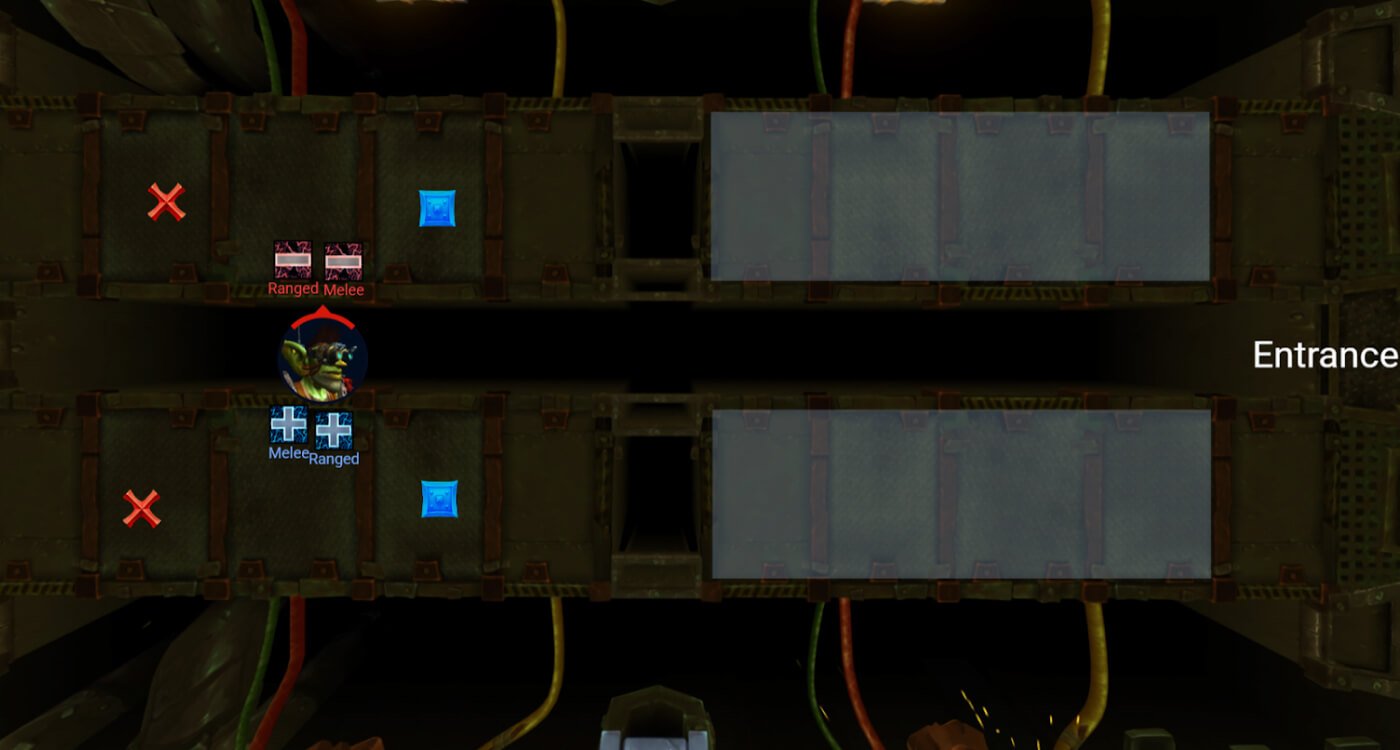
Position yourself like this and stay stacked most of the time, that way you won’t have players accidentally pop a mine or run into other players.
Ranged players should instantly and always bait the drills when they are about to be cast.
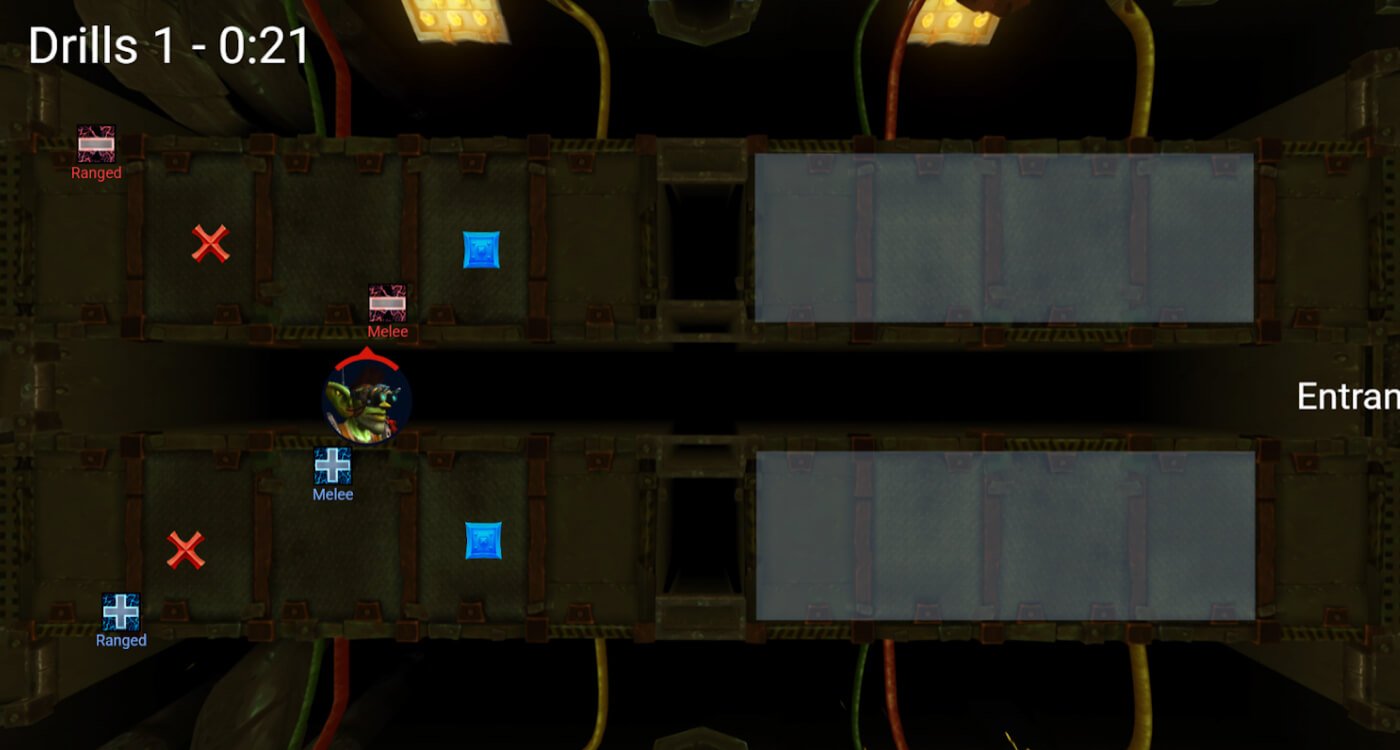
Melees can only get the drills if there are several ranged players dead, and the same player cannot get drills twice in a row.
If the conveyor belt is moving, you can just stand still on it and let it drag you while spawning drills. This way you can still attack the boss without having to worry that you will get hit by a drill.
Once you popped the first set of mines, you will move the boss towards the other section of the room. Make sure you do not get hit by fire beams; on Mythic difficulty, these will one-shot most classes.
2nd Set of Mines
Here you will get another set of drills, during which you can use the belt to dodge them.
Shortly after this, you will get the fire beams and the first rockets. It is very important that everyone takes the rockets seriously, it will be the main issue for wipes early into progression.
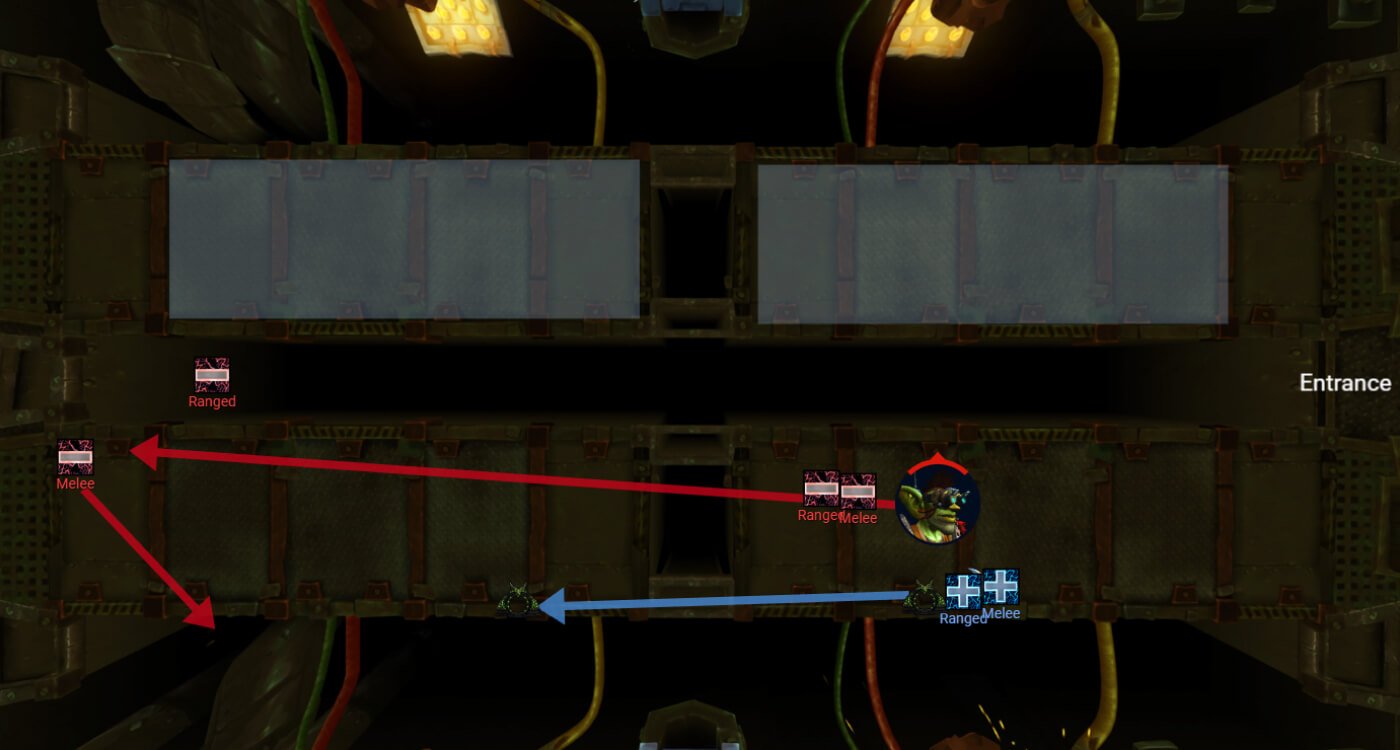
3rd Set of Mines
This is the first set where you have the far mines. We suggest that you first do the melee ones and afterwards the two far ones.
This is also the last set of mines in this phase, and then you are getting ready for intermission.
Intermission Knock
The intermission knock is very specific due to people being divided with two colors, however it is very simple once you know exactly what needs to be done.
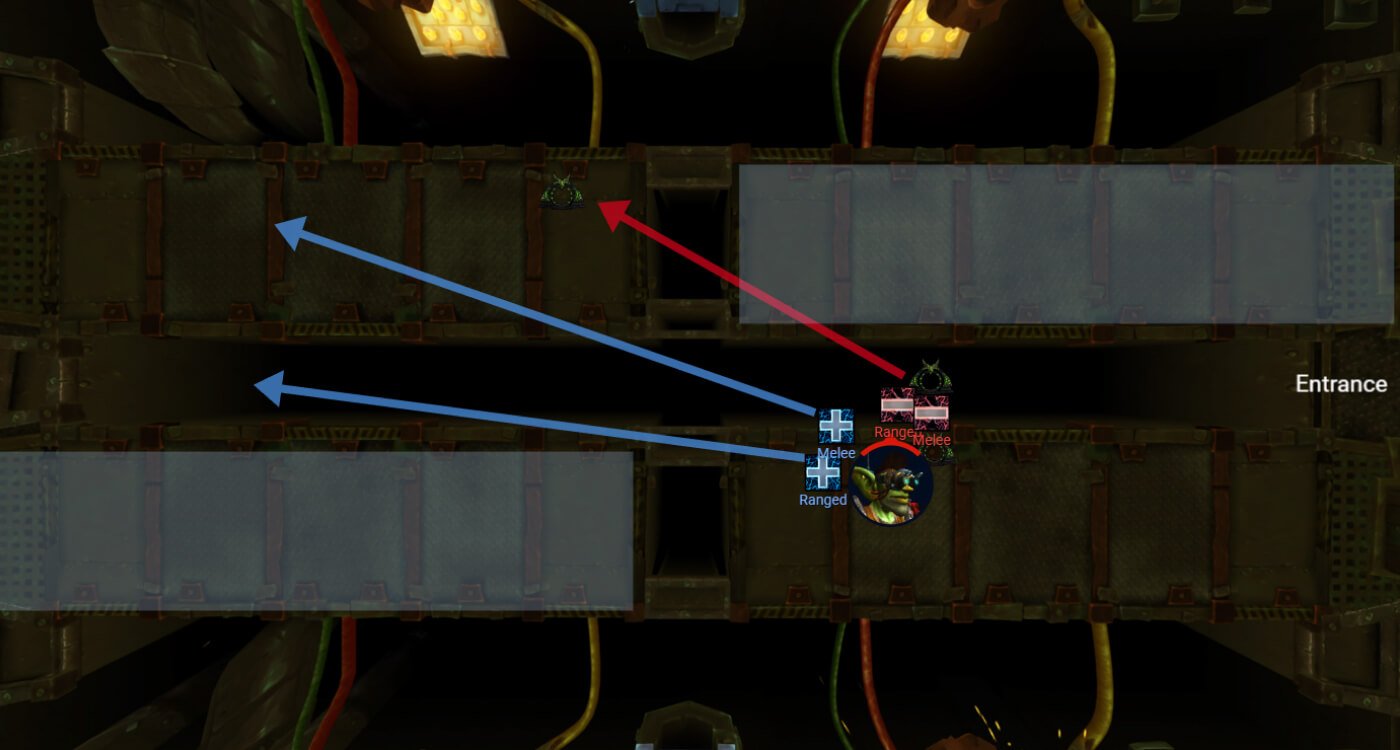
Blue Team
Stand in front of the boss and get knocked to the back of the room. Ranged should aim to land on the middle belt, while melees should aim for the outer belt.
Red Team
Stand behind the boss, make sure you are positioned between the boss and the warlock gate.
The absolute safest way is to wait to get knocked and spam the button to take the gate.
As long as you are knocked towards the gate, there is no way to fail this by spamming the button. You can also take the gate like 0.2 seconds before the knock if you have slow reaction time to the knock, but taking the gate too early will lead to getting knocked off the platform.
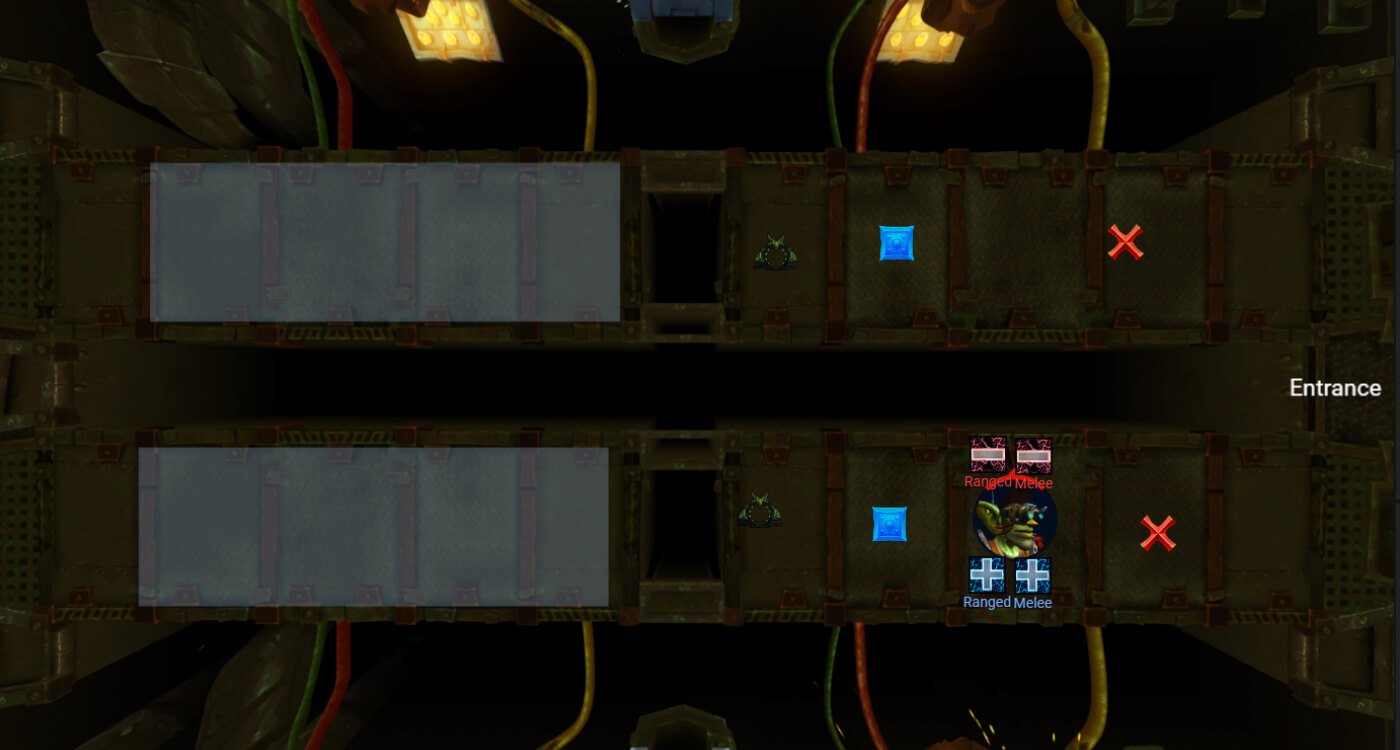
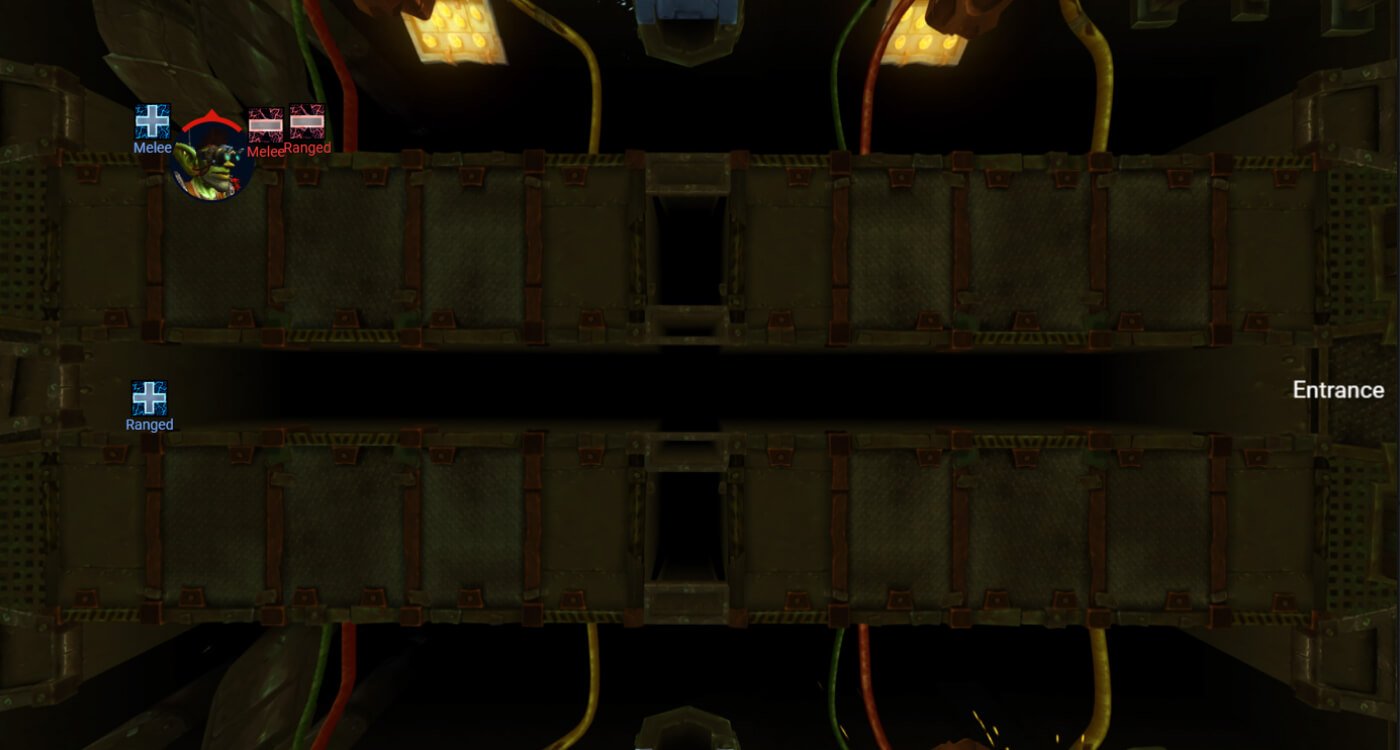
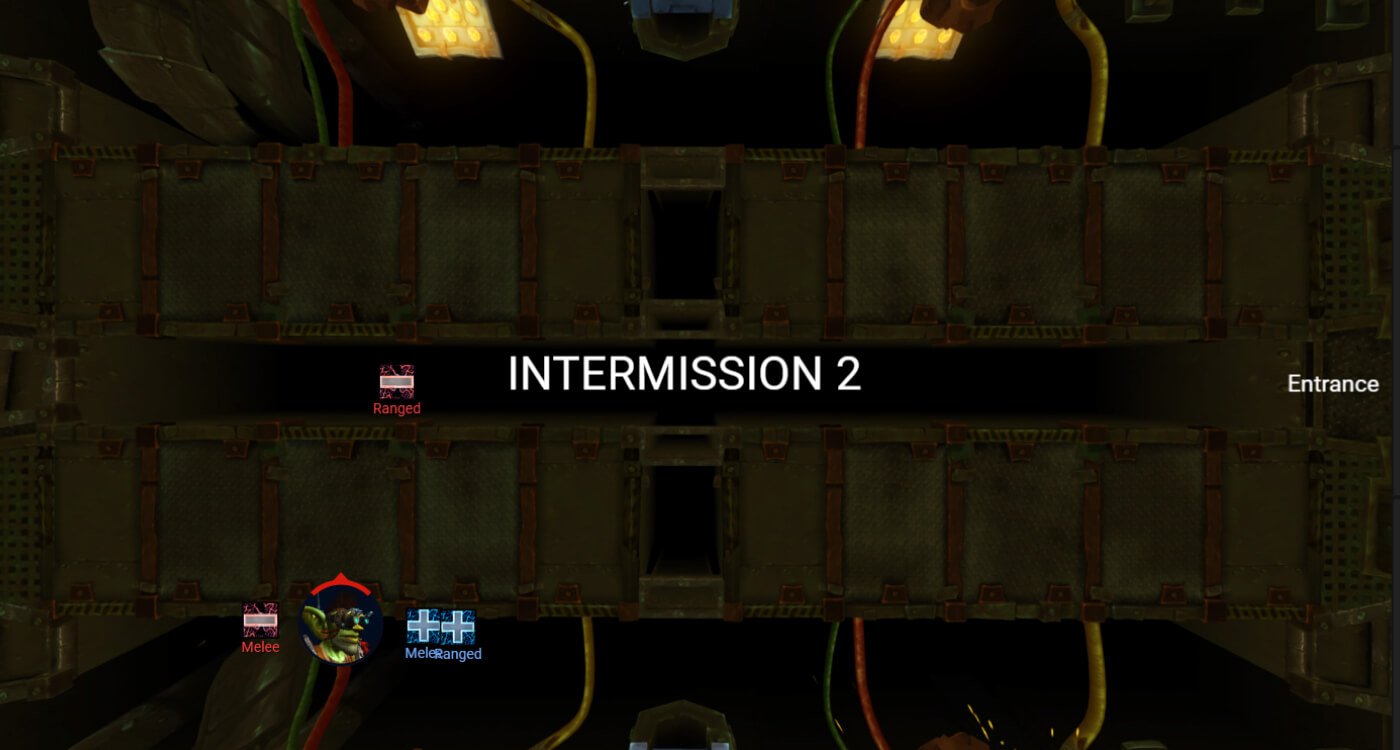
Intermission
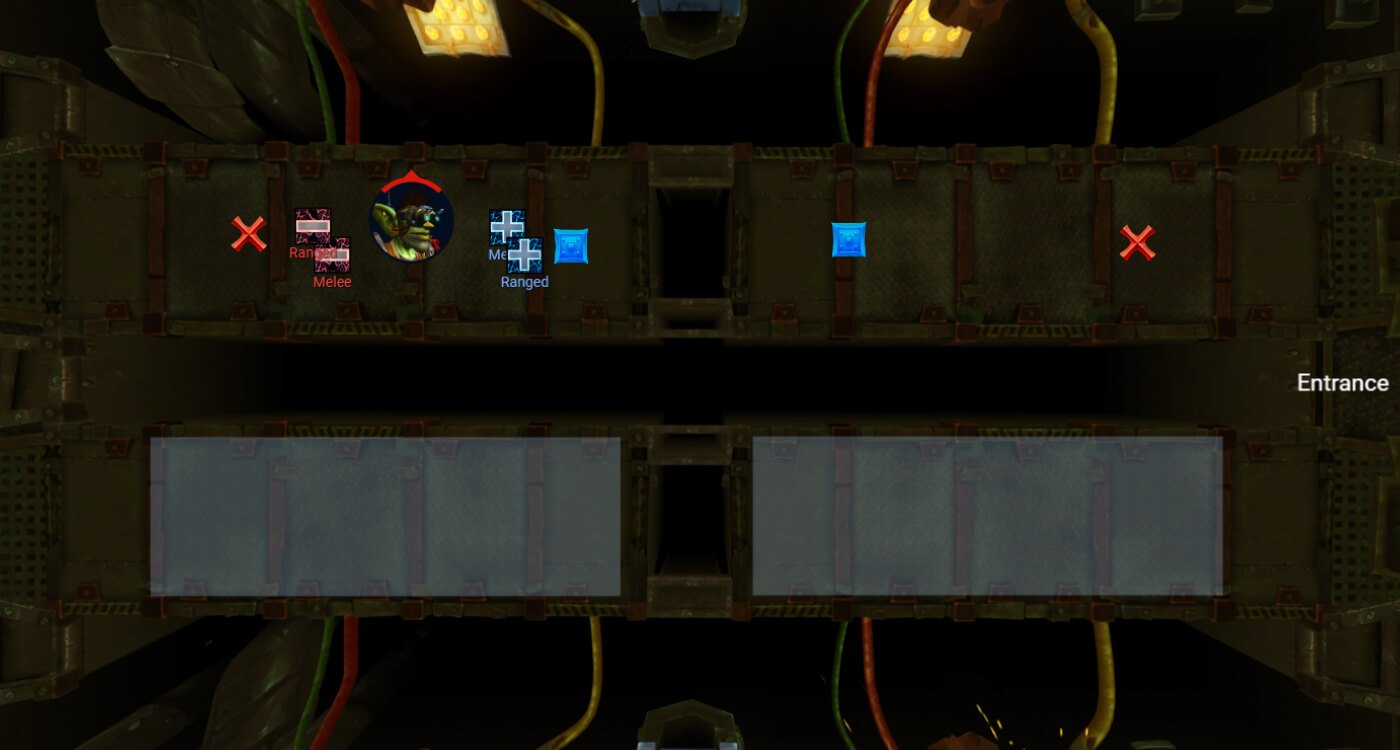
The setup during the intermission should look like this:
Phase 1 (2)
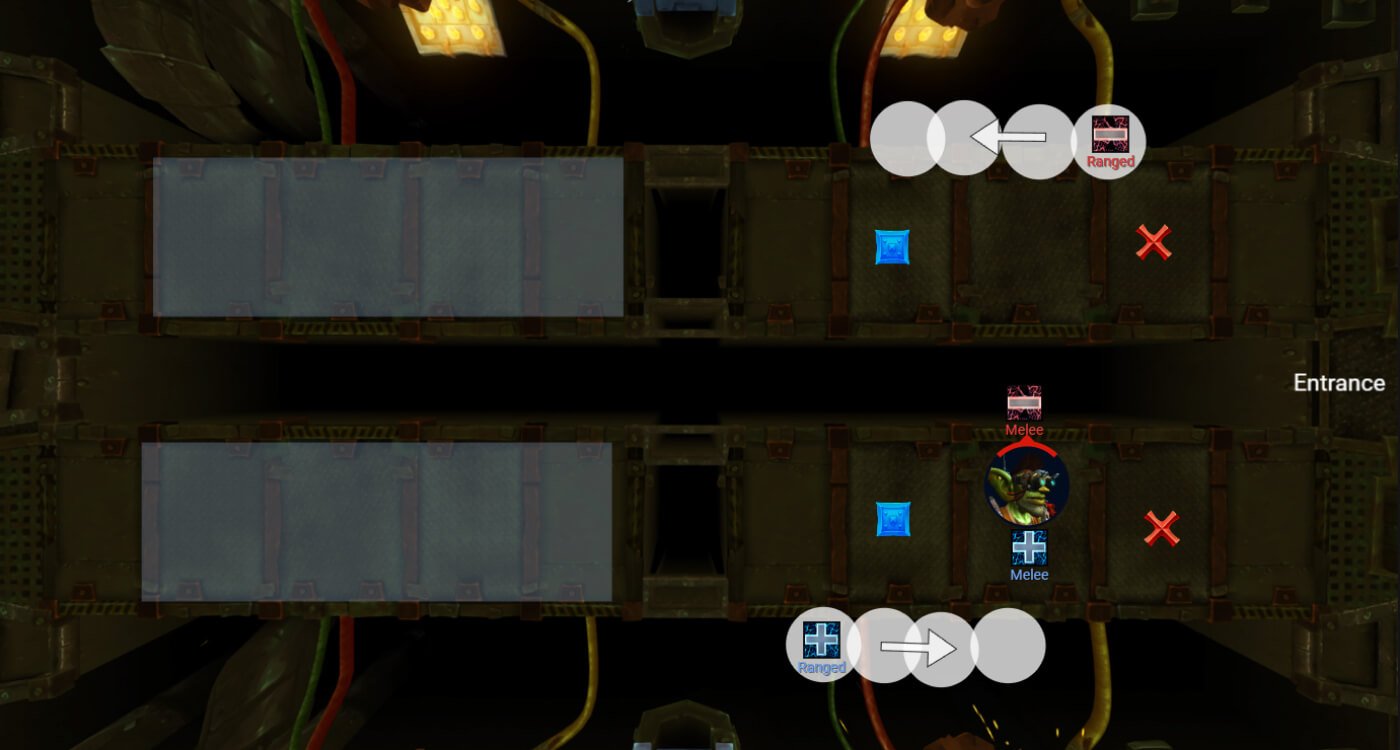
1st Set of Mines:
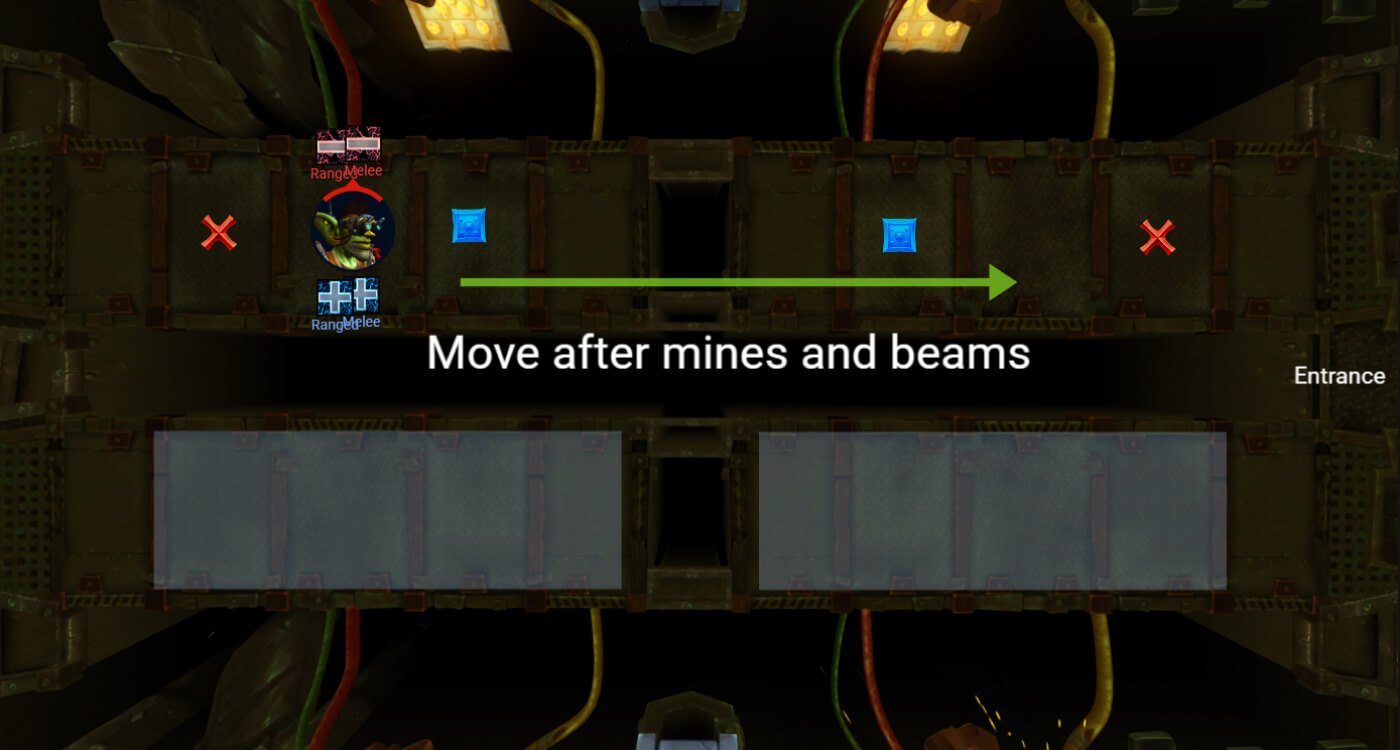
You have 2 close mines, and 2 far ones.
We suggest doing the close ones first, then the far ones. From now on, you have the purple beams instead of the fire beams until the end of the fight. They cover a large portion of the area just like on heroic, and one shot.
The two players popping the far mines need to be careful going back, if slow, find a safe spot and wait there until it's finished.
2nd Set of Mines:
This one comes fairly quickly after the first one. You will be popping mines as the raid is moving to the other side.
That’s why we suggest popping the “far” mines first, which in this case are the ones that spawned in the room you were already standing in, but will become further away for the 2 players popping those since the raid moved to the other section of the room.
Something very important here is that players are careful moving over to the other section, because this happens as the mines are spawning, and someone might accidentally run into a mine.
After this, you will have a very tight space to dodge the purple beams and it is very important that the drills are placed properly to the side.
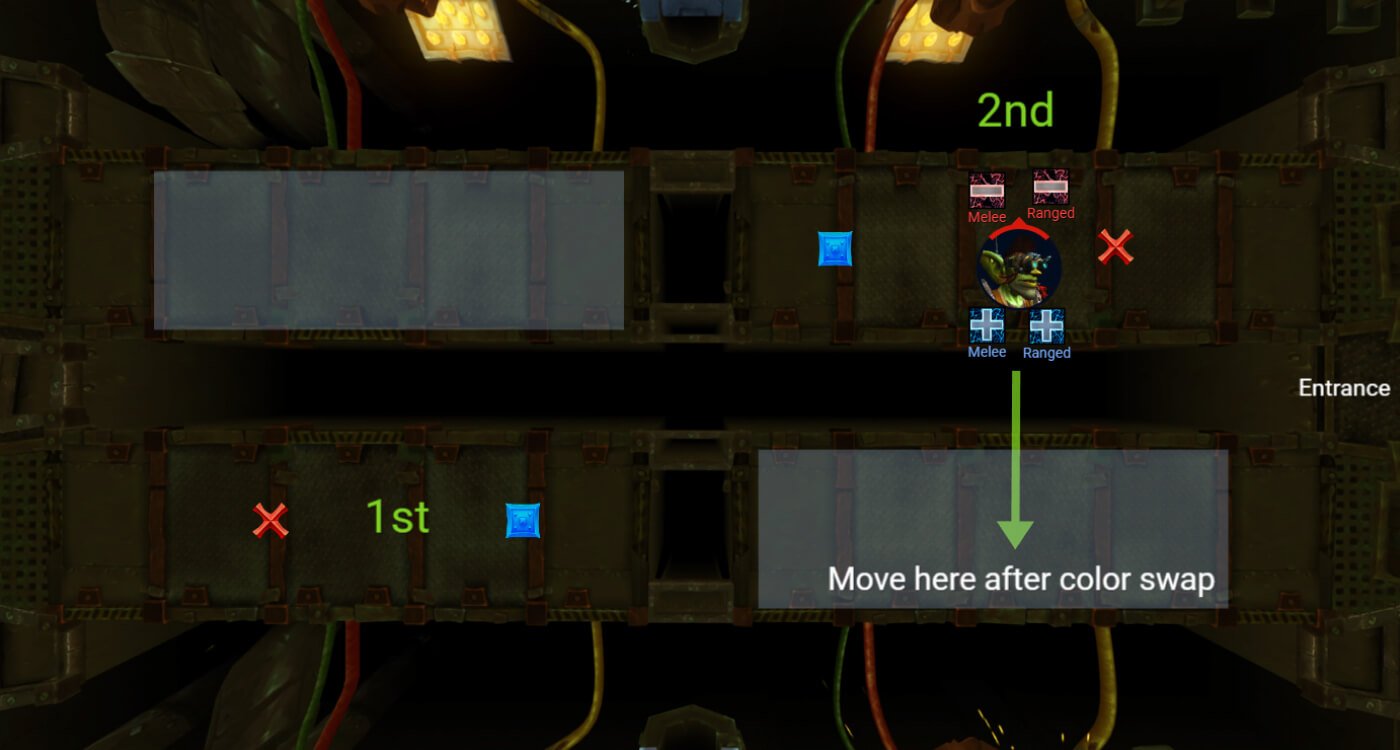
Just before you get the last set of mines in this phase, you will be dealing with the hardest color swap of the fight.
Basically, all players that have blue after the color swap need to quickly move towards the bottom of the room. This is because the boss needs to be moved as soon as possible, and you cannot guarantee that the tanks will have the proper color for this, so by moving away, you create a gap for the tanks to move the boss, regardless of what color they have.
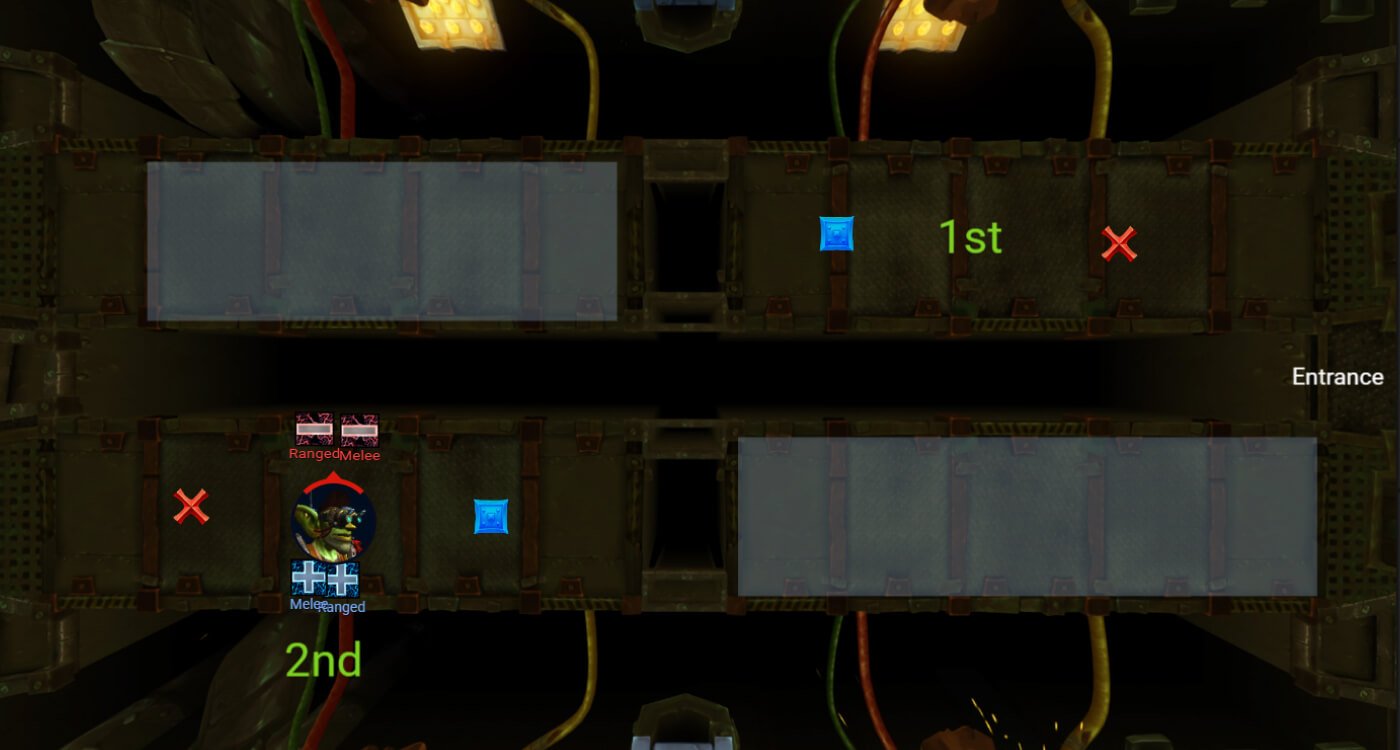
Once in position, you are doing the hardest set of mines of the fight.

Red team needs to stand as close as possible to the boss, and not on the middle belt. Blue team needs to stand as close as possible to the boss and not on the back belt.
Bait the drills and run to the team as soon as possible when done, this is because you are getting the purple beams right after and you have no space here.
Players with mobile immunities should use them here and intercept the rockets.
Once done, you are playing the last knock of the fight.
This time, the red team stands in front of the boss, and gets knocked to the back of the room.
Blue team stands below the boss, towards the edge and hugs the gate. Take the gate when there is less than 0.5seconds remaining on the cast.
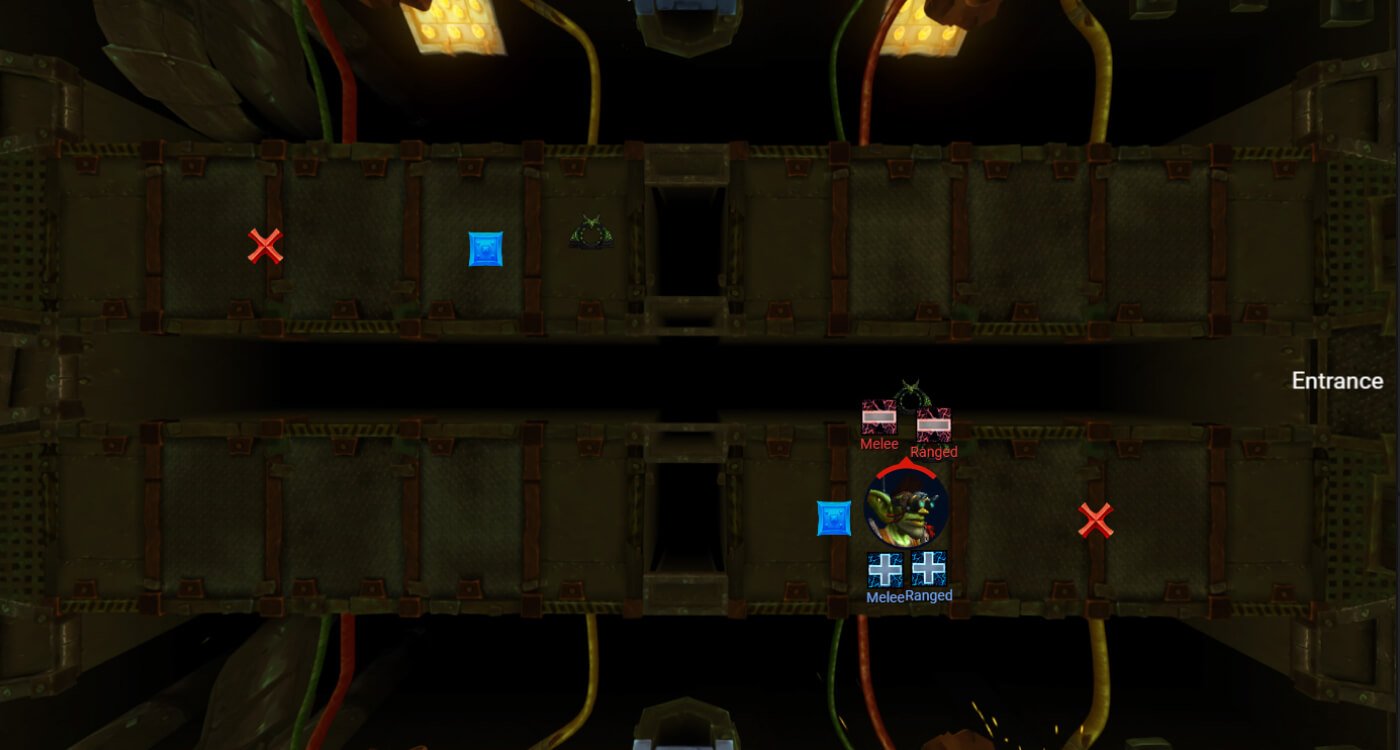
Intermission 2
You should end up standing like this once everyone is positioned.
Phase 1 (3)
Sprocketmonger Lockenstock should be fairly low health at this point, but assuming you need to continue playing, you will have to deal with another set of mines.
You want to pop the far mines first, and then do the close ones.
Once done, you will have to dodge the empowered inventions which now are the purple balls. Everyone needs to stop damage and simply dodge the balls as the number one priority.
Move the boss over to the other side afterwards and do mines again.
As soon as you finish the mines, the raid needs to start moving towards the bottom to create distance because balls will come out of the side where you are standing on right now.
If the boss is not dead by now, you most likely had a very bad pull and simply go again, learning to play the fight past this point is not recommended due to the difficulty of the overlaps. With everyone alive, the boss should be long dead.
WeakAuras
Northern Sky: Liberation of Undermine WeakAura Pack
This WeakAura also requires the Northern Sky Database and Functions WeakAura.
https://wago.io/NSUndermine