Raid Setup
Introduction
Welcome to our Heroic Rik Reverb boss guide, for the Liberation of Undermine raid. Learn about Rik Reverb mechanics and the strategy we recommend to deal with this boss on Heroic difficulty!
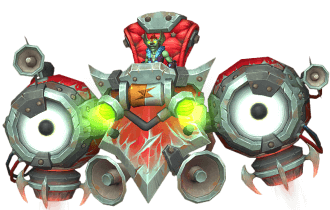
In the heart of the junker’s paradise, Rik Reverb, a goblin DJ-turned-mad-mechanic, rides into battle atop his custom-built Boombringer 9000, a souped-up mech armed with bass-boosted cannons and an endless supply of Explosive Barrels. Each one packs a punch, and if left unchecked, they’ll turn the battlefield into a firestorm of destruction.
But the real danger isn’t just the explosions, it’s the Sonic Amplifiers scattered around the arena. As the fight drags on, these machines crank up the volume, building towards an earth-shattering drop that will blow the raid apart. If the amplifiers aren’t drained in time, the party will experience a soundwave so deafening it makes a Skrillex concert feel like a lullaby.
Break the barrels, drain the amps, and shut Rik Reverb down before his beats blast you into oblivion!
Fight Style: Single Target fight (and some barrels)
Recommended Setup: 2x Tank / 4x Healer / 14x DPS
Enrage: Hard - When you reach 3rd intermission
Hero/Lust usage: On Pull
Guide Author's Thoughts
This encounter feels appropriately tuned for its likely position in the boss order. While it doesn't introduce anything groundbreaking, the intermission will undoubtedly create some memorable moments. The Mythic version, however, is a significant improvement, offering a much more engaging experience. At the very least, it stands as a far stronger upgrade compared to Sikran in Nerub'ar Palace.
Method Boss Rating: (3/5)
Easy Mode
- Move Rik away from the Pylons
- Soak the Pylons before they reach 100 energy
- Dodge Sonic circles
- Destroy all barrels as soon as they spawn
- Dodge swirls and move away from others with blue circles
- Move to the indicated Pylon in the intermission to get knocked up and dodge the wave
Mechanics
Rik deploys 2 Sonic Amplifiers in each set, one on the tank, and the other on a random player nearby. Amplifiers deal heavy damage, on impact, to anyone standing in the circle and stunning them for 3 seconds. Each Amplifier gains energy over time.
Draining an Amplifier will deal damage to the player and apply stacks of Lingering Voltage, this dot starts to hurt when above 3 stacks, so make sure to keep an eye on that.
Additionally, players who have soaked will take extra damage for the next 45 seconds if they soak again.
Amplifiers send out Echos in random directions, getting hit by this will deal damage to the player and place a debuff for 6 seconds.
The raid takes passive damage from the amplifiers every 2 seconds, which increases by 50% with each active amplifier.
If an amplifier reaches 100 energy, it deals heavy damage to the entire raid and shoots out additional Resonant Echoes. This effect can be interrupted if the affected Amplifier is drained.
Rik activates all Amplifiers, making them send out Resonant Echoes at the same time.
A beam targeted towards one player, that inflicts damage to all players caught in its path.
Several players get affected with blue circles that deal damage and additionally send out Static Jolts that deal damage to the entire raid if the players with blue circles collide.
Rik spawns several explosive barrels in close proximity that explode after 15 seconds, and applies a debuff to the entire raid. This stacks.
Having more than one barrel explode is already very heavy for the healers.
Frontal cone attack that applies a debuff on hit, it increases damage taken by this ability for 10 seconds, forcing you to perform a tank swap.
The Amplifier with the highest energy during the intermission becomes marked with a blue circle. If standing within the circles, the players will take damage, but will also get knocked up in the air just before the Blaring Drop wave reaches them.
A wave that deals lethal damage if hit by it. Can be skipped using Blowout Amplifiers or movement abilities like Blinks, teleports etc.
Once you reach the 3rd intermission, after 32 seconds, the boss will lose the immunity shield but deal 500% increased damage and constantly cast Blaring Drop waves.
Strategy
Rik Reverb is a very repetitive fight, which introduces you to nearly all mechanics the fight has to offer within the first opening seconds of the fight. Very similar to the Sikran encounter.
It consists of the main phase and an intermission. Reaching the intermission for the 3rd time triggers an enrage effect (Hype Fever!).
Phase 1 Strategy
Start tanking Rik Reverb at his spawn location, and face him away from the raid. Tanks should preferably hug the wall to avoid anyone randomly standing in front of the boss.
Rik will always spawn one Amplifier on the tank, and one on a random ranged player.
Once the Amplifiers spawn, tanks need to move Rik to another location, far away from the Amplifiers, because standing close to them increases their energy generation speed.
After the 3rd set, tanks should move Rik as far as possible to the opposite side of the room, this will give you extra space to run from one amplifier to another to dodge the wave that comes from the position where Rik was standing when the intermission was triggered.
Draining the Amplifiers
The best way to handle this is using a WeakAura. The amplifiers can be marked with World Markers by default with BW/DBM and using a priority list WA should automatically assign players when to soak.
Generally speaking, the rule that you should follow is that at 50+ energy, it is safe to soak, but if an Amplifier is close to 100 or even at 100 energy, a player draining that Amplifier fully will take heavy damage from the DoT. In scenarios like this, you should make sure to pop a strong defensive and also call for extra heals. The player can also choose to stop soaking mid way to prevent getting extra stacks.
Due to a 45 seconds debuff that makes you take extra damage from soaking, everyone should be assigned to soak at some point, even melees.
In the last few seconds before the intermission, you can stop soaking amplifiers.
Rik Reverb’s other Abilities
Additionally, throughout Phase 1, you will have to deal with several other mechanics.
While Sound Cannon, Echoes and Faulty Zap are your typical “don’t get hit and dodge” abilities, the Barrels will need extra attention.
4 Barrels will spawn relatively close to the boss, but it is not guaranteed to have them stacked. After 15 seconds, every remaining barrel will explode, applying a heavy DoT to the raid. Having more than one Barrel explode will make it very hard for the healers, so we suggest having everyone main target barrels to ensure not a single barrel pops.
It’s also worth mentioning, that when Rik uses Echoing Chant ability, all Amplifiers will send out Resonant Echoes in random directions, making it a bit of an “extra focus” moment to dodge all of those. If a player gets hit by 2 echoes within 6 seconds, they become charmed and need to be nuked down to break the effect. Avoid using DoTs on them, because this can easily kill the player.
Intermission Strategy
When the intermission starts, the boss will become immune to damage and will not move from the position he was standing in when the intermission started.
It is important that you put the boss in a good spot, far away from all Amplifiers, to give your raid additional time to move into position.
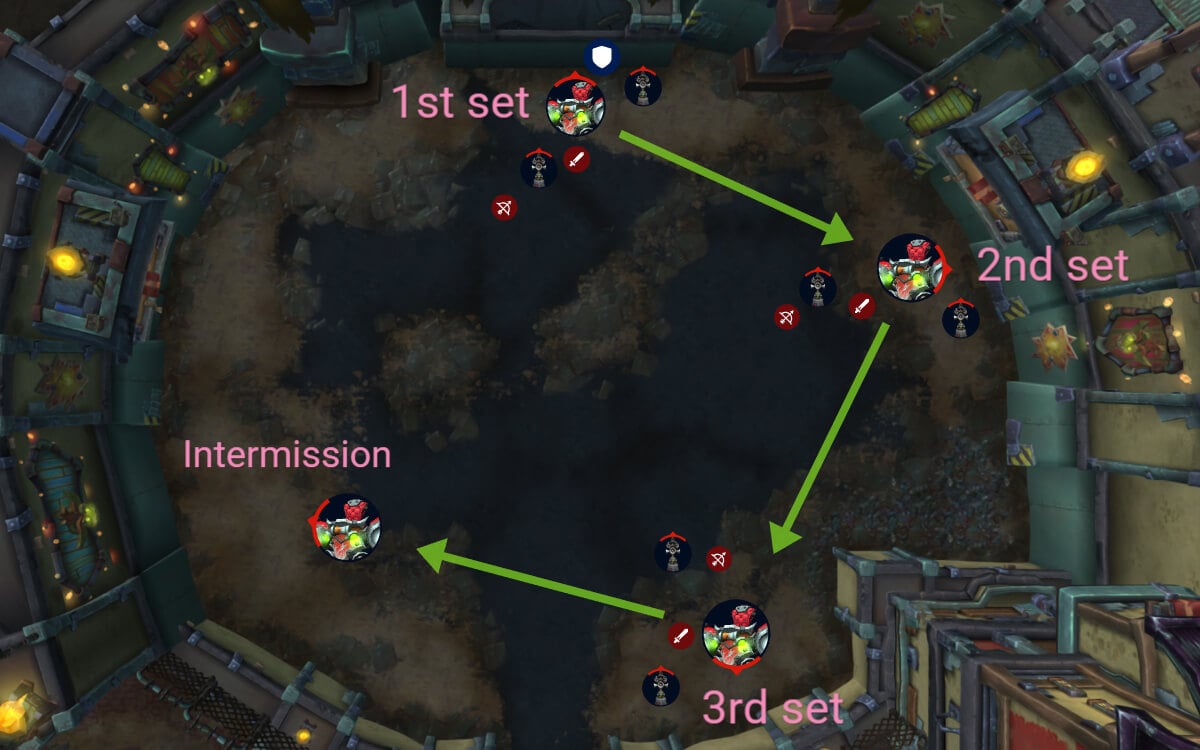
The Amplifier with the highest energy count will become the first active one, marked with a blue circle. Standing within that circle, you will take damage, but when the wave comes close, everyone standing within will get knocked up in the air and jump over the wave (Queen Ansurek style).
Afterwards the raid needs to move to the next active Amplifier, again the highest energy one will be prioritized, but in case the Amplifiers have the same energy amount, a random one will be selected.
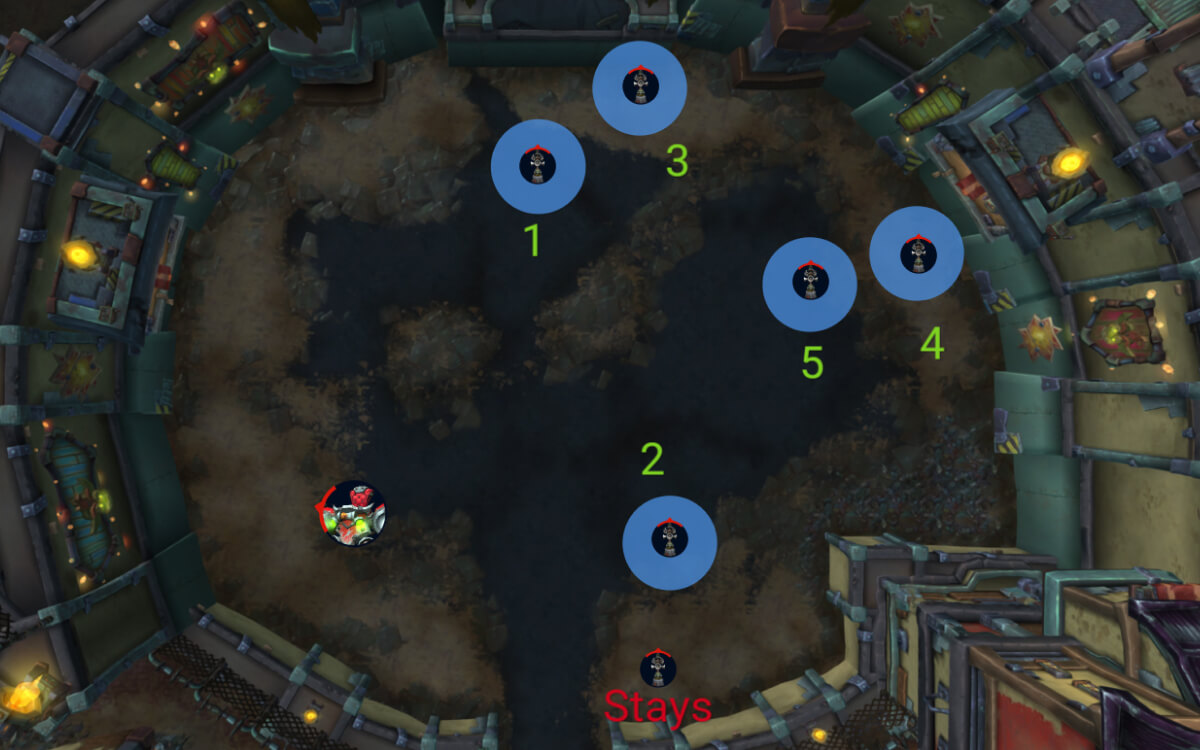
This is an example of the possible order of Amplifiers. Make sure to assign speed boosts to be used throughout the intermission.
One Amplifier will always stay, this serves as additional difficulty for the next phase.
After the intermission, the tanks should move the boss close to the remaining Amplifier and start the rotation from there. Simply do the same as you did on the opener but from that location, so move clockwise.
Your goal is to kill the boss before the 3rd intermission.
WeakAuras
Northern Sky: Liberation of Undermine WeakAura Pack
This WeakAura also requires the Northern Sky Database and Functions WeakAura.
https://wago.io/NSUndermine