


Introduction
Hey everyone, and welcome to the Cithrel’s Fall dungeon guide for Fellowship’s Early Access release! In this guide I’ll be going over the abilities used by the trash mobs found inside, strategy tips and tricks for the boss encounters, as well as a recommended route that is both simple to execute and PUG friendly.
Some background on myself, my name is Tactyks and I am an avid M+ player in WoW, where I’ve achieved the 0.1% M+ title in every season it has existed. I also create Dungeon, Raid, and Tank guide content over on my YouTube and Twitch channels, so if that’s something you’re interested in make sure to stop by and say hi!
Video Guide
Noor, the Betrayer Trash

Tundra Stalker
- Rapid Fire is a frontal channel towards the tank, point this away from your group and step out of the effect or use a CC to stop the channel.

Eldrin Sentinel
- Make sure to interrupt or CC every cast of Shattering Barrier, if missed focus down the shielded target to remove its pulsing damage.
After a short series of mob packs you’ll arrive at a split path, where one goes down and to the left towards Noor, and the other goes up and to the right towards Ancient Koros. The left path is filled with humanoid mobs, whereas the right path has elementals, though regardless of which path you go down first you will need to eventually move to the other side of the dungeon, so you’ll face off against both groups of mobs in the end. In general I recommend starting by moving down the left path and taking on Noor, the Betrayer first.

Deceitful Scholar
- Rune Of Detonation channels for AoE damage, use an interrupt or CC to stop it.
- Arcane Strike targets the tank, use spare interrupts on this.
- Volatile Orb spawns near the furthest player, slowly chasing them until the Scholar is defeated. Make sure you kite it away from your group as it deals pulsing damage to nearby players plus a massive hit of group damage if it reaches its target.

Blade of Cithrel
- Slicing Blades channels in a 3yd radius and follows the tank for the duration, avoid the effect or use a CC to stop the channel.
- Tanks beware this mob uses Enrage at 30% health, gaining 30% haste until defeated.
- Ice Breaker causes the mob to leap at a random player, move away from your allies if targeted and note that you can use a well timed dash or teleport ability to avoid the hit when the charge is in motion.

Noor, the Betrayer Boss Fight
Noor, The Betrayer Abilities
Noor targets a random player with an arrow that deals moderate damage to the player and, after a delay, to anyone around them.

Noor applies a stacking Magic debuff to the entire party that deals damage over time every second for 6 seconds.
Noor jump to the centre of the arena and splits the room into 10 sections, alternating between a safe area and an icy area, shooting a barrage of icicles at the frozen sections.

Noor summons two Eldrin Recruits and an Eldrin Sentinel to aid them in combat.

Noor spawns a trap underneath a random player that activates after a short delay, rooting and dealing damage to any player who becomes trapped.
Boss Strategy
After crossing a few bridges you’ll be able to take on the first boss in Noor, which is a 1 phase encounter with lots of dodging plus some adds mixed in. First up is Cold-Blooded Twist, which causes the boss to jump to the centre of the arena and split the room into 10 sections, alternating between a safe area and an icy area. After a short cast time the boss shoots icicles through the icy area, rotates the cones counter-clockwise slightly, fires another barrage of icicles, before rotating a final time with a 3rd set of icicles. On top of that, every time the ability is cast the boss will shoot one more wave of icicles out, up to a maximum of 5 waves total, so you’ll need to be ready to dodge for longer as the fight progresses.
Avoiding these cones on their own isn’t too difficult, but some of the other boss abilities can make things a bit more complicated, namely the Razor Trap ability. This spawns a trap underneath a random player that activates after a short delay, and these will remain for the rest of the fight unless someone walks over them, taking some damage and rooting them in the process. Obviously this is very bad if it happens during Cold-Blooded Twist, so you’ll want to be very careful with where you place them, particularly if you have melee heroes who need to play close to the centre of the room to hit the boss.
The other ability that reduces your space is Betrayer's Arrow, which targets a random player and does an AoE hit around them after a few seconds, so this player will just want to make sure they move away from the rest of your group before they explode, and potentially use a defensive if needed.
The main source of group damage comes from Arcane Volley, which applies a stacking magic DoT to your party every second for 6s, so be ready with healing CDs or group defensives once this damage has ramped up, or if you have the proper relic you can use a Mass Dispel near the end of the channel to remove a massive chunk of the damage.
Outside of that the boss will occasionally use Actuate Ambush, summoning 2 Eldrin Recruits and 1 Eldrin Sentinel that your tank will need to pick up. These mobs are exactly the same as the trash mobs you encountered earlier, so all you’ll need to do is keep interrupts on the Sentinel's Shattering Barrier cast.
Ancient Koros Trash
After Noor is defeated you’ll need to cross over to the elemental side of the dungeon to get to Ancient Koros. This part of the dungeon has several repeat mobs, including all of the ones already mentioned in this article, but it also has a few mobs you haven’t encountered yet.

Corrupter
- The Lifetap passive causes this mob to heal for 35% of damage done, so any spare interrupts should be used to reduce this mobs damage so you can kill it faster.
- Healers be ready to dispel the Freezing Blood random target DoT, as if it expires it ticks for 250% increased damage.
- Drain Life channels damage into all nearby players, make sure this is always interrupted or CC’d.
- Ice Bolt targets the tank, use spare interrupts on this.

Ice Shardling
- On death triggers a Shardling Explosion, applying a stacking 10% slow and DoT for 5s.

Spellbound Golem
- This mob is immune to CC.
- Avoid the Ice Spike circles spawned under all players.
- On death the golem Shatters, spawning 3 Ice Shardlings.

Ancient Koros Boss Fight
Ancient Koros Abilities
Koros conjures a Volatile Orb to follow the furthest player. Deals huge group-wide damage on impact but can be destroyed by Koros' Shatterstrike ability.
Koros targets a random player and strikes them with a frontal cone after a few seconds, dealing high damage. Destroys Volatile Orbs.
Koros applies a powerful Magic DoT and slow to any player who is caught in the blast cone of Shatterstrike. If left to expire, Converging Cold will freeze the target solid.
Koros creates a rift on the ground that must be soaked or else it will fracture into a massive rift. Soaker receives the Calamity Rift debuff.

A debuff applied any player who soaks Calamitous Fracture, spawns a pool on the ground after a few seconds which pulses for group damage.
Boss Strategy
This giant elemental is a pure single target encounter that combines some familiar abilities with some new ones. To start, this boss has the same Volatile Orb ability that you saw earlier on the Deceitful Scholar mobs, so you’ll want to assign either a ranged DPS or healer to be the furthest player from the boss to bait all of these orbs onto them, while the rest of the group stays safe from their pulsing AoE near the boss.
Luckily the player you assigned won’t need to kite forever, as unlike the trash version of this ability, you’re actually able to destroy these orbs without taking a hit of group damage by using the Shatterstrike cone. This follows a random player and fires after a short delay, removing any Volatile Orb it hits, which is why it's beneficial to have the orbs chasing one player instead of several. Healers be aware that this frontal also applies the Converging Cold magic DoT and slow to any players in the effect, which you’ll want to dispel ASAP as if it expires it will freeze the target solid.
The only other mechanic you’ll have to deal with is Calamitous Fracture, which creates a small soak circle near the boss that someone will need to get into to prevent a massive rift from forming. The player who soaked will be debuffed with Unstable Energy, causing a small Calamity Rift to form underneath them after a few seconds which serves as area denial and constantly pulses for group damage, so you’ll want to make sure you drop these away from both the boss and the player kiting the Volatile Orb. This also means that as the fight progresses, you’ll be taking more and more group damage, so healers will want to be prepared for this to ramp up.
Another important note is that once Unstable Energy expires it debuffs the player with Calamitous Affliction, doubling the damage they would take from the next soak, so you need to rotate soakers between the 3 players not kiting Volatile Orb. Beware that you may need to adapt who is soaking on the fly, as sometimes the soak overlaps with the Shatterstrike frontal which takes priority.

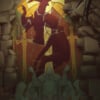
Cithrel Boss Fight
Cithrel Abilities

CIthrel target's a player with a powerful explosion that must be soaked by the party. Shortly after the initial explosion, a second explosion will fire off.
Cithrel marks two players for Bloodhunt.

Cithrel dashes between two players that are marked for blood and swipes at them, dealing AoE damage to each and applying a bleed.

Cithrel becomes enraged at 50%, increasing the frequency of all abilities for the remainder of the encounter.
Cithrel target's the Tank with a powerful frontal cone that deals high damage.
Cithrel pulls all players towards them.
Boss Strategy
After defeating Ancient Koros you can make your way up to Cithrel’s platform, fighting a combination of all the previously mentioned trash. This encounter starts out slow, but ramps up the ability cadence quickly as your space is slowly taken away, making it a race to the finish!
Starting with tanks, your main source of damage will come from Breath Of Al'zerac, which is a frontal hit that you’ll want to point away from your group and have a defensive ready for.
For your whole group, you’ll want to be ready to stack on the player targeted by Path To Oblivion, as this damage hit is split between all players inside. If you have group damage reductions this is a good spot to put them on, especially later on in the encounter as overlaps between abilities become more difficult. After the soak hits make sure everyone moves away from the soak location, as there’s a 2nd explosion that goes off after a few seconds that you want to avoid. This is also the ability that causes the arena to shrink slightly, reducing the space you have to dodge, so you may need to be careful where you place the soak later on in the encounter.
The other ability that eats into your space is Bloodhunter's Mark, which targets 2 players that the boss dashes between after a short delay, dealing a hit of damage around them that also applies a bleed. When this goes out you’ll want to make sure these players move away from both each other and the rest of the group, however this is made more difficult by the Maelstrom ability, which the boss often casts after debuffing players but before charging to them, and this pulls all players to the bosses location. In terms of Strategy, we had the non-debuffed players just stay under the boss when this happened, while the debuffed players ran either left or right to prevent anyone from getting cleaved.
To make all of this more interesting, when you push the boss to 50% health she’ll gain Draconic Frenzy, drastically increasing the cadence of all the previously mentioned abilities for the remainder of the fight. This combined with the room slowly closing in on you means the fight can get very chaotic the longer you’re fighting the boss below 50% health, so to make it a bit easier it can be beneficial to pool damage cooldowns and ultimate casts until after she gains this buff.