


Introduction
Hey everyone, and welcome to the Urrak Markets guide for Fellowship’s Early Access release! In this guide I’ll be going over the abilities used by the trash mobs found inside, strategy tips and tricks for the boss encounter, as well as a recommended route that is both simple to execute and PUG friendly.
Some background on myself, my name is Tactyks and I am an avid M+ player in WoW, where I’ve achieved the 0.1% M+ title in every season it has existed. I also create Dungeon, Raid, and Tank guide content over on my YouTube and Twitch channels, so if that’s something you’re interested in make sure to stop by and say hi!
Video Guide
Dungeon Trash

Urrak Slaver
- Avoid or use a CC on the Bloodlash Wake AoE hit and knockback this mob casts around itself
- VAYR’S LEGACY: Barbed Chain links 2 players for 12s dealing damage reduced by distance, ideally interrupt or use a CC on this ability but if successful stand near your partner for the duration

Mancatcher
- Stay close to these mobs as they will attempt to Grip anyone further than 15yds away, dealing damage and slowing the target.

Outrunner
- Watch out for the random target Bola Throw, which slows by 40% for 5s.
- VAYR’S LEGACY: Beware that these mobs will Charge to their target if out of range dealing light damage, making it difficult to kite and dangerous to tag packs as a non-tank.

Slavebind Totem
- Mobs near this Totem guard it, preventing it from taking damage until they are killed.
- Beware that standing near the totem debuffs you with Slavebinding Aura, reducing your primary stat by 20%.
- After defeating the totem you gain the Breaker of Chains buff for 12s, granting additional CDR for the duration.

Gorestained Butcher
- This mob is immune to CC.
- Beware of the additional group damage from the Furious Tantrum channel and be ready with healing.
- VAYR’S LEGACY: Mince channels damage into the tank, be ready to use a defensive.

Desecrator
- Avoid the random target circles created by Volley, you can also use a CC to stop this channel early.
- VAYR’S LEGACY: Be ready to have a player soak the Infernal Explosive circle when it’s thrown out, otherwise the group will take a large hit of damage.
Shortly into the dungeon you’ll reach an area with 3 potential paths, which include the previously mentioned mobs as well as some new ones you haven’t seen yet. Going down the center path puts you towards the boss, which you’ll likely want to avoid doing until later on. That gives you the choice of left or right, where I generally recommend the right path. Regardless, you’ll face the same mob types on either side and they do eventually connect into a circle.

Horned Seer
- Pain Bolt targets the tank, use any spare interrupts on this.
- Orb Of Blood shoots out towards a random player, increasing damage done of the first player hit by 20% for 10s, if you’re not in danger you can use this for the damage buff, otherwise avoid it or use a spare interrupt or CC on the cast.
- VAYR’S LEGACY: Sanguine Offering shoots out multiple Orbs of Blood at random players, be ready to interrupt or CC this cast as it can quickly burst players down if unprepared.

Hellcaller
- Make sure to interrupt or use a CC on the Restore Vitality cast to prevent any healing.
- Watch out for the many circles created by Armaggedon.
- VAYR’S LEGACY: Demonic Lash targets a random player, use any spare interrupts on this.

Urrak Witch
- Grasping Vines creates a slowing puddle underneath a random player, avoid it or use an interrupt or CC to stop the cast.
- Mossfire Bolt targets the tank, use spare interrupts on this.
- VAYR’S LEGACY: Beware of the heavy group damage from the Jungle Rot DoT and be ready to use group defensives or a mass dispel relic if you have them.

Bloodfang Raider
- Tanks beware when pulling these mobs as they’ll deal additional damage with their instant cast Shred ability.

Bloodfang
- These mobs will occasionally leap to a random player and Shred them, try to stay close to the pack to prevent them from jumping too far.

Slaughtervine
- These mobs lie dormant on the ground until a player runs over them, which immediately causes them to attack.
- Beware of their Thorns passive, which reflects 10% of all damage taken back at the attacker.

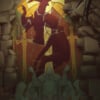
Drazhul the Fleshbroker and Slavetrader Brull Boss Fight
Drazhul the Fleshbroker Abilities

Drazhul runs to the centre of the room and pulls players in, dealing lethal damage to any player that gets too close.

Drazhul shoots out spinning blades in a line towards a random player, this blade bounces upon impact and causes a Bleed DoT effect on any players hit.
Drazhul spawns an Infernal Explosive which must be soaked by a player or else it will deal massive group-wide damage.

Deal 2% more damage for every 1% more health than Slavetrader Brull.

Drazhul flies into a rage, dealing high damage in a radius around it periodically.
Slavetrader Brull Abilities
Deal 2% more damage for every 1 percent more health than their Drazhul the Fleshbroker.
Launches a volley of ice at all heroes. Deal damage to heroes in AoE and leave a small pool of freezing mist. Standing in this deals damage over time and slows movement by 50%
Brull targets the Tank with a Wild Bolt, dealing moderate damage.
Brull hits the tank for a high amount of damage.
Boss Strategy
In this encounter you’ll be fighting both boss mobs simultaneously, and it’s important that you cleave them down evenly as the higher health boss gains a stacking 2% damage increase 1% more health it has, so the closer they are in health the less damage they deal.
In terms of abilities, there’s quite a bit of area denial in this fight, first with Drazhul’s Conjure Scythe ability. This shoots out a spinning blade in a line towards a random player that then bounces around the room, applying a bleed to anyone hit, so you’ll want to do your best to aim this away from your group while also avoiding the scythe yourself.
On top of this, Brull will spawn Wildroot Thorns on a random player, creating a root puddle on their location similar to the Urrak Witch mob you encountered earlier. This field deals damage and slows anyone inside it, which you usually would want to avoid, however it’s actually something you’ll need to use in order to prevent yourself from being pulled in by Drazhul’s Vortex ability.
When this is cast Drazhul jumps to the middle of the room and will deal heavy damage to players too close to him, but being in the Thorns heavily mitigates the pull in effect allowing you to avoid the lethal area in the centre of the room. That means that when this cast begins, you’ll want your whole group to hop into the thorns for safety, so it needs to be in an accessible place. Since Drazhul always jumps to the centre of the arena to do his Vortex cast, the player targeted by Wildroot Thorns will want to drop it somewhere between the centre and the wall, to give your group room to avoid any potential scythes while also avoiding the Vortex AoE.
Aside from this, there’s some additional AoE damage from Drazhul’s Furious Tantrum channel, so healers make sure you’re ready for that. The tank damage comes from Brull, who spam casts Wild Bolt into the tank, so keep an interrupt rotation on this to help with the damage intake, especially near the Creeping Decay cast which is a larger, uninterruptible tank hit that you’ll likely want to have mitigation ready for.
Once the Vayr’s Legacy affix is active you’ll also need to deal with the Infernal Explosive ability, which is the same as the Desecrater ability mentioned previously, so when this circle appears make sure one player gets into it in order to avoid additional group damage.