


Introduction
Hey everyone, and welcome to the Empyrean Sands guide for Fellowship’s Early Access release! In this guide I’ll be going over the abilities used by the trash mobs found inside, strategy tips and tricks for the boss encounter, as well as a recommended route that is both simple to execute and PUG friendly.
Some background on myself, my name is Tactyks and I am an avid M+ player in WoW, where I’ve achieved the 0.1% M+ title in every season it has existed. I also create Dungeon, Raid, and Tank guide content over on my YouTube and Twitch channels, so if that’s something you’re interested in make sure to stop by and say hi!
Video Guide
Dungeon Trash

Sandsworn Husk
- These mobs gain stacks of Fervor on melee hits, increasing haste by 2% up to 20 times, so tanks be careful near the end of pulls when these stacks are high.

Acolyte of Sinnari
- Sinnari's Wrath buffs the mob to deal random target damage over 10s, make sure to interrupt or use a CC on it.
- Healers be ready to dispel the Collapsing Star random target DoT.

Dunesnare Hunter
- Soulpiercer aims a line at a random player, be ready to avoid it or use a CC to stop it, and if anyone gets hit use a dispel to remove the DoT.
- VAYR’S LEGACY: Avoid the Dunehunter's Trap thrown towards a random player as they will root and deal ticking damage to anyone who touches them.

Tombguard Reaver
- This mob is immune to CC.
- Charge aims a line at a random player, step out of the effect to avoid the stun and bleed it applies.
- VAYR’S LEGACY: Whirlwind creates and AoE around the mob as it fixates the nearest player, make sure everyone is ready to avoid it.

Gravebreaker Brute
- This mob is immune to CC.
- Stay away from your tank when fighting these mobs as their melee swings splash to anyone within 4yds of the target.
- Crescent Cleave aims a frontal at a random player, make sure you step out of the effect.
- VAYR’S LEGACY: Beware of the group damage from Decimate, and have casters stand at max range to avoid it if possible.

Nightbound Magi
- This mob is immune to CC.
- Constellation Of Ruin spawns 4 circles that must be soaked otherwise you take heavy group damage, make sure you group spreads out and each player gets in 1.
- Shadow Bolt targets a random player, use spare interrupts on this.
After progressing inside the Gate, you’ll find a mixture of all the previously encountered trash mobs as well as some new ones.

Ruins Lasher
- Avoid the random target Acidic Sap puddles these mobs create.

Water Elemental
- This mob is immune to CC..
- Healing Waters restores mob health, be ready to interrupt it.
- Hydrobolt targets a random ranged player and cleaves anyone nearby, stack in melee to prevent it from casting or use spare interrupts on it.

Barbarous Lasher
- This mob is immune to CC.
- Crush Armor targets the tank, reducing armor by 10% for 12s, so watch your damage intake when this is active.
- Beware of the Wicked Thorns passive, which reflects 25% of all damage taken back at the attacker.

Gravescythe
- Dark Cleave shoots a frontal cone at the tank, make sure to point these mobs away from your group.

Greedspawn Sentinel
- Greed's Embrace applies a stacking DoT and haste buff to all nearby enemies and players while also reducing the damage the mob takes by 80%, I recommend using an interrupt or CC to stop it ASAP as the downsides outweigh the benefits.

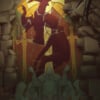
Sin-Magir Boss Fight
Sin-Magir Abilities
Sin-Magir spawns corrupted zones of various sizes, dealing high damage to any players caught within them.

Sin-Magir channels a beam through the Tank that deals heavy damage to anyone in the path.
Small explosions will go off randomly around the boss arena.
Sin-Magir spawns 10 Ruinous Stars randomly around the room that begin a 25s cast of Darkstar Ruin.
If the cast completes, the Ruinous Star will explode for a moderate amount of party-wide damage. Destroying the Ruinous Star provides a 5% damage increase buff for players.
Sin-Magir fires a massive beam that cuts across the entire room.
Boss Strategy
Once you reach the Temple of Sinnari you’ll be able to take on the final boss, Sin-Magir, which is a mixture of single target with some add spawns throughout.
Starting with the bosses abilities, for tanks there's the Lunar Soulsear frontal, which channels a beam through the tank that deals heavy damage to anyone in the path. This does follow the target, so the tank will just want to make sure they point this away from the group and they use a defensive to help reduce the damage.
For group movement, Penumbra is a 3 step ability that creates void zones that you’ll need to avoid. The first hit of this ability is a small circle around the boss, the second hit of this ability is everywhere in the room but a small circle around the boss, and the final hit is the same as the first. Because of this I recommend all players stand relatively close to the boss, allowing them to easily dip in and out of melee to dodge the void zones.
The most dangerous ability by far is Ruinous Starfall, which spawns 10 Ruinous Stars randomly around the room that begin a 25s cast in Darkstar Ruin. If successful the stars explode for a small hit of group damage, which is likely lethal if you let them all go off together, however you can trigger this damage hit earlier by killing the star itself. Doing so has a couple benefits, first it gives your healer time to top players between detonations, and second it actually stacks up a 5% damage increase on your group, something you don’t gain if you let the stars explode on their own.
Because of this I recommend immediately swapping to nearby stars when they spawn, dragging the boss around to the closest group of them for some extra cleave, and destroying as many of them as possible. For bonus points you can try to kill a star right at the end of the Darkstar Ruin cast to extend your buff for the longest possible duration. Also note that tanks can have a big impact on destroying stars as the Lunar Soulsear beam will also deal significant damage to any stars in the effect, so do your best to cleave these when you get targeted.
This phase of the encounter is definitely the most dangerous, so make sure you are using things like group defensives, healing cooldowns, and even personals to survive. On top of that, be aware that after the first cast of Ruinous Starfall, small Celestial Burst will go off randomly around the room for the duration of the encounter, so you’ll want to do your best to avoid these hits.
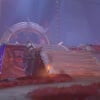
When the Vayr’s Legacy affix is active the boss gains Sinnari’s Judgment, which shoots 2 massive beams across the entire room, further reducing the safe area your group has available to them. The location of this beam is shown beforehand by 2 large sundials that spawn along the edges of the room, so watch for their positioning and make sure to pre-move towards a safe area of the room.